Chrysler made reading the codes yourself much easier than any other manufacturer. Cycle the ignition switch from "off" to "run" three times within five seconds without cranking the engine. Leave it in "run", then count the flashes of the Check Engine light. You'll see a series of flashes for the first digit of the fault code, then a short pause. The second digit will flash the same way, then there will be a longer pause, then the next code will flash the same way. The last code will be code 55 which just means it's done. If you think you miscounted, turn the ignition switch off, then back to "run". The codes will flash again. You can go here:
https://www.2carpros.com/articles/retrieve-trouble-codes-for-chrysler-dodge-plymouth-odb1-1995-and-earlier-car-mini-van-and-light-trucks
to see the definitions, or I can interpret them for you.
The symptoms you described indicate the charging system is not working. The electrical system is being supplied by the battery, but that is only going to last less than an hour. This system is very easy to diagnose with three voltage measurements. Here's a link to an article about how to use a digital voltmeter, if you need it:
https://www.2carpros.com/articles/how-to-use-a-test-light-circuit-tester
If you don't have a voltmeter, you can find a perfectly fine one at Harbor Freight Tools for seven bucks, or at Walmart, any hardware store, or any auto parts store. I can help you set it up, if necessary.
First measure the battery voltage with the engine not running. A good, fully-charged battery will read close to 12.6 volts. A good, fully discharged battery will read closer to 12.2 volts. If you find it near 11 volts or less, it has a shorted cell and must be replaced.
Next, measure the voltage on the fat output wire bolted to the back of the alternator. You must find the same voltage that you found in the previous test.
The last two measurements are on the two small terminals on the back of the alternator. Those must be taken with the engine running. One of them will have the same voltage as across the battery. Both may be lower now due to the battery working to supply the electrical system. The key to the diagnosis is what you find on the second small terminal. It's going to be 0 volts, the same as on the first small terminal, or something in between. When working properly, that second terminal will be something in between, typically between 4 and 11 volts. The lower the voltage, the harder the alternator is working to meet the needs of the electrical system.
If you find 0 volts on one of the smaller terminals, it's due to worn brushes inside the alternator. You can replace the alternator, or I can describe how to replace the brush assembly. On some engines, that can be done without removing the alternator from the engine. When the brushes are worn, the voltage regulator will see the lack of current flow through that "field" circuit. The regulator lives inside the Engine Computer. The computer will set the diagnostic fault code, "Field circuit not switching properly", and since the low system voltage affects the ignition coil and injectors, and thus could adversely affect emissions, it turns on the Check Engine light.
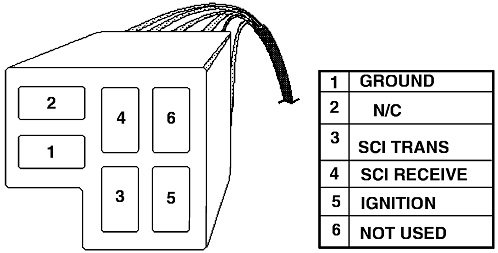
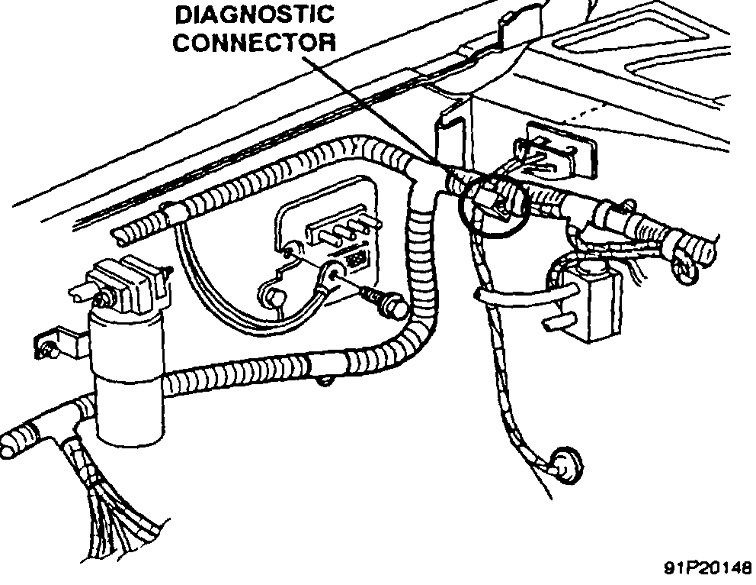
The diagnostic connector for '95 and older models is under the hood, normally near the driver's side hood hinge. For your model, the connector is near the right hood hinge as shown in the second drawing.
Let me know what you find with those three voltage readings.
Images (Click to make bigger)
SPONSORED LINKS
Tuesday, May 3rd, 2022 AT 12:02 PM


