Wednesday, May 3rd, 2017 AT 12:26 PM
SPONSORED LINKS
Hub bearing replacement
1 Reply
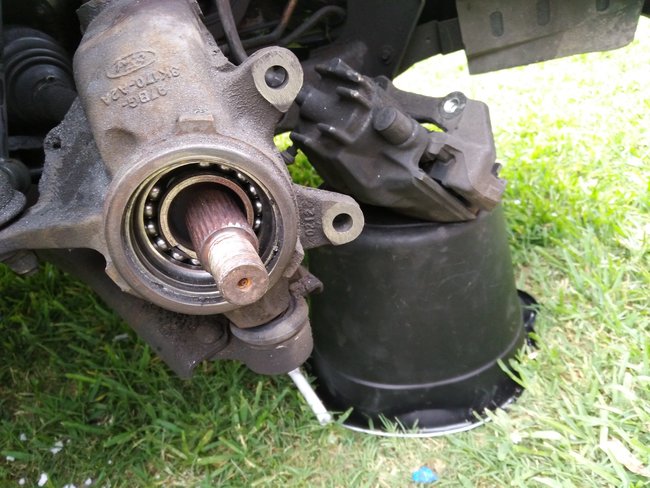
This really is not a do-it-yourselfer job with this pressed-in type of bearing. I have a special tool set for doing these, but it does not actually have a name. The tool bolts to the spindle, then a pressing screw is turned with an air wrench to force the hub out of the bearing, then force the bearing out of the spindle. A pulling screw is used to pull the new parts together. This style was used on 1980's and older Chrysler products, and many import models. All others use a much more user-friendly bolt-on bearing assembly that require no special tools.
You also have a snap ring holding the bearing in the spindle. Do not overlook that. Once it is removed, try pounding on the back of the bearing to see if you can push it out. Do not get excited if it will not move. If it does, great, but if it will not budge, ask at some local auto parts stores that rent or borrow tools if they have the bearing tool set. To make life easier, instead of forcing the screw to push the bearing out with an air wrench, tighten it by hand, then give it one good smack with a hammer. Tighten again, then smack again. That will do the job without stressing the tool.
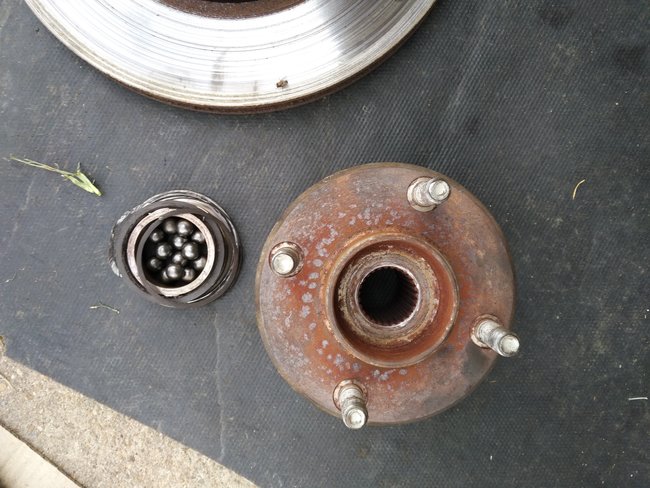
You will need an air or electric cutoff tool to cut the bearing race from the hub. Just cut through it about ninety percent of the way, then crack it open with a hammer and sharp flat chisel. Once cracked, it will slide off.
Pull the new bearing into the spindle first and install the snap ring. Next, pull the hub into the bearing, but be sure to pull against the inner race with the correct-size round plate. If you pull against the spindle, you will tear the bearing apart and destroy it.
Be absolutely certain to have the axle nut, (CV joint nut), tightened to specs before any vehicle weight is placed on the bearing. The CV joint holds the bearing together. If weight is placed on it when it is not tight, it will instantly become noisy.
SPONSORED LINKS
Was this helpful?
Yes
No
Wednesday, May 3rd, 2017 AT 12:48 PM
Related Bearing Hub Replace/Remove Content

Wheel Bearing Hub Replacement
Instructional repair video
Sponsored links
SPONSORED LINKS

Wheel Bearing Hub Replacement

How to Replace Wheel Hub Assembly


