Hi ashleyruff07,
Here are the procedures for removing the door trim.
DOOR TRIM PANEL
NOTE:
Take care not to scratch the door panel. Remove the door with as little bending as possible to avoid creasing or breaking it.
Removal & Installation
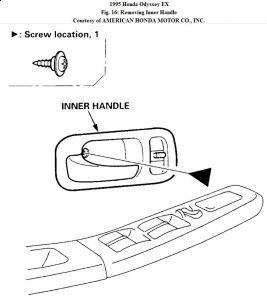
1 .Remove the screw from the inner handle. See
Fig. 16 .
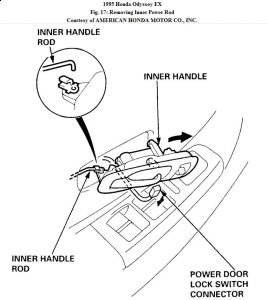
2. Pull the inner handle forward and out half way, disconnect the inner handle rod, power door lock switch connectors. Take care not to bend the inner handle rod. See Fig. 17.
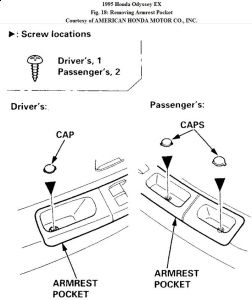
3. Remove the cap(s), then remove the screw(s) from the armrest pocket. See Fig. 18.
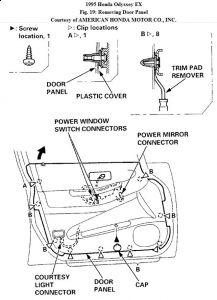
4. Remove the cap, then remove the screw from the door panel. See Fig. 19.
5. Release the clips that hold the door panel. Remove the door panel by pulling upward. See Fig. 19.
6. Disconnect the power window switch connectors, power mirror connector (driver's), and courtesy light connector. See Fig. 19.
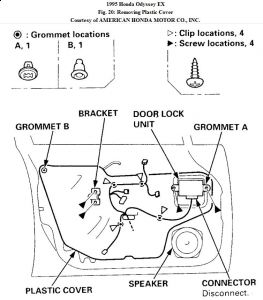
7. Remove the bracket and door lock unit. Detach the grommets and harness clips, then carefully remove the plastic cover. See Fig. 20.
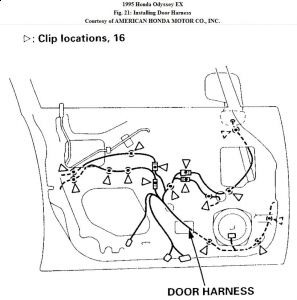
8. Before installing the plastic cover, make sure the door harness and connectors are fastened correctly on the door. See Fig. 21.
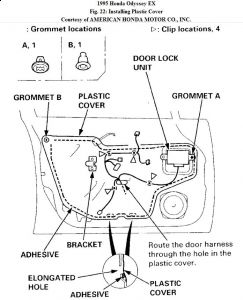
9. Install the plastic cover and all removed parts. Apply adhesive along the edge where necessary to maintain a continuous seal and prevent water leaks. Do not plug the elongated hole. See Fig. 22 .
10. Install the door panel. Make sure the door harness is not pinched. If necessary, replace any damaged clips, and make sure the connectors are connected properly.
11. Install the inner handle. Make sure the connectors are connected properly.
Friday, January 22nd, 2010 AT 11:32 AM


