REMOVAL & INSTALLATION
CAUTION
Always disable the power to the vehicle by disconnecting the negative battery cable before checking, replacing or adjusting the drive belts. Working with the drive belts requires placing tools, hands and fingers near areas of potential danger. In addition, the cooling fan could engage even with the ignition in the OFF position.
V-Belts
Click image to see an enlarged view
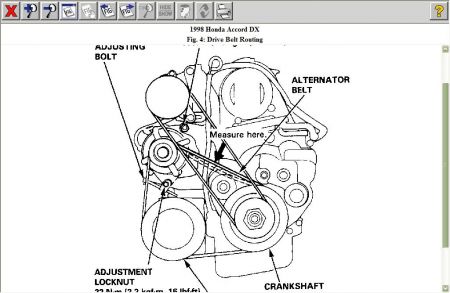
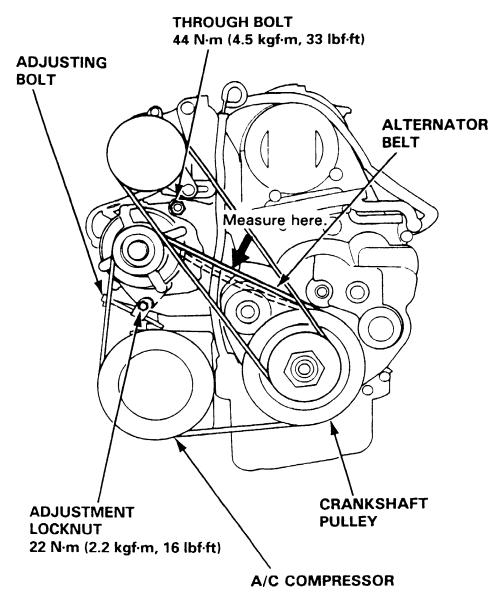
Fig. Accessory drive belt routing-2.2L and 2.3L engines without A/C
Click image to see an enlarged view
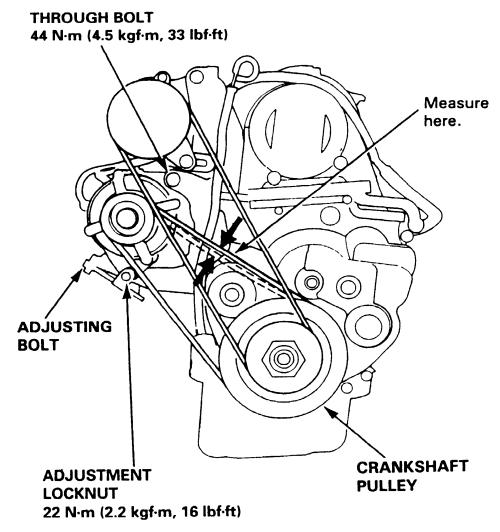
Fig. Accessory drive belt routing-2.2L and 2.3L engines with A/C
Click image to see an enlarged view
Fig. Accessory drive belt routing-2.7L engines
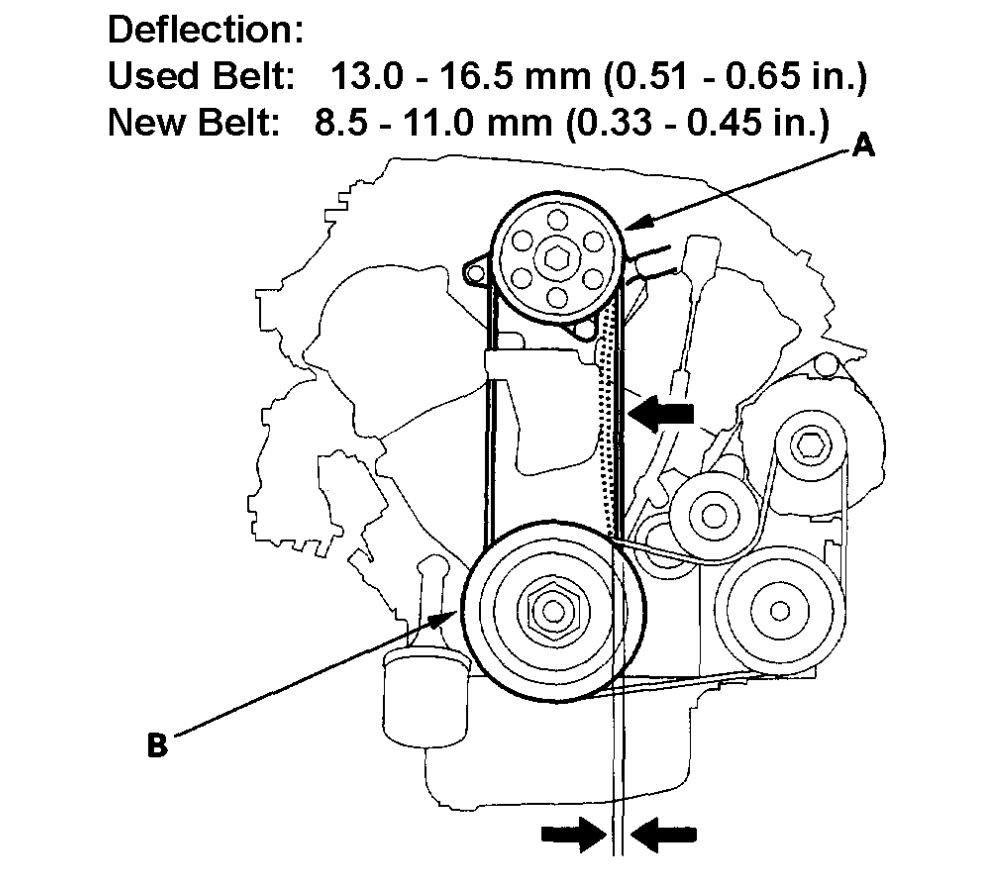
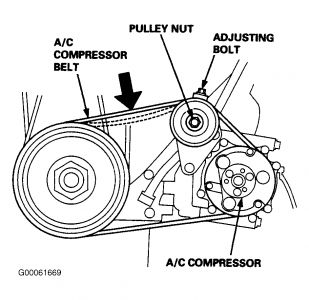
If a belt must be replaced, the driven unit or idler pulley must be loosened and moved to its extreme loosest position, generally by moving it toward the center of the engine. After removing the old belt, check the pulleys for dirt or built-up material, which could affect belt contact. Carefully install the new belt, remembering that it is new and unused; it may appear to be just a little too small to fit over the pulley flanges. Fit the belt over the largest pulley (usually the crankshaft pulley at the bottom center of the engine) first, then work on the smaller one(s). Gentle pressure in the direction of rotation is helpful. Some belts run around a third, or idler pulley, which acts as an additional pivot in the belt's path. It may be possible to loosen the idler pulley as well as the main component, making the job much easier. Depending on which belt(s) being changed, it may be necessary to loosen or remove other interfering belts to access the being replaced.
When buying replacement belts, remember that the fit is critical according to the length of the belt ("diameter") and the width of the belt. The belt shape should match the shape of the pulley exactly. Belts that are not an exact match can cause noise, slippage and premature failure.
After the new belt is installed, draw tension on it by moving the driven unit or idler pulley away from the engine and tighten its mounting bolts. This is sometimes a three or four-handed job; and an assistant could be helpful. Make sure that all the bolts that have been loosened are retightened and that any other loosened belts have the correct tension. A new belt can be expected to stretch a bit after installation, so be prepared to readjust the new belt, if needed, within the first two hundred miles of use.
Serpentine Belts
Because serpentine belts use a spring loaded tensioner for adjustment, belt replacement tends to be somewhat easier than it used to be on engines where accessories were pivoted and bolted in place for tension adjustment. All the belt replacement involves is to pivot the tensioner to loosen the belt, then slide the belt off the pulleys. The two most important points are to pay CLOSE attention to the proper belt routing (since serpentine belts tend to be "snaked" all different ways through the pulleys) and to make sure the V-ribs are properly seated in all the pulleys.
Take a good look at the installed belt and make a note of the routing. Before removing the belt, make sure the routing matches that of the belt routing label or one of the diagrams in this guide.
Note the radio presets and disconnect the negative battery cable.
If necessary, remove the power steering belt.
Use the proper-sized socket and breaker bar (or a large handled wrench) on the tensioner idler pulley center bolt to pivot the tensioner away from the belt. This will loosen the belt sufficiently that it can be pulled off one or more of the pulleys. It is usually easiest to carefully pull the belt out from underneath the tensioner pulley itself.
Once the belt is off one of the pulleys, gently pivot the tensioner back into position. DO NOT allow the tensioner to snap back, as this could damage the tensioner internal parts.
Remove the belt from the other pulleys and remove it from the engine.
To install:
Begin to route the belt over the pulleys, leaving whichever pulley the belt was first released from during removal for last.
Once the belt is mostly in place, carefully pivot the tensioner and position the belt over the final pulley. Carefully release the pressure on the tensioner and it to contact with the belt, making sure the belt is properly seated in the ribs. If not, release the tension and seat the belt.
Once the belt is installed, take another look at all the pulleys to double check the installation.
Install and properly tension the power steering belt.
Connect the negative battery cable, enter the radio presets, then start and run the engine to check belt operation.
Once the engine has reached normal operating temperature, turn the ignition OFF and check that the belt tensioner arrow is within the proper adjustment range.
Images (Click to make bigger)
Wednesday, November 13th, 2019 AT 7:22 PM
(Merged)
