ENGINE OIL PAN REPLACEMENT
REMOVAL
1. Remove the engine. Refer to Engine Replacement. See: Service and Repair
![https://www.2carpros.com/forum/automotive_pictures/12900_op1_1.gif](https://www.2carpros.com/forum/automotive_pictures/12900_op1_1.gif)
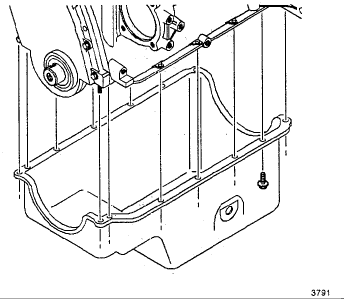
2. Remove the oil pan bolts.
![https://www.2carpros.com/forum/automotive_pictures/12900_op2_1.jpg](https://www.2carpros.com/forum/automotive_pictures/12900_op2_1.jpg)
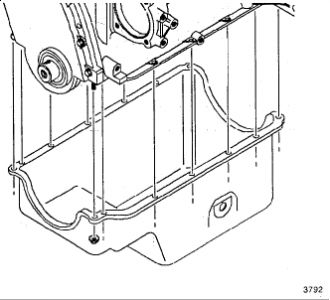
3. Remove the oil pan nuts.
![https://www.2carpros.com/forum/automotive_pictures/12900_op3_1.gif](https://www.2carpros.com/forum/automotive_pictures/12900_op3_1.gif)
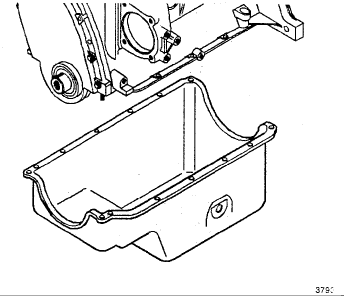
4. Remove the oil pan. Use a narrow putty knife in order to separate the oil pan from the engine block.
![https://www.2carpros.com/forum/automotive_pictures/12900_op4_1.jpg](https://www.2carpros.com/forum/automotive_pictures/12900_op4_1.jpg)
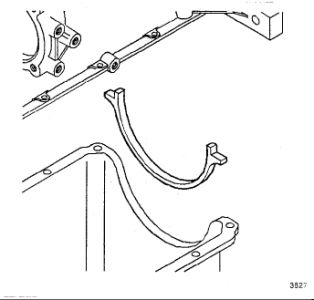
5. Remove the oil pan rear oil seal.
6. Clean the sealing surfaces of the oil pan and the engine block.
INSTALLATION
![https://www.2carpros.com/forum/automotive_pictures/12900_op5_1.gif](https://www.2carpros.com/forum/automotive_pictures/12900_op5_1.gif)
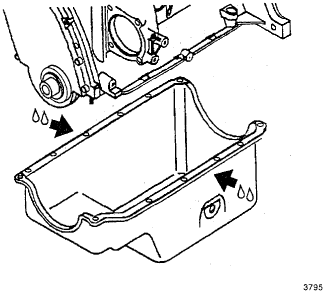
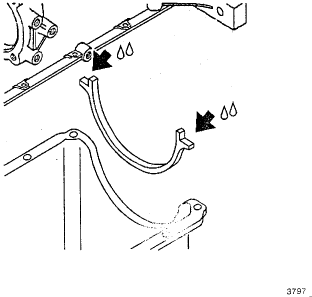
1. Apply a 5 mm (0.193 in) diameter bead of RTV sealer or equivalent to the oil pan side sealing flanges.
![https://www.2carpros.com/forum/automotive_pictures/12900_op6_1.gif](https://www.2carpros.com/forum/automotive_pictures/12900_op6_1.gif)
2. Apply RTV sealer or equivalent to the oil pan surface that contacts the timing cover.
![https://www.2carpros.com/forum/automotive_pictures/12900_op7_1.gif](https://www.2carpros.com/forum/automotive_pictures/12900_op7_1.gif)
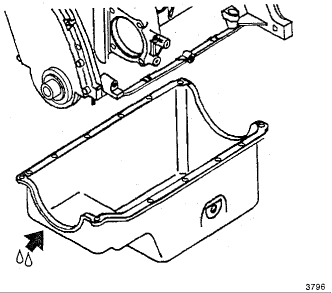
3. Install a new oil pan rear seal. Apply a small amount of RTV sealer or Equivalent to the oil pan rear seal ears.
4. Install the oil pan.
5. Install the oil pan nuts.
o Tighten the oil pan nuts to 10 Nm (89 inch lbs.)
6. Install the oil pan bolts.
o Tighten the oil pan bolts to 10 Nm (89 inch lbs.)
7. Install the engine. Refer to Engine Replacement.
SPONSORED LINKS
Tuesday, January 19th, 2010 AT 9:52 PM