Best looking in a good recycle/junk yard for replacement motor ...
MOTOR & BRACKET ASSEMBLY
Removal
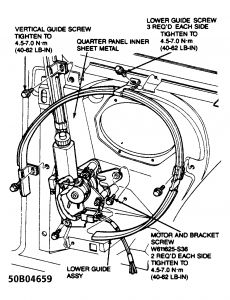
Remove rear seat and rear seat back. Remove the A-pillar trim and quarter panel trim. Remove the vertical guide-to-quarter panel lower sheet metal retaining screw. Separate lower guide from the motor guide. See Fig. 8 .
Disconnect the drive belt motor harness connector. See Fig. 8 . Remove 2 motor-to-inner quarter panel bolts. Separate the vertical guide from the motor guide.
Fig. 8: View of Motor & Lower Guide
Courtesy of FORD MOTOR CO.
Rotate the thumb wheel on the motor counterclockwise to disengage the drive belt from the motor drive gear. Remove motor and bracket assembly.
Installation
To install reverse removal procedure.

MANUAL OVERRIDE SYSTEM
If the shoulder belt does not move or stops before reaching the B-pillar position, perform the following steps before driving the vehicle.
Open and close door(s). Make sure the door is completely closed.
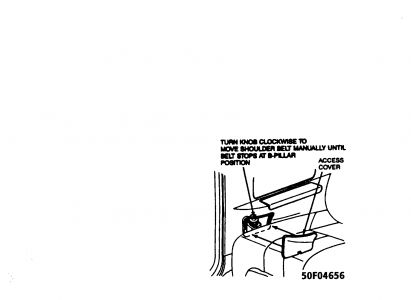
Using a coin or screwdriver, remove cover at lower end of the B-pillar interior trim panel, next to the rear seat on either side. Turn override knob clockwise to move shoulder belt manually until it stops at the B-pillar. See Fig. 1 .
WARNING:For Fig. Fig. 1 if it is necessary to use the override knob to put the shoulder belt in position, have the system serviced by a qualified technician as soon as possible.
Fig. 1: Accessing Manual Override Knob
Courtesy of FORD MOTOR CO.
If the belt does not mover to the B-pillar, the belt may be broken or the motor drive gear stripped. Grasp the belt and pull it towards the B-pillar while turning the knob on the motor clockwise. This should move the belt to the lowest position on the B-pillar. This will allow the occupant(s) to position the belt manually over the shoulder until the system can be serviced properly.

SPONSORED LINKS
Friday, December 19th, 2008 AT 6:59 AM


