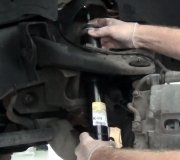
You can rent the sprig compressor at autozone for fourty dollars, then get it back when the tool is returned, you will spend time inside the trunk, so if you arent flexible, pass on this one! An air compressor and air gun will speed the job up. Compressing these springs whithout a compressor is tough!
Removal (Sedan) 1. Remove the parcel tray. 2. Loosen the nuts. Fig. 3: Identifying Strut & Spring Upper Mount-To-Body Nuts Courtesy of FORD MOTOR CO. 3. Remove the stabilizer bar, if so equipped. For additional information, refer to STABILIZER BAR. Remove the jack stands after the stabilizer bar is removed. 4. Remove the wheel and tire assembly. 5. Remove the bolt and detach the rear wheel brake hose. Fig. 4: Identifying Brake Hose Retainer Bolt Courtesy of FORD MOTOR CO. 6. Remove the nut, washer and bushing. Detach the tension strut from the spindle. Discard the nut. Fig. 5: Identifying Tension Strut Nut Courtesy of FORD MOTOR CO. Fig. 6: Identifying Strut-To-Spindle Pinch Bolt Courtesy of FORD MOTOR CO. 7. Remove and discard the pinch bolt. Detach the spindle from the strut and spring assembly. To aid in removal, use a large screwdriver to spread the pinch joint. 8. Partially lower the vehicle. 9. Remove the nuts and the strut and spring assembly. Discard the nuts. Fig. 7: Identifying Strut & Spring Upper Mount-To-Body Nuts Courtesy of FORD MOTOR CO. CAUTION: Suspension fasteners are critical parts because they affect performance of vital components and systems and their failure can result in major service expense. A new part with the same part number or an equivalent part must be installed if installation becomes necessary. Do not use a new part of lesser quality or substitute design. Torque values must be used as specified to make sure of correct retention of these parts. NOTE: It is not necessary to remove the stabilizer bar links from the stabilizer bar. CAUTION: Care should be taken when removing the strut and spring assembly so the rear wheel brake hose is not stretched. Installation 1. Position the strut and spring assembly and install new nuts. Do not tighten the nuts at this time. Fig. 8: Identifying Strut & Spring Upper Mount-To-Body Nuts Courtesy of FORD MOTOR CO. 2. Partially raise the vehicle. 3. Position the spindle on the strut and install a new pinch bolt. 4. Position the tension strut in the spindle and install the bushing, the washer and a new nut. 5. Position the rear wheel brake hose and install the bolt. Fig. 9: Identifying Brake Hose Retainer Bolt Courtesy of FORD MOTOR CO. 6. Install the stabilizer bar, if so equipped. For additional information, refer to STABILIZER BAR. 7. Install the wheel and tire assembly. 8. Tighten the nuts. 9. Install the parcel tray. NOTE: Make sure the cupped side of the washer is facing away from the bushing. When compressing the springs go as evenly as you can, keep all body parts away from BOTH ends of the strut, if compressor breaks or slips off, this spring force will injure or kill you!
Saturday, September 12th, 2009 AT 9:44 AM


