Hello ..thanks for the donation ... much appreciated
LOWER CONTROL ARM, BALL JOINT & BUSHINGS
Removal
Raise and support vehicle. Remove wheel and tire assembly. Remove brake disc shield. Remove upper shock absorber nut/washer assembly and bushing.
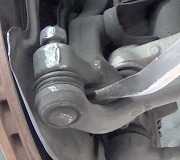
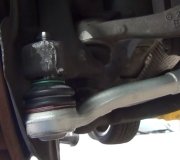
Remove 2 nuts and front shock absorber. See Fig. 1 . Remove front stabilizer bar link nut. On models with coil spring suspension, using Coil Spring Compressor (D78P-5310-A), compress coil spring. On all models, remove lower ball joint, cotter pin and nut. Using Pitman Arm Puller (T64P-3590-F), separate lower ball joint from spindle.
Remove front and rear lower control arm pivot bolts, and remove lower control arm from vehicle. Inspect lower ball joints and boot seals. Replace lower control arm assembly to service ball joints and bushings (if necessary).
Installation
Ensure end of spring is positioned properly between 2 holes in lower control arm. See Fig. 2 . Lower control arm forward pivot bolts must be tightened first with lower control arm at normal ride height. On right lower control arm, install rear bolt adjustment cam and nut in center of frame slot.
On both control arms, install NEW cotter pin toward engine compartment. Ensure head of cotter pin is facing tire. Ensure fingers of cotter pin are bent at a right angle to secure.
To complete installation, reverse removal procedure. Tighten remaining bolts and nuts to specification. See TORQUE SPECIFICATIONS . Before driving vehicle, pump brake pedal several times to restore normal pedal position. Check wheel alignment.
UPPER CONTROL ARM, BALL JOINT & BUSHINGS
Removal
Raise vehicle on hoist, and support lower control arm. Remove wheel and tire assembly. On models with coil suspension, remove brake disc shield. Mark position of upper control arm adjustment cams for installation.
On all models, remove upper ball joint-to-spindle retaining nut and pinch bolt. On models with coil suspension, separate upper ball joint from spindle. Remove nuts and cam bolts attaching upper control arm-to-frame, and remove upper control arm. See Fig. 1 .
On models with torsion bar suspension, remove upper suspension arm bolts and nuts. Remove front suspension arm.
Installation
To install right upper control arm, align marks made during removal on upper control arm adjustment cams. Lower control arm forward pivot bolts must be tightened first with lower control arm at normal ride height.
To complete installation, reverse removal procedure. Tighten remaining bolts and nuts to specification. See TORQUE SPECIFICATIONS . Before driving vehicle, pump brake pedal several times to restore normal pedal position. Check wheel alignment.
hope this helps

Thursday, August 6th, 2009 AT 4:53 AM


