Hello -
Thanks for getting back with me.
Sorry for the delay in getting back with you. . .. . .. . ..I encountered some technical difficulties. . .. . .. . ...
You problem is not on the troubleshooting chart so we are going to have to guess through this.
Can you turn the electrical connector around and connect the other way?
Reason, to test the lock motor you can apply 12v and ground to the elec connectors and the lock should operate in one direction. Then, reverse the 12v and ground on the connector and the lock will reverse.
Can you try that please.
Now there is a note on the lift gate window for removal and installation of the lift gate lock. I have attached for your review to see if you missed a step.
Removal & Installation (Liftgate Lock)
1. Open liftgate window glass. Remove liftgate inside handle screws. Remove liftgate trim panel from around door lock knob. Remove screw from opening. Using a molding/trim removal tool, carefully pry on liftgate door trim to disengage clips. Remove liftgate window latch door trim panel.
2. Remove watershield from door. Disconnect liftgate latch actuating rod by opening clip and removing rod from clip. Mark position of the liftgate window latch before removing. Disconnect electrical connectors and remove nuts securing latch to door. Remove latch.
(Note the step above to Mark position of the liftgate window latch before removing.)
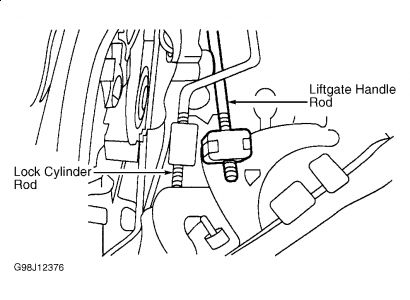
3. Remove push-pins and remove vent panel. Disconnect liftgate latch release actuating rods by opening clips and removing rods from clips. Disconnect liftgate handle and lock cylinder rods by opening clips and removing rods from clips. See Fig. 4 .

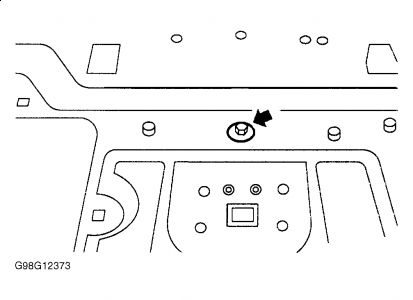
4. Remove liftgate latch remote control bolt. See Fig. 5 . Disconnect liftgate lock actuator connector. Remove bolts securing liftgate actuator to door and move actuator to left side access hole to remove. To install, reverse removal procedure.

NOTE: Manually close liftgate window latch and install control rod. Make sure the bell crank of the liftgate latch remote control is in the unlocked position to adjust control rod properly. When reinstalling all control rods, they should be set in a relaxed position and not binding for proper operation.
Friday, March 27th, 2009 AT 9:13 PM


