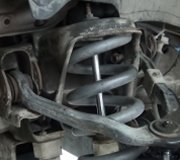
I'm not sure why there's no previous reply to a 15-year-old question, but it deserves an answer. The first step is to remove the pressure on the torsion bar. That is the spring that holds up one front corner of the truck. Raise the vehicle up so there's no weight resting on the front tires.
https://www.2carpros.com/articles/jack-up-and-lift-your-car-safely
Be sure to use jack stands under the frame, not the control arms, to safely support the truck. There's an adjusting bolt in the cross member roughly under the driver's seat area. You'll need a socket and a large breaker bar or ratchet to loosen that bolt. To make reassembly easier, count the number of revolutions that bolt is turned. During reassembly, turn it back the same amount for a starting point.
Once all the tension is removed from the torsion bar, there should be a wire ring at the back of the socket that bar sits in. Squeeze that ring to remove it. The torsion bar can be slid back now. The hex on the front of that bar will slide out of the socket in the lower control arm.
All of that sounds simple, but in fact, you're trying to slide two hexes out of their sockets at the same time, and each one is going to be stubborn. There is a special tool that can be bolted around the torsion bar to give you a surface to pound on with a large hammer, but with some patience, you can usually work the bar back without that tool. Remove the pivot bolt for the lower control arm. If you can pull that arm down, you may be able to slide the control arm off the torsion bar first. That can't be done if this is still of the older design from the 1960s and '70s. With those, the arm can be slid back with the torsion bar after the front nut is removed, then the arm can be tapped off the bar later. If you can slide the new control arm onto the torsion bar that way, there won't be any need to slide the rear hex out of its socket.
Once everything is reassembled, bounce the truck or drive it around a little to settle the suspension. Measure the front height on both sides. To level the truck from side to side, readjust one or both torsion bars. They interact back and forth. Typically if you raise the left front corner an inch, the right corner will go up close to half an inch.
To get more precise, every tire and alignment shop has a small book that shows every year and model, where to take the front and rear height measurements, and what they should be. Only torsion bar suspensions are adjustable. For all others the coil springs or leaf springs must be replaced to restore ride height.
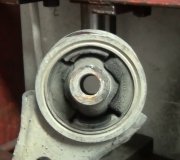
One thing to be aware of is with anything that has a rubber bushing in something that pivots, the mounting bolts must not be tightened until the vehicle is sitting on the tires at normal ride height. If they're tightened while the vehicle is raised up with the suspension hanging down, the bushings will be clamped in that orientation. As the truck is lowered and the suspension parts pivot to their at-rest position, those bushings will be clamped in a permanent twist. That will greatly shorten their life.
Saturday, November 25th, 2023 AT 5:23 PM


