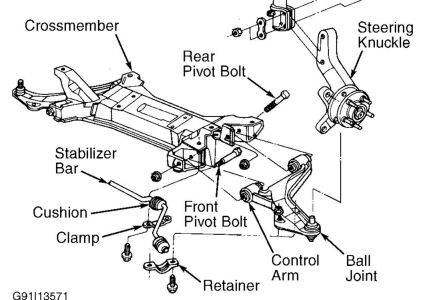
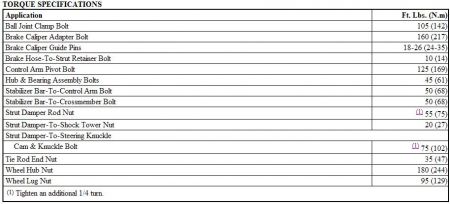
The lower front suspension ball joints operate with no free-play. The ball joint housing is pressed into the lower control arm with the joint stud retained in the steering knuckle with a (clamp) bolt.
INSPECTION
With the weight of the vehicle resting on the ground, grasp the ball joint grease fitting, and attempt to move it. If the ball joint is worn the grease fitting will move easily. If movement is noted, replacement of the ball joint is recommended.
REMOVAL:
Special Chrysler Tools C-4699-1 and C-4699-2, or their equivalents, are required to remove and install the ball joint form the lower control arm. If the tools are not on hand, remove the control arm and have an automotive machine shop press the ball joint out and in.
Remove the lower control arm. Pry off the seal from the ball joint.
Position a receiving cup, special tool C-4699-2, or its equivalent, to support the lower control arm.
Install a 11/8 in. Deep socket over the stud and against the joint upper housing.
Press the joint assembly from the arm.
INSTALLATION:
Position the ball joint housing into the control arm cavity.
Position the assembly in a press with special tool C-4699-1, or its equivalent, supporting the control arm.
Align the ball joint assembly, then press it until the housing ledge stops against the control arm cavity down flange.
To install a new seal, support the ball joint housing with tool C-4699-2 and place a new seal over the stud, against the housing.
With a 11/2 in. Socket, press the seal onto the joint housing with the seat against the control arm. Install control arm.
Thanks for using 2CarPros. Com!
Thursday, September 12th, 2019 AT 2:26 PM
(Merged)

