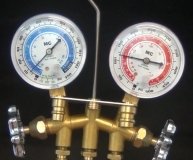
Attach the a/c gauge set to the vehicles service ports. Always follow the procedure in the service manual for your specific vehicle. The blue hose of the gauge set goes to the low-pressure side service port, and the red hose goes to the high-pressure service port. See the resources section below for a link to online service manuals, if you do not have the service manual for your vehicle.
Add one can of refrigerant, containing leak detection dye, to the system with the engine running and the a/c controls in the vehicle set for "MAX A/C". It is important to add refrigerant only through the low-pressure side to avoid explosion of the can due to high pressure.
Test drive for 15 minutes with a/c on "MAX A/C. This will keep the pressures up, circulate the refrigerant dye through the system and help make the leak identifiable.
Check the condensation coming out of the condensation tube for traces of the refrigerant dye. As the evaporator leaks, the dye will collect in the evaporator case, and drip out of the condensation tube onto the ground. The condensation tube is located coming out of the firewall, below the level of the evaporator case. If there is no dye in the condesation coming out of the tube, go to the next step.
Turn engine off and let set for 15 minutes. As the evaporator leak refrigerant, it will collect in the evaporator case, and pass into the passenger compartment through the a/c vents on the dash. Test the vent nearest the evaporator with an electronic leak detector. Always follow the manufacturer's directions for using the specific leak detector you have. If the evaporator passes both of these tests, there is no leak present, or the leak is too small to detect.
SPONSORED LINKS
Wednesday, May 12th, 2010 AT 3:47 PM


