Check engine light with no code

Tiny
JOE SO
  • MEMBER
  • 2000 PLYMOUTH VOYAGER
  • 6 CYL
  • 2WD
  • AUTOMATIC
  • 84,000 MILES
My minivan runs great when cold and even warmed up. Intermittently just out of the blue it runs lean and the check engine light comes on. After warmed up some times when warmed up runs normal. When the check engine light is on it only is on when the engine is running, not just the battery. I took it to AutoZone and Advance when the light is on an no codes appeared. I am hesitant to taking to a pro mechanic due to my fear of trial and error. After I start the cold engine after driving 20-25 miles the check engine light shuts off until next time.
Saturday, April 20th, 2019 AT 6:04 AM

3 Replies

Tiny
ASEMASTER6371
  • MECHANIC
  • 52,797 POSTS
Good morning,

You can try another method.

Turn the key off and on three times. The check engine light will start to blink.

There will be codes flashed by the blinking light. Such as one flash, pause, one flash. That is code 11. It will go through the sequence until the end. It will flash 5 times, pause and 5 times. That is 55 and the end of the sequence.

Try this and let me know.

Roy
Was this
answer
helpful?
Yes
No
Saturday, April 20th, 2019 AT 6:28 AM
Tiny
JOE SO
  • MEMBER
  • 2 POSTS
Thanks for your reply. However, I turned the key 3 times as instructed (just so the battery made connection did not start the van). The check engine light did not blink.
Was this
answer
helpful?
Yes
No
Saturday, April 20th, 2019 AT 8:16 AM
Tiny
ASEMASTER6371
  • MECHANIC
  • 52,797 POSTS
Okay, then there is an issue with the PCM if it is not going into diagnostic mode.

You need to get it checked to be sure but it looks like you need a PCM or the computer.

Roy

Procedure

REMOVAL
1. Disconnect both cables from battery, negative cable first.

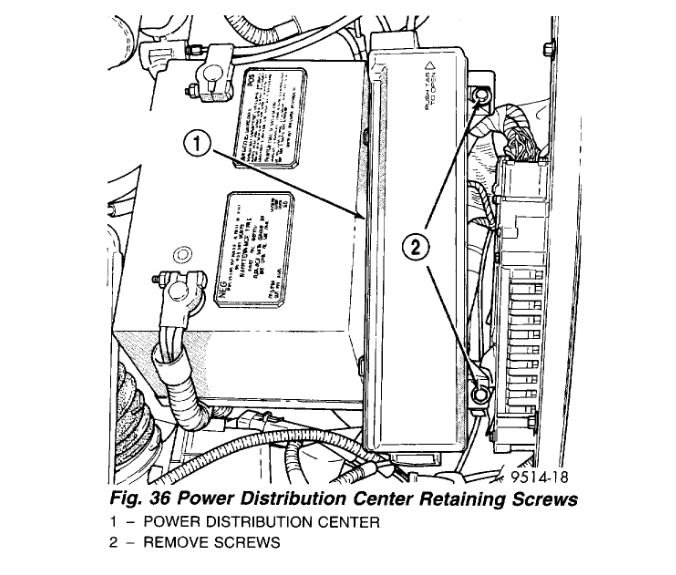
Fig. 36 Power Distribution Center Retaining Screws
imageOpen In New TabZoom/Print

2. Remove 2 screws holding Power Distribution Center (PDC) to bracket.

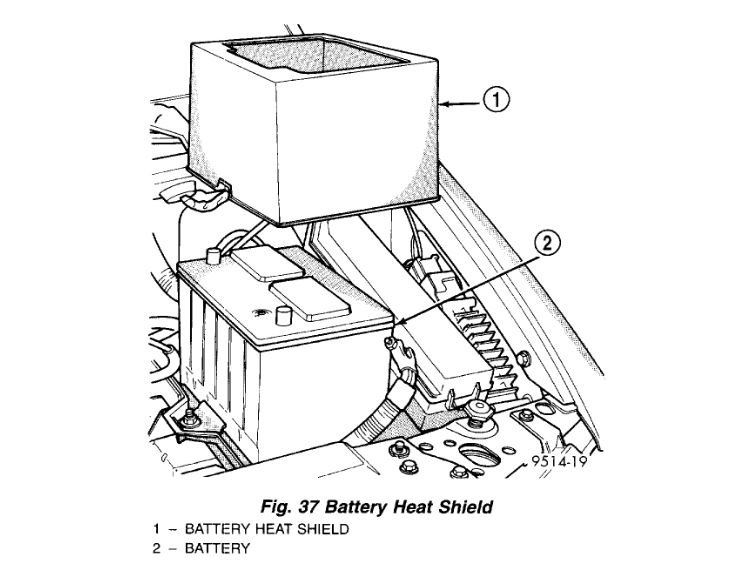
Fig. 37 Battery Heat Shield
imageOpen In New TabZoom/Print

3. Remove heat shield from battery.

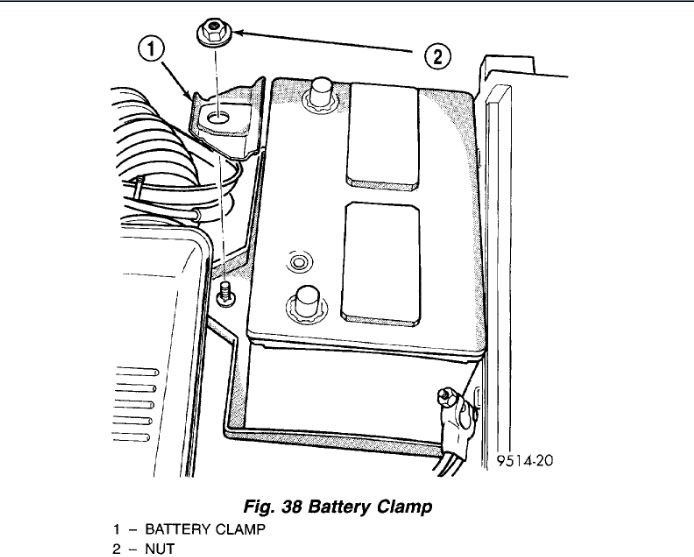
Fig. 38 Battery Clamp
imageOpen In New TabZoom/Print

4. Remove nut and clamp holding battery to battery tray.
5. Remove battery from vehicle.

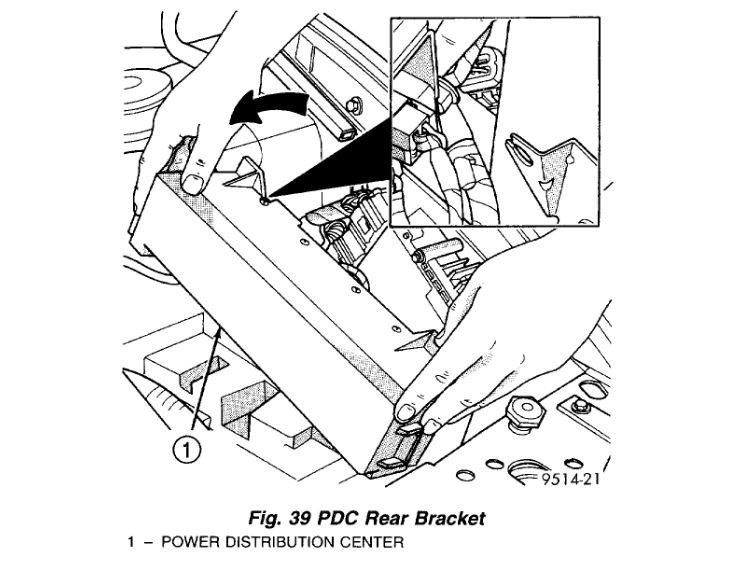
Fig. 39 PDC Rear Bracket
imageOpen In New TabZoom/Print

6. Rotate PDC toward center of vehicle to remove from rear bracket.
7. Pull PDC rearward to remove from front bracket. Lay PDC aside to allow access to Powertrain Control Module (PCM).

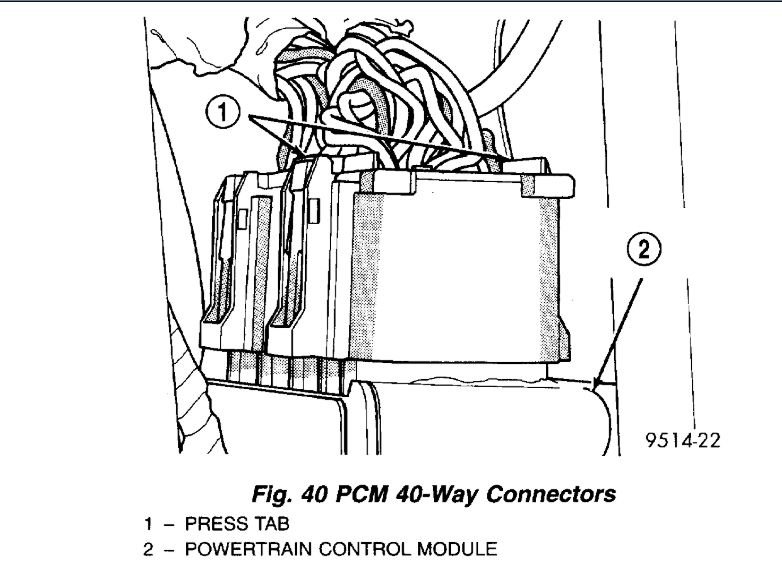
Fig. 40 PCM 40-Way Connectors
imageOpen In New TabZoom/Print

8. Squeeze tabs on 40-way connector. Pull connector rearward to remove from PCM. Remove both way connectors.

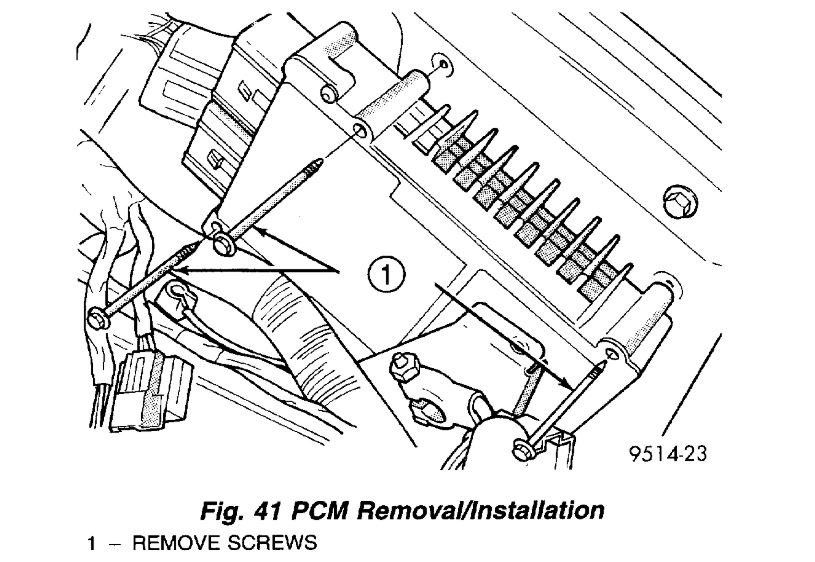
Fig. 41 PCM Removal/Installation
imageOpen In New TabZoom/Print

9. Remove 3 screws holding PCM to fende.
10. Remove PCM from vehicle.
Was this
answer
helpful?
Yes
No
Saturday, April 20th, 2019 AT 1:08 PM

Please login or register to post a reply.

Sponsored links