Sounds like this is an intermittent problem. If so, any testing has to be done while the problem is occurring. If the tests are performed while the problem is not occurring, everything is going to come up "good".
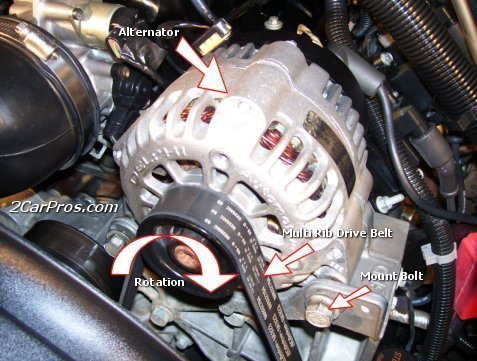
By far the most common cause of this is worn brushes inside the alternator. Most people just replace the alternator, but the brushes can be replaced separately. Sometimes you can find the repair kit at farm and home-type stores, otherwise you'll need to find a starter / generator rebuilder. Every larger city has one or two of them. You can also ask at any local repair shop or heavy equipment / truck repair shop where they send their starters that need repair. They'll know where to send you to buy the brush assembly. The brush assembly costs around ten dollars and can often be replaced without removing the alternator from the engine on some models.
If you want to verify my suspicion, you'll need an inexpensive digital voltmeter. This article shows how to use one:
https://www.2carpros.com/articles/how-to-use-a-voltmeter
They're using an "auto-ranging" meter which is an expensive feature you don't have to have. Harbor Freight Tools has a perfectly fine meter for $7.00. You can find them at Walmart and hardware stores too. I can help you set it up if necessary.
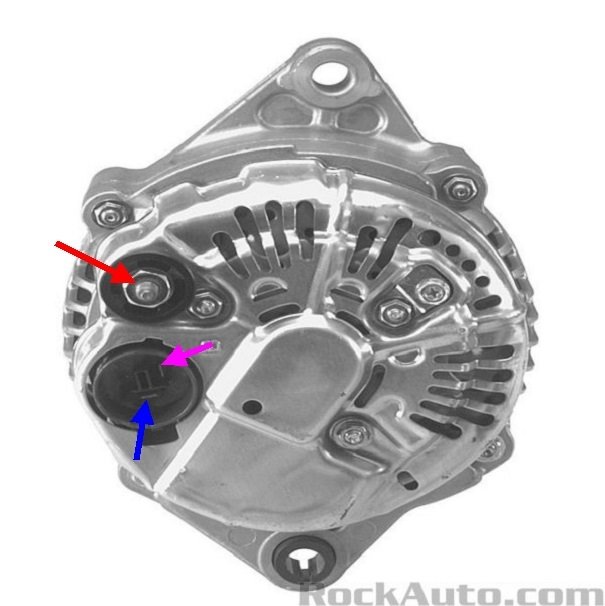
This first photo shows the back of your alternator. You'll need to measure the voltages on the two wires in the plug. Those are shown with the blue and pink arrows I added. There's two important points. First, to be valid, these voltages have to be taken with the plug connected. That means you'll poke the meter's probe in next to each wire until it touches the terminal. Second, this circuit is only live when the engine is running. No testing can be done with the engine stopped.
One of the two wires is going to have full system voltage. That will be between 13.75 and 14.75 volts when the charging system is working properly, or it will be near 12.6 volts or less when the charging system is dead. When dead and the "Battery" light is on is when these tests will give us the results we're looking for.
Once you find that wire with full voltage, it's the voltage on the other wire that we're interested in. During normal operation you're going to find between roughly 4 and 11 volts. The lower the voltage, the greater the difference between the two, and the harder the system is working.
When it's in the defective, or failed mode, expect to find 0 volts on that second wire. That is what happens when one of the internal brushes isn't making good contact due to wear.
A second possibility is to find exactly the same voltage on both wires. That's much less common, but it indicates a break in the circuit after the alternator. We can pursue that later if it appears necessary.
If testing verifies the brushes are worn, I can put together some photos to show you how they're replaced. I've done this on two of my vehicles, both without removing the alternator from the engine. On some applications it's easier to do this job with the alternator on the workbench.
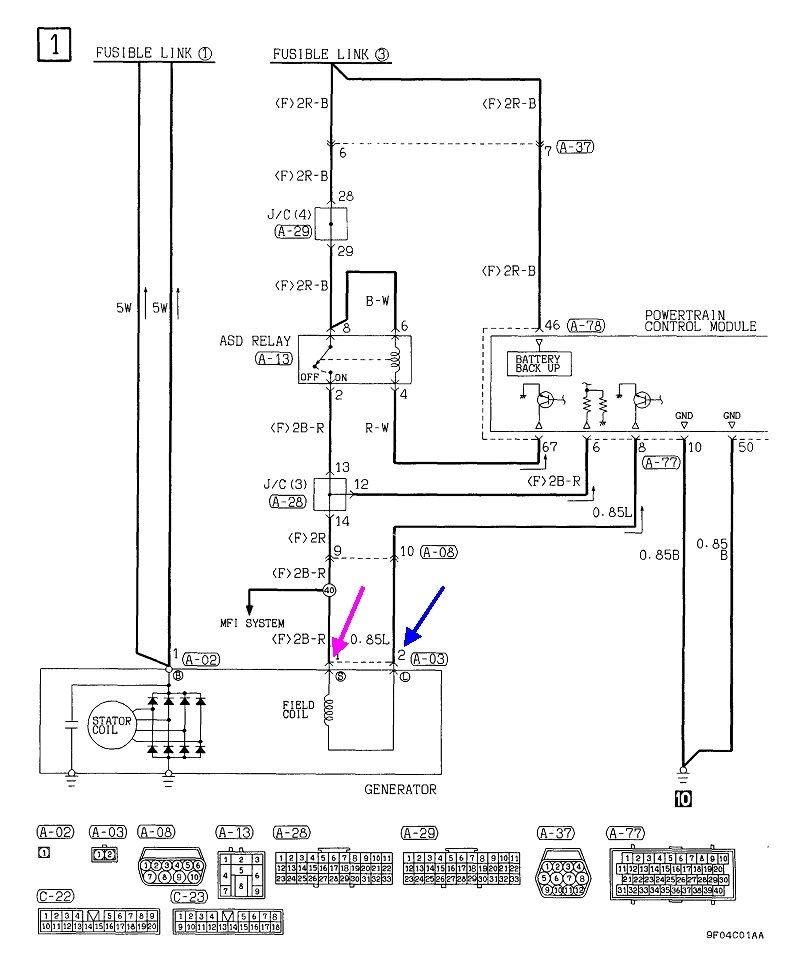
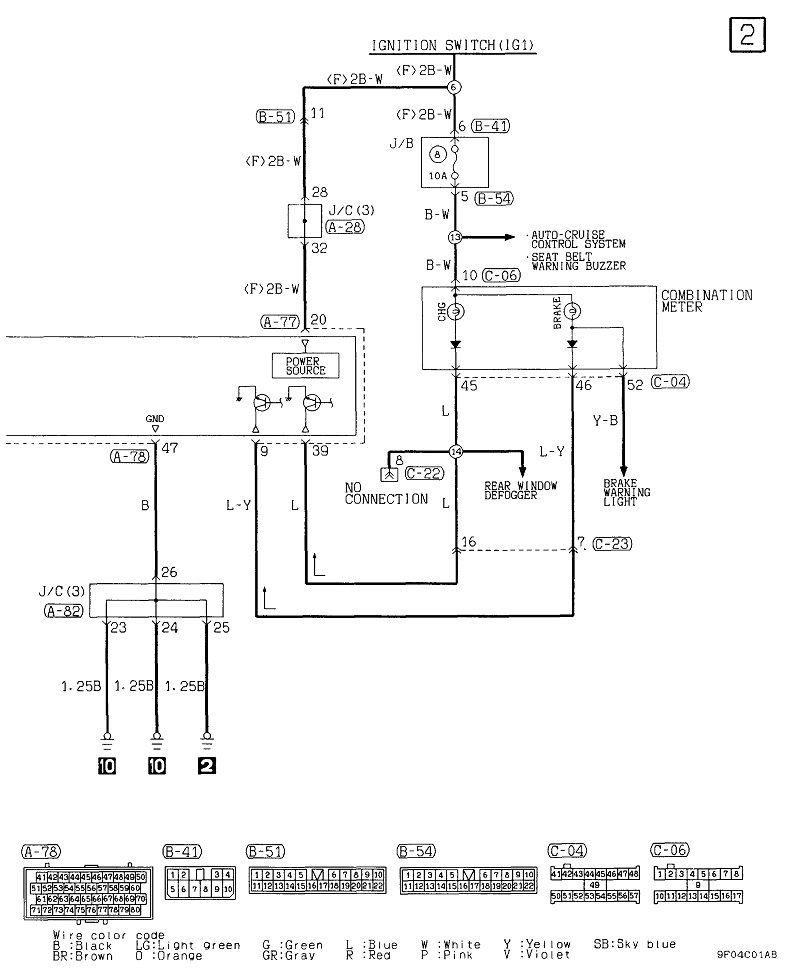
The last two diagrams are of this charging system. The blue and pink arrows are pointing to the wires you'll be taking the voltage readings on.
Images (Click to make bigger)
SPONSORED LINKS
Saturday, July 24th, 2021 AT 12:02 PM
