Hi,
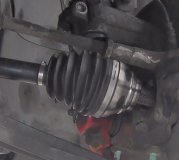
Chances are it is the CV joints. Have you checked them to see if the rubber boot that covers them is torn? Often times, that is what causes them to go bad. The grease leaks out and dirt gets in.
Here is a link that explains what to look for. You already know about the clicking, so that's good.
https://www.2carpros.com/articles/symptoms-of-a-bad-cv-axle-joint
If you find they are bad, here is a link that explains in general how to replace one.
https://www.2carpros.com/articles/replace-cv-axle
Here are the removal and replacement directions specific to your vehicle. The attached pics correlate with the directions.
_______________________________________________
2006 Acura TL V6-3.2L
Driveshaft Removal
Vehicle Transmission and Drivetrain Drive Axles, Bearings and Joints Axle Shaft Assembly Service and Repair Procedures Driveshaft Removal
DRIVESHAFT REMOVAL
Driveshaft Removal
1. Raise the front of the vehicle, and support it with safety stands in the proper locations.
pic 1
2. Remove the wheel nuts and front wheels.
3. Lift up the locking tab (A) on the spindle nut (B), then remove the nut.
4. Drain the transmission fluid, then reinstall the drain plug using a new washer:
- Manual transmission.
- Automatic transmission.
5. Remove exhaust pipe A.
pic 2
6. Hold the stabilizer ball joint pin (A) with a hex wrench (B), and remove the flange nut (C). Separate the front stabilizer link (D) from the lower arm.
pic 3
7. Remove the self-locking nut (A), 12 mm flange bolt (B), and 10 mm flange bolt (C), then remove the damper fork (D).
8. Remove the cotter pin from the lower arm ball joint castle nut, and remove the nut, then disconnect the lower ball joint from the lower arm using the ball joint thread protector and remover.
NOTE:
- To avoid damaging the ball joint, install the ball joint thread protector on the threads of the ball joint.
- Be careful not to damage the ball joint boot when installing the remover.
- Do not force or hammer on the lower arm, or pry between the lower arm and the knuckle. You could damage the ball joint.
- The collar on the lower arm is removed with ball joint, the lower arm must be replaced.
pic 4
9. Pull the knuckle outward, and remove the driveshaft outboard joint from the front wheel hub using a plastic hammer.
pic 5
10. Left driveshaft: Pry the inboard joint (A) from the transmission housing with a prybar. Remove the driveshaft as an assembly.
NOTE: Do not pull on the driveshaft (B) or the inboard joint may come apart. Pull the driveshaft straight out to avoid damaging the oil seal.
pic 6
11. Right driveshaft: Drive the inboard joint (A) off of the intermediate shaft with a drift and hammer. Remove the driveshaft as an assembly.
NOTE: Do not pull on the driveshaft (B) or the inboard joint may come apart. Pull the driveshaft straight out to avoid damaging the oil seal.
_____________________________________
Install
2006 Acura TL V6-3.2L
Driveshaft Installation
Vehicle Transmission and Drivetrain Drive Axles, Bearings and Joints Axle Shaft Assembly Service and Repair Procedures Driveshaft Installation
DRIVESHAFT INSTALLATION
Driveshaft Installation
pic 7
1. Install a new set ring (A) in the set ring groove of the left driveshaft (B).
pic 8
2. Apply 0.5 - 1.0 g (0.02 - 0.04 oz) of grease to the whole splined surface (A) of the right driveshaft. After applying grease, remove the grease from the splined grooves at intervals of 2-3 splines and from the set ring groove (8) so that air can bleed from the intermediate shaft.
pic 9
3. Clean the areas where the driveshaft contacts the differential thoroughly with solvent or brake cleaner, and dry with compressed air. Do not wash the rubber parts with solvent. Insert the inboard end (A) of the driveshaft into the differential (B) or intermediate shaft (C) until the new set ring (D) locks in the groove (E).
pic 10
4. Install the outboard joint (A) into the front hub (B).
pic 11
5. Clean off any grease contamination from the ball joint tapered section and threads, then install the knuckle (A) onto the lower arm (B). Torque the new castle nut (C) to the lower torque specification, then tighten it only far enough to align the slot with the ball joint pin hole. Do not align the nut by loosening it.
NOTE: Make sure the ball joint boot is not damaged or cracked.
6. Install the new cotter pin (D) into the ball joint pin hole, and bend the cotter pin as shown.
pic 12
7. Install the damper fork (A) over the driveshaft and onto the lower arm. Install the damper in the damper fork so the aligning tab (B) is aligned with the slot in the damper fork. Loosely install the flange bolt (C).
8. Loosely install the flange bolt (D) and a new self locking nut (E).
pic 13
9. Connect the front stabilizer link (A) to the lower arm. Hold the stabilizer link ball joint pin (B) with a hex wrench (C), and tighten the new flange nut (D).
10. Install exhaust pipe A.
pic 14
11. Install a new spindle nut (A), then tighten the nut. After tightening, use a drift to stake the spindle nut shoulder (B) against the driveshaft.
12. Clean the mating surfaces of the brake disc and the front wheel, then install the front wheel with the wheel nuts.
13. Turn the front wheel by hand, and make sure there is no interference between the driveshaft and surrounding parts.
14. Tighten the flange bolt and the self-locking nut with the vehicle's weight on the damper.
15. Refill the transmission with the recommended transmission fluid:
- Manual transmission.
- Automatic transmission.
16. Check the front wheel alignment, and adjust it if necessary.
______________________________________________
Chances are this is the issue. Let me know if you have other questions.
Take care,
Joe
Images (Click to make bigger)
Saturday, July 4th, 2020 AT 8:28 PM


