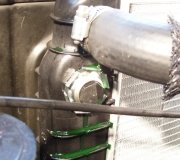
The water pump on 3.6L engines is bolted directly to the engine timing chain case cover.
Disconnect negative battery cable from battery.
WARNING:Constant tension hose clamps are used on most cooling system hoses. When removing or installing, use only tools designed for servicing this type of clamp. Always wear safety glasses when servicing constant tension clamps.
CAUTION:A number or letter is stamped into the tongue of constant tension clamps. If replacement is necessary, use only an original equipment clamp with matching number or letter.
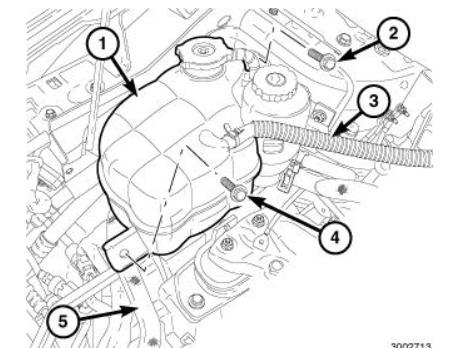
Fig. 59: Coolant Bottle Assembly & Right Side Engine Mount Assembly
Courtesy of CHRYSLER LLC
Remove the coolant bottle assembly (1) and position aside.
Fig. 60: Right Side Engine Mount Assembly
Courtesy of CHRYSLER LLC
Using a suitable jack, support the engine.
Remove the right side engine mount assembly (4).
Remove the engine mounting block from the water pump.
Raise vehicle.
CAUTION:Do not pry on the water pump at the timing chain case/cover. The machined surfaces may be damaged resulting in leaks.
Remove the lower engine cover.
Drain coolant into clean container for reuse. Refer to STANDARD PROCEDURE.
Remove right front wheel.
Remove the inner splash shield.
Fig. 61: Belt Tensioner, Accessory Drive Belt & Belt Routing
Courtesy of CHRYSLER LLC
Remove the accessory drive belt (7). Refer to BELT, SERPENTINE, REMOVAL.
Remove accessory drive belt idler pulley (2).
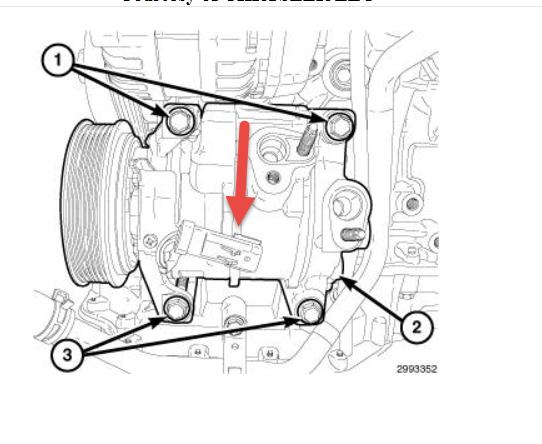
Fig. 62: A/C Compressor
Courtesy of CHRYSLER LLC
Disconnect the A/C compressor electrical connector.
Remove the A/C compressor (2) and position aside.
Fig. 63: Idler Pulley
Courtesy of CHRYSLER LLC
Remove the lower bypass hose and the lower radiator hose from the water pump (1) and position aside.
Remove the remainder ten water pump mounting bolts. Take notice to the four water pump bolts (2) that mount directly to the timing chain cover.
Remove water pump (1) and discard seal
Remove the water pump assembly from the vehicle. Refer to PUMP, WATER, REMOVAL.
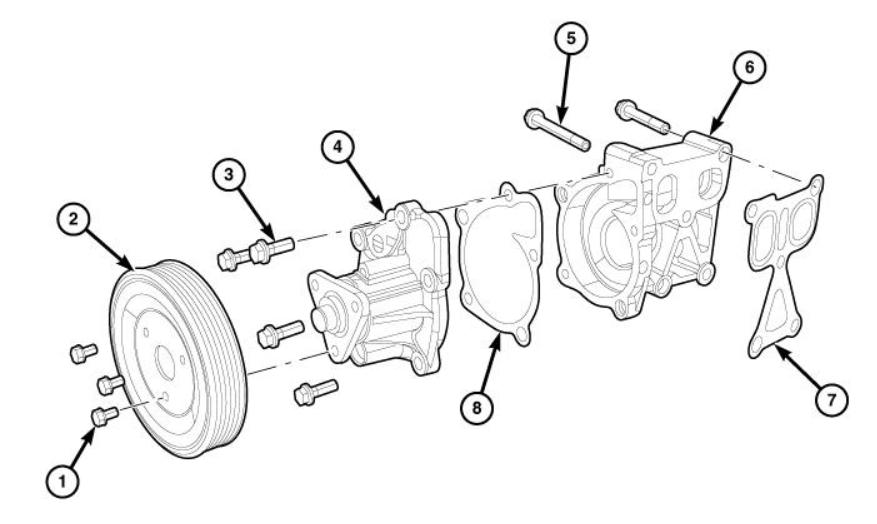
Discard the water pump outlet gasket (7).
Remove the three bolts (1) attaching the water pump pulley (2) to the water pump (4).
Remove the water pump pulley (2).
Remove the five bolts (3) attaching the water pump (4) to the water pump adapter (6).
Remove and discard the gasket (8).
Remove the water pump (4) and inspect carefully for any damage. Refer to PUMP, WATER, INSPECTION.
INSPECTION
Images (Click to make bigger)
SPONSORED LINKS
Monday, December 9th, 2013 AT 3:34 PM
