2006 Ford Taurus Power Steering Hose Leak Fix
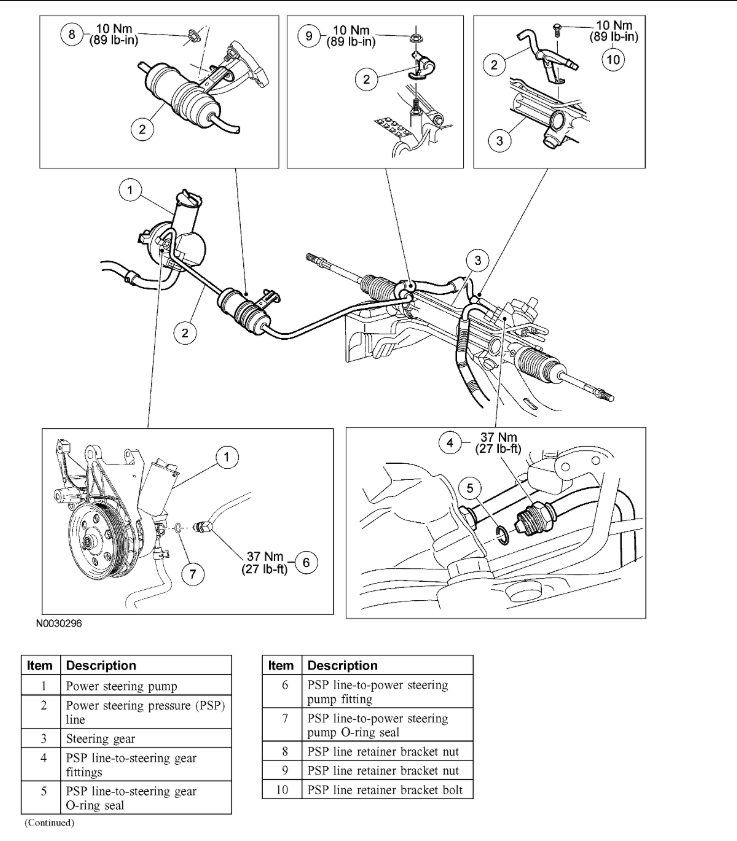
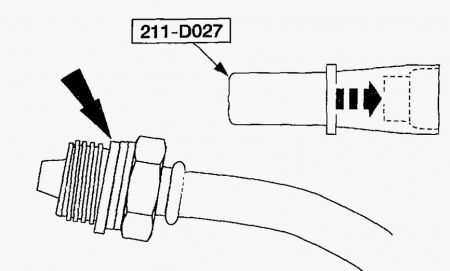
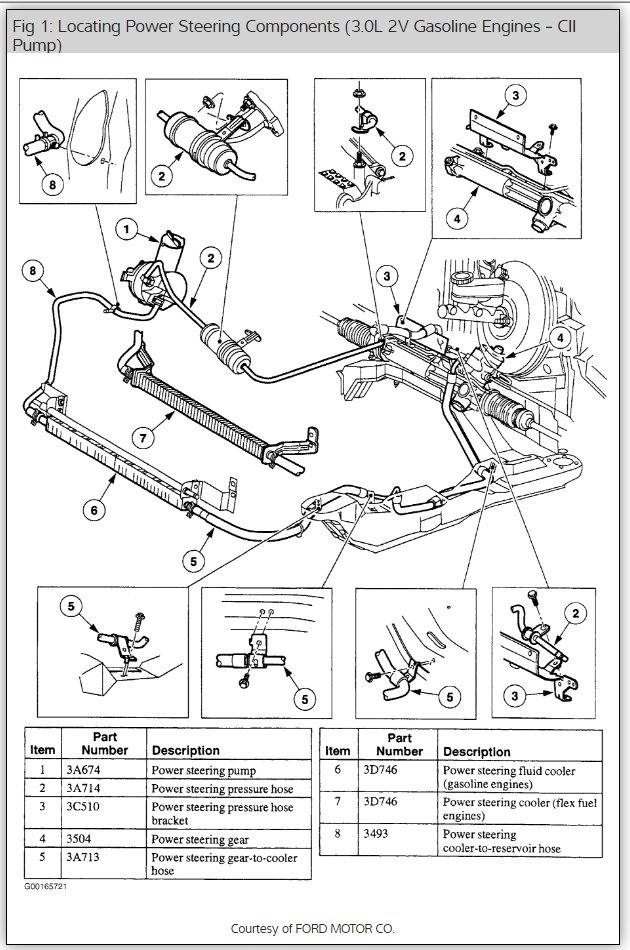
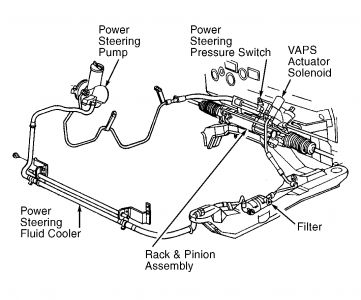
Here is a video that shows the steps of changing the power steering line out with diagrams below to show you how on your car.
https://youtu.be/BGBUv5r9fk0
Check out the diagrams (Below). Please let us know if you need anything else to get the problem fixed.


JC
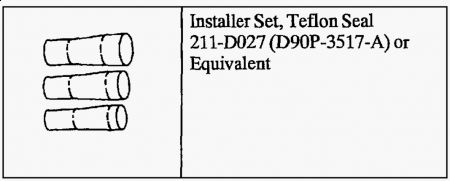
This can be a difficult job becasue the lines are tucked down low behind the engine and some of the job needs to be done for under the car. Also you will need line wrenches and possibly a crows foot which is a super small line wrench end that an extension plugs onto.
Here are some guides and a diagram to help you get the job done.
https://www.2carpros.com/articles/jack-up-and-lift-your-car-safely
and
https://www.2carpros.com/articles/how-to-replace-a-power-steering-pump
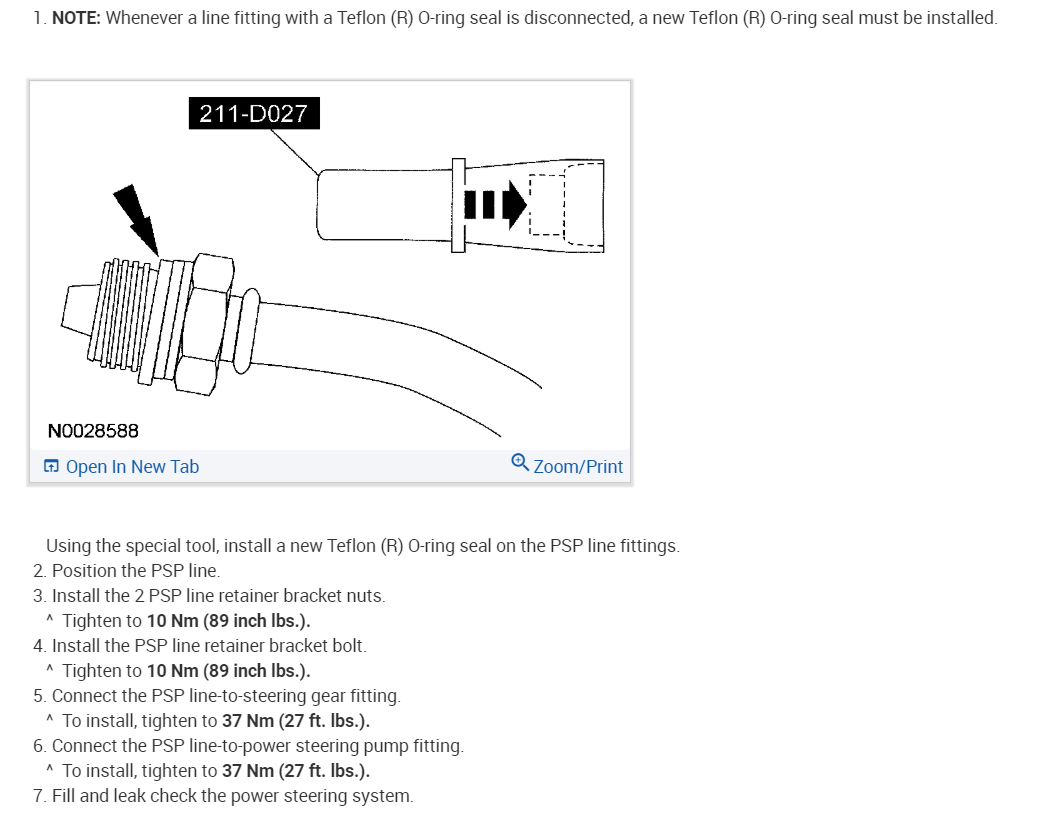
Here is a step by step for your car. (Diagram below)
(3.0L 2V Engine)
Disconnect battery ground cable.
Position the power distribution box out of the way.
Remove the engine outlet tube.
Disconnect power steering pressure hose from power steering pump.
Remove the nut from the exhaust manifold stud.
Remove the nut from the transmission stud.
Disconnect the power steering pressure (PSP) switch electrical connector.
Disconnect the power steering pressure hose from the steering gear.
Remove the power steering pressure hose. Remove and discard the seals.
Please let us know if you need anything else to get the problem fixed.
Cheers, Ken


The 18mm nut is not a locknut, but a fitting that is part of the steering rack. The hose itself uses a 15mm nut that fits into this fitting. No special tool should be required. The line will appear loose on the rack, but this is a normal condition. The seal is made by an O-ring on the end of the hose that fits into the rack. This is a lot easier to reach if you disconnect the steering column shaft from the rack, and lower the rear of the subframe for access.
I would first wash the area down really good to see exactly where it is leaking from.
It is best to use line wrenches when doing this…..but either way if it is coming from the fitting area I would make sure they are tight………..if not that may be your problem. If they have to be replaced then it won’t be easy but can be done.
Here is the info below and again…….line wrenches are best to use. Sorry the manual doesn’t’ provide any pics for this operation.
POWER STEERING PRESSURE & RETURN LINES
Removal
1. Disconnect battery ground cable. Remove air cleaner and hot air tube (if equipped). On 2.5L models, disconnect connectors from distributor, ignition coil, radio capacitor, oil switch and move harness. On all models, disconnect connectors from radiator fan and purge valve. Remove fan shroud. Disconnect integrated module harness connector from headlamp harness and place module out of the way.
2. Remove screw at pressure and return line bracket. Remove anti-rattle clip. Disconnect electrical connector on power steering pressure switch at steering gear. Remove pressure line fitting at power steering pump. Loosen clamp and remove return line at pump. Remove return line fitting at steering gear. Remove pressure line fitting at steering gear.
NOTE: Pressure and return fittings have the same thread size. Ensure pressure nut on line is installed in the pressure port, and that check valve is properly oriented. The return fitting is silver colored and longer than the pressure line fitting.
Installation
Installation is reverse of removal.
Forgot to provide the bleeding – not sure if you knew how.
BLEEDING & REFILLING SYSTEM
1. Fill pump reservoir. See RECOMMENDED FLUID TYPE table. Operate engine until power steering fluid reaches operating temperature. Stop engine. Recheck fluid level. Add fluid as necessary. Repeat procedure until fluid level stabilizes.
2. Raise and support vehicle so front wheels are off ground. Start engine. Turn steering wheel from side-to-side several times. Avoid hitting stops on holding wheel in full left or right position. Fluid level should remain visible.
3. Return wheels to center position. Operate engine for 2-3 minutes. Road test vehicle. Recheck fluid level. Fluid containing air will have a milky appearance. All air should be eliminated to obtain normal steering.
NOTE: Abnormal noise originating from the power steering system may be caused by air trapped in the system. Rotunda Vacuum Tester (021-00014) and following procedure will eliminate this condition.
4. Carefully remove pump filler adapter and dipstick. check and fill reservoir to "COLD" mark. Disconnect ignition coil lead. Raise front wheels of ground.
5. Crank engine while cycling steering wheel. DO NOT hold wheel on stops. Add fluid if necessary. Attach coil lead. Install evacuation tool onto reservoir.
6. Start engine. Apply 15 in. Hg on reservoir for approximately 3 minutes with engine idling. As air is purged from system, vacuum will decrease.
7. Maintain sufficient vacuum with vacuum source. Release vacuum. Check fluid level. Install filler adapter assembly and dipstick. Start engine.
8. Turn steering wheel from stop to stop while checking for leaks. If condition is severe, repeat procedure until all air is removed. Lower vehicle. Road test vehicle.
RECOMMENDED FLUID TYPE
Application Fluid Type
Ford Motor Co. ATF Type F
Suggested Repair
Locate the leak after cleaning the area. If the high-pressure fitting seal is leaking, install a new seal or replace the complete pressure line if the internal seal cannot be serviced. Use line wrenches, avoid overtightening, watch for a loose check valve in the rack port, and refill and bleed the system with the specified ATF.
Conversation Summary
The owner of a 2006 Ford Taurus asked for return power steering hose routing and later reported a persistent leak at the high-pressure pump fitting after replacing the O-ring. Replies said a new seal is required whenever a sealed fitting is opened, while some said the internal line seal is not serviceable and the whole line must be replaced. Access is tight and may require line wrenches, work from below, or lowering the subframe. Separate pressure and return lines should be reinstalled in the correct ports, then the system filled and bled.