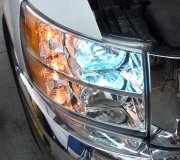
The computer field generation duty cycle circuit was checked and the condition was not present and no defects were found in the circuit. I found this Pre service bulletin online but the service advisor is hesitant to do anything with it becuase it is old? Anyone heard of this or know if it works or have any other ideas?
IPC Interior and/or Headlamps Flicker - keywords battery courtesy electrical fluctuation generator head intermittent lamp light #PIT3170D - (Jul 20, 2005)
1999-2005 All Cadillac Full Size Utilities
Without Regulated Voltage Control
1999-2005 All Chevrolet Full Size Trucks and Utilities
Without Regulated Voltage Control
1999-2004 Chevrolet Blazer, S-10
1999-2005 All GMC Full Size Trucks and Utilities
Without Regulated Voltage Control
1999-2004 GMC Envoy Classic, Jimmy, Sonoma
1999-2001 Oldsmobile Bravada
The following diagnosis might be helpful if the vehicle exhibits the symptom(s) described in this PI.
Condition/Concern:
Customers may have comments of a flickering light condition in the IPC, interior lamps or headlights. This condition is most likely to be noticed when the engine RPM is low and when high electrical load requirements are in place on the generator.
Recommendation/Instructions:
Disconnect the negative battery cable from the battery/batteries.
Slide the protective boot on the generator BAT terminal aside and remove the retainer and wire cable from the BAT terminal.
Unplug the generator 4-cavity terminal from the top of the generator.
Inspect cavity D on the generator connector for a red cavity plug. If a red cavity plug is present, it is not necessary to replace the generator connector. Remove the CPA and save. Remove the red cavity plug and continue with step 9. If a red cavity plug is NOT present, continue with the next step.
Remove and save the orange weatherpack seal and CPA from the 4-way connector.
Using the proper terminal removal tool, remove the two or three wires from the 4-way connector. On vehicles without Supplemental Brake Assist (SBA), install a red cavity plug, P/N 12059168, into cavity "A" of the new 4-way connector, P/N 12186568. On some 2003 and 2004 model year vehicles with SBA, install the dark blue (Circuit 5668) wire of the vehicle wiring harness into cavity "A" of the new 4-way connector.
Install the brown (Circuit 25) wire of the vehicle wiring harness into cavity "B" of the new 4-way connector.
Install the gray (Circuit 23) wire of the vehicle wiring harness into cavity "C" of the new 4-way connector.
Obtain a piece of 0.80 mm/18GA black wire, 254 mm (8 in) long.
Install a red terminal seal, P/N 12048086, and terminal, P/N 12048074, (crimp and solder) on one end of the new black wire.
Install the new black wire into cavity "D" of the new 4-way connector.
Reinstall the connector seal and CPA, from the original connector, to the new connector.
Plug the 4-way connector into the generator.
Route the black wire to the generator BAT terminal, sliding the wire into the small end to the output terminal boot, along side the generator output wire.
Obtain a ring terminal from the terminal kit (J-38125-D) that is the same diameter as the positive post of the generator. Crimp and solder the ring terminal from the terminal kit (J-38125-D) on to the open end of the new black wire.
Place the generator output wire and the new black wire onto the generator BAT terminal and install the retainer.
Connect the negative battery cable.
Note: This modification will not work if the vehicle is utilizing the new "Regulated Voltage Control" system. This is new feature on some full-size trucks and utilities for the 2005 model year. Please inspect the vehicle prior to performing this modification.
Please follow this diagnostic or repair process thoroughly and complete each step. If the condition exhibited is resolved without completing every step, the remaining steps do not need to be performed.
GM bulletins are intended for use by professional technicians, NOT a "do-it-yourselfer". They are written to inform these technicians of conditions that may occur on some vehicles, or to provide information that could assist in the proper service of a vehicle. Properly trained technicians have the equipment, tools, safety instructions, and know-how to do a job properly and safely. If a condition is described, DO NOT assume that the bulletin applies to your vehicle, or that your vehicle will have that condition. See your GM dealer for information on whether your vehicle may benefit from the information.
WE SUPPORT VOLUNTARY TECHNICIAN CERTIFICATION
Friday, July 22nd, 2011 AT 4:12 PM


