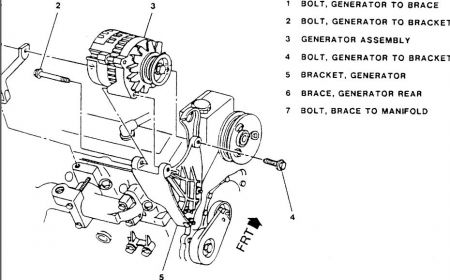
REMOVAL AND INSTALLATION
1.Disconnect the negative battery cable.
2.Remove the serpentine belt from the alternator pulley
3.Remove the air cleaner assembly
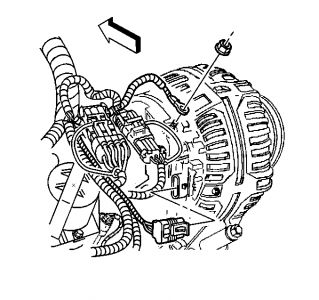
4.Disconnect the positive lead at the alternator by removing the nut
5.Disconnect the electrical connector (PLIS) plug
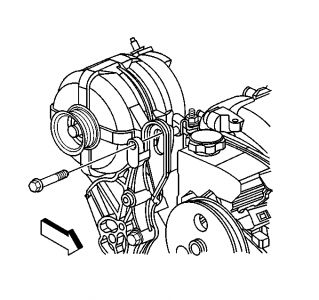
6.Remove the bolt (#1) connecting the rear brace to the generator
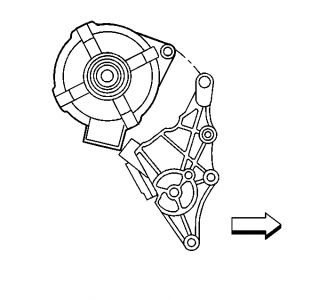
7.LOOSEN the bolt (#7)retaining the rear brace to the exhaust manifold, (it is not necessary to remove it) move the brace aside.
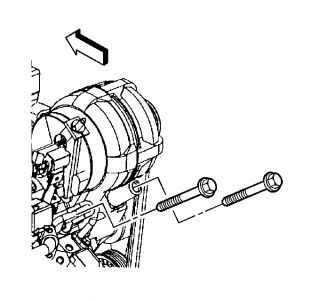
8.Remove the remaining alternator mounting bolts and remove the alternator.
3.1L Engine
See Figure 1
Fig. Fig. 1: Alternator mounting-3.1L engine
To install:
For 3.1L (LG6) engine, where a rear brace is used, bolt installation sequence and tightening sequence are important. Use the diagram as a guide.
1.Position the alternator and install the pivot (long) mounting bolt (#2). Do not tighten
2.Install the other bracket bolt (#4), but do not tighten.
3.Reposition the rear brace and install the bolt (#1) into the rear of the alternator (do not tighten)
4.Tighten bolt #4 to 18 ft. lbs. (25 Nm). Tighten the pivot bolt to 35 ft. lbs. (47 Nm).
5.Tighten bolt #7 to 35 ft. lbs. (47 Nm), making sure brace is properly aligned. Tighten bolt # 1 to 18 ft. lbs. (25 Nm).
6.Assure that tightening brace bolts does not place alternator in a bind. The pulley must spin freely.
7.Reconnect the electrical connector- (PLIS) plug
8.Install the battery positive lead to the output (BAT) terminal on the alternator and tighten the nut.
9.Install the serpentine belt
10.Install the air cleaner
11.Connect the negative battery cable.
SPONSORED LINKS
Wednesday, January 23rd, 2019 AT 1:21 PM
(Merged)

