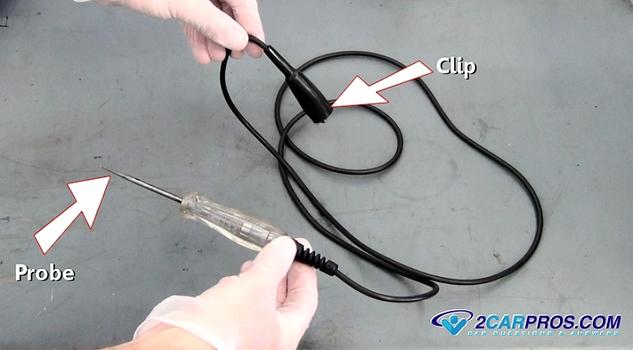
A test light is a simple device that can tell you if power or ground is present at a particular circuit or fuse. The test light consists of a sharp probe, indicator light bulb and a wire lead with a clip. This tool is easy to use and is reasonably priced on Amazon (about $20.00 US) and pertains to all 12 volt systems. EV's use a 12 volt system to run everything but the main drive motor, and most have a conventional 12 volt battery including Tesla.
Lest Jump In!
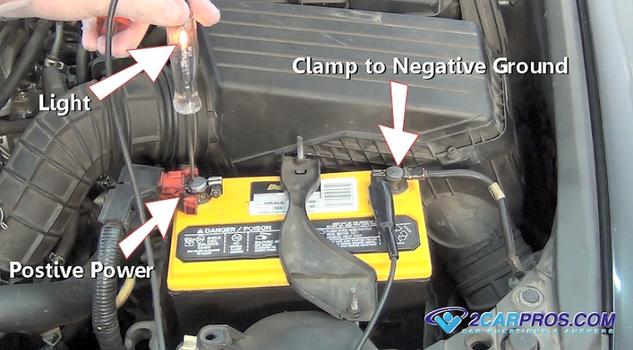
Before you begin testing it is good practice to make sure the test light works.
This is easily done by connecting the test light lead to the negative side of the
battery and then touching the point of the probe to the positive side battery terminal,
the test light should light up.
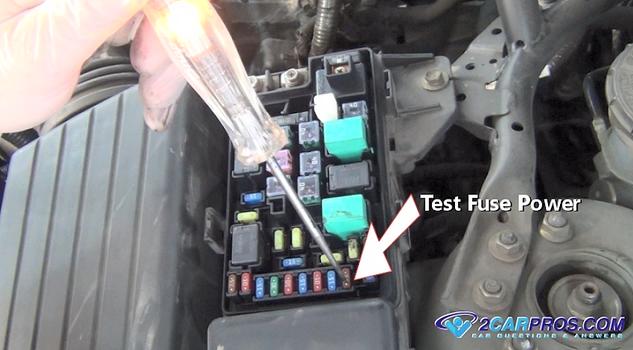
A popular use of a test light is to check for power and the condition of the fuses in the fuse panel or power distribution center (PDC), this should be the first check when a particular accessory such as door locks, lighting or power windows are not working. If you need the locations of a fuse or electrical item such as a fuel pump relay you can ask our experts to supply the information (free), or consult an online resource such as AllData DIY (pay).
Once the test light is properly grounded (negative side of the battery or any solid
metal part), touch each side of the fuse, both sides should light up which is telling
you both the fuse is good, and there is power present in the fuse panel. Note: Any
solid metal part of the vehicle such as the frame, engine, radiator core support
is grounded naturally as part of the
electrical systems design.
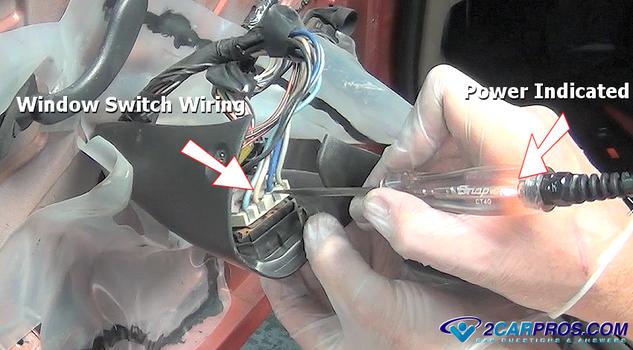
If the fuse is good the next step is to see if a particular accessory is getting
power such as a power window, with the test light grounded check for power at the
switch, and then the window motor. If there is power at the switch but none at the
motor with the switch activated, you know the window switch is bad, if there is
power at the motor the motor is bad, assuming the grounds are good, which we will
show you in the next steps.
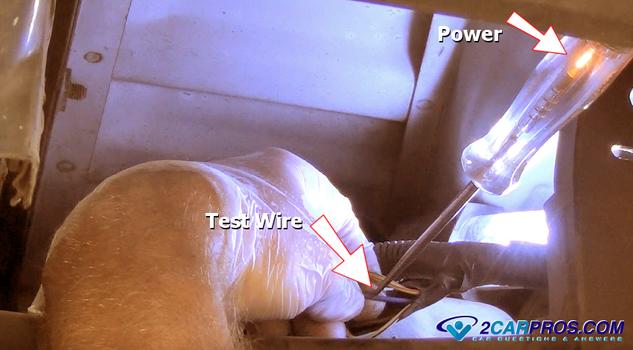
Here a mechanic is testing the power feed to the fuel pump from under the vehicle,
with the test light grounded the sharp point is pushed through the wire insulation
to contact the internal wire. This is done by locating the wiring harness headed
to the fuel tank and while using a wiring diagram provided
by our expert to confirm the color of the wire, in this case blue, if power
is present as in this case the fuel pump motor is bad.
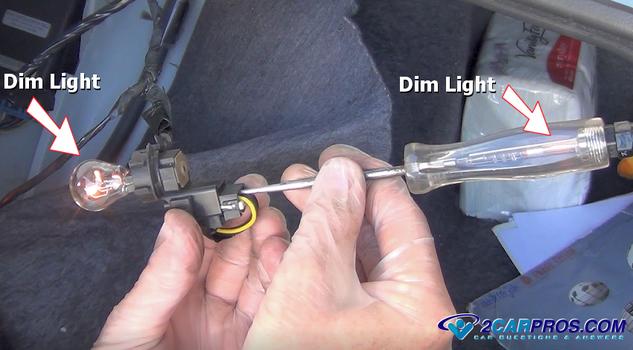
When a bulb is dim such as a headlight and brake light it usually means the power
side is okay and there is a bad ground. To confirm this, connect the test light
lead to power, which then changes the test to find ground. Here a mechanic is testing
the light bulb ground which is bad by showing dimly lit bulbs for both the brake
light and test light. Follow the ground wire to the body and repair the connection.
When power tests okay at the fuse yet power is not present at a particular accessory
such as the cooling fan, a test light can trace the problem down through the wiring
harness to find a melted or bad connection.
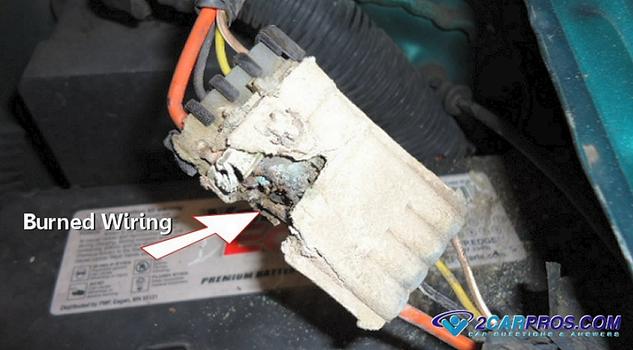
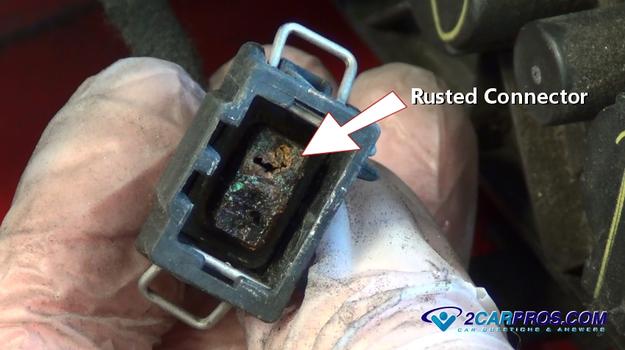
This electrical connector tested good while probing the wires before the connector,
it wasn't until the technician removed the connector was the problem discovered.
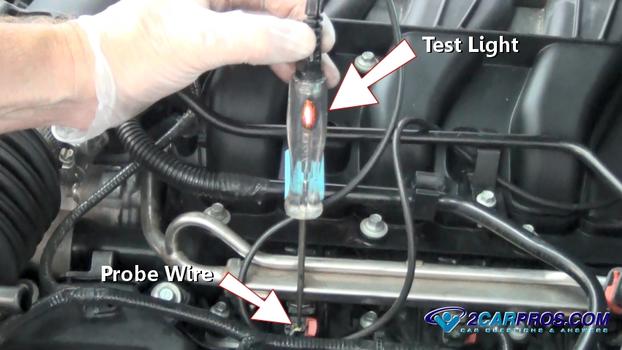
By probing the wires at a fuel injector you can see if the PCM is producing a
signal to open the injector.
Watch the Video!
Please watch this video of the job being done to glean additional helpful information.
Credits
This guide knowledge base was created by the 2CarPros Team, and by Ken Lavacot: Automobile repair shop owner and certified master automobile technician of over 30 years. If you have question or need help please ask one of our experts we are happy to help. Please visit our 2CarPros YouTube Channel for additional car repairs.
