Introduction
The engine coolant temperature (ECT) sensor is a critical component in your vehicle's cooling system and is is designed to measure the heat inside the engine. This data is then sent back to the main computer PCM so adjustments can be made to the engine timing, fuel injector pulse width, temperature gauge/light readings and cooling fan operation. If the sensor fails, your car might exhibit a check engine light, poor performance, overheating, or erratic temperature readings. This guide provides a detailed step-by-step approach to replacing the ECT sensor.
Tools and Materials Needed
- New engine coolant temperature sensor
- Socket wrench set
- Flathead screwdriver
- Torque wrench
- Coolant drain pan
- Coolant (as specified by your vehicle's manufacturer)
- Thread sealant (if required)
- Gloves and safety goggles
- Shop towels
Coolant Temperature Sensor Replacement
Start with the engine cold, jack the car up while using jack stands, you should also wear protective eyewear and gloves.
1. Release the Cooling System Pressure
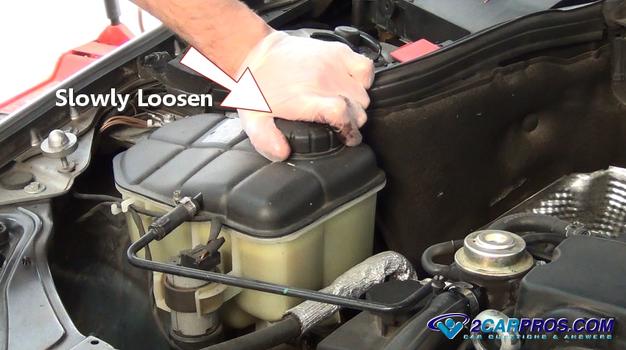
Locate and slowly remove the cooling system pressure cap to relieve the system of any residual pressure. You will then need to drain the cooling system because the sensor is submerged in coolant and when it is removed coolant will leak from the coolant port.
2. Locate the Coolant Temperature Sensor
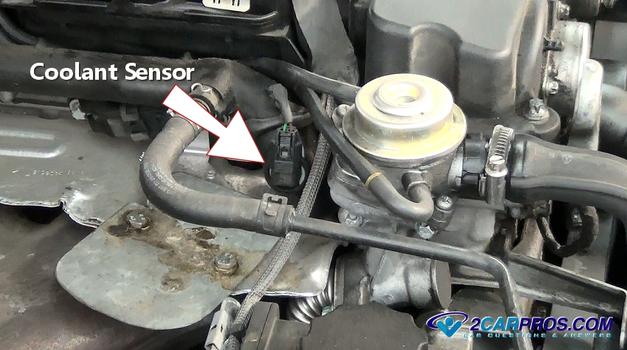
There are usually only three places the coolant temperature sender can be located which are: In or near the thermostat housing, in the cylinder head, or in the intake manifold. To find where your particular coolant sensor is located, please ask one of your experts, they are happy to help. You can also purchase the new sensor and match it to the sensor on the engine.
3. Remove the Electrical Connector
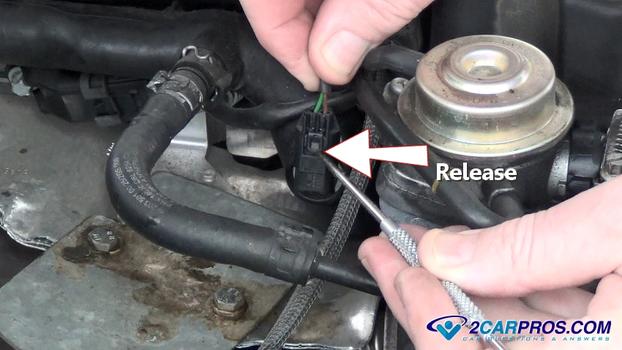
Remove the 2 wire electrical connector to the sensor which will be held on a by a safety clip. You must push down or lift upwards on the clip lever to release it.
Once the safety has been released gently pull upward on the connector but be careful not to damage the wires to the connector. Also, check the electrical terminals for corrosion because this will alter the reading of the sensor which will cause false values. If rust or corrosion is present clean or replace the sensor pigtail.
4. Remove the Coolant Sensor
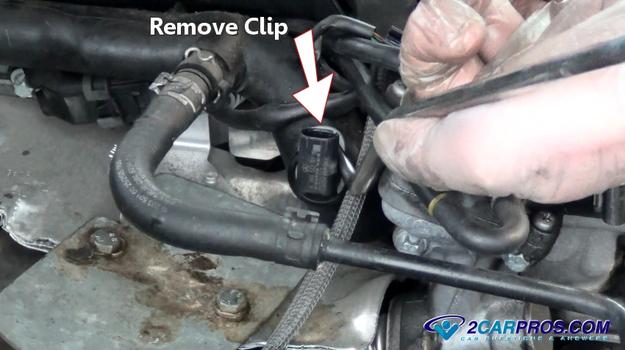
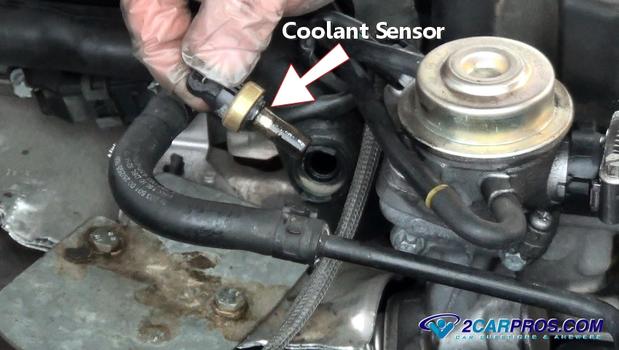
A coolant sensor will be held in place by one of two methods. The first, is a typical threaded housing which you will be able to remove using a large 22mm or 24mm deep well socket or wrench. In the example below the sensor is being held in by a large C clip. Use a pick to pull the clip upward and away from the sensor. This will enable the sensor to be removed from the coolant access port.
After the clip is removed or the sensor unscrewed, grasp the sensor to remove it from the coolant access port. A small amount of coolant may be expelled from the port. Use a shop towel to clean the access port free from dirt or grease.
5. Install the New Coolant Temperature Sensor
Match the new sensor to the old unit, they should match identically. If the sensor uses threads, apply a small amount of thread sealer to help stop coolant leaks once the sensor is reinstalled (some coolant sensors have sealer already applied). In this example the sensor is sealed by an O ring which requires no sealer.
Install the sensor by reinserting it back into the coolant access port and repositioning the clip. If the sensor is threaded in, tighten the sensor to manufacturers specific torque. Do not over tighten the sensor or you will crack the composite which will cause the sensor to send false information to the computer. Firmly grasp the electrical connector and gently push it back onto the coolant sensor until you hear an audible click signaling the complete installation of the connector.
6. Refill the Cooling System
Once the sensor installation is complete, close the radiator drain valve and refill the system with coolant. Start the engine and allow it to heat up while adding coolant as needed. Reinstall the radiator cap once the engine is at operating temperature and recheck the system for leaks.
Conclusion
Inspect the area around the new sensor for leaks. Start the engine and let it reach operating temperature. Check for any leaks again and ensure the sensor is functioning correctly by monitoring the temperature gauge.
Watch the Video!
Please watch this video of the job being done to glean additional helpful information.
Credits
This guide knowledge base was created by the 2CarPros Team, and by Ken Lavacot: Automobile repair shop owner and certified master automobile technician of over 30 years. If you have question or need help please ask one of our experts we are happy to help. Please visit our 2CarPros YouTube Channel.


