Introduction
The engine coolant reservoir, also known as the overflow tank, expansion tank, or coolant recovery tank, plays a crucial role in maintaining the engine's cooling system. Because the cooling system works best when there are no air bubbles a coolant reservoir is used to catch the heated coolant and then allow the coolant it to be pulled back into the radiator once the engine has cooled down.
What Goes Wrong?
The coolant reservoir is made of plastic and with the extreme temperature changes it will become brittle and leak coolant or the mounting tabs will break off allowing the reservoir to move round in the engine compartment. In either case the unit must be replaced to retain it's proper operation.
Tools and Materials Required
- New coolant reservoir (OEM or aftermarket)
- Coolant (check vehicle specifications for the correct type)
- Socket wrench set
- Screwdrivers (flathead and Phillips)
- Pliers
- Drain pan
- Funnel
- Work gloves
- Safety goggles
- Shop towels
Getting Started
In most cases you will be able to change the reservoir using everyday tools while the car is on the ground. But sometimes the car will need to be lifted to get at that pesky underneath screw in which case the car will need to be raised using a floor jack. You will also want to use gloves to protect against cuts and the grime of the engine compartment. If the reservoir is pressurized with a screw on cap you should drain the cooling system and wait until the engine has completely cooled down before beginning this job.
1. Removing Coolant Reservoir Overflow Hose: Remove the reservoir cap and place it to the side. At the top of the coolant reservoir there will be an overflow hose which is designed to relieve the pressure once opened. Using a pair of pliers gently force the tube from the fitting.
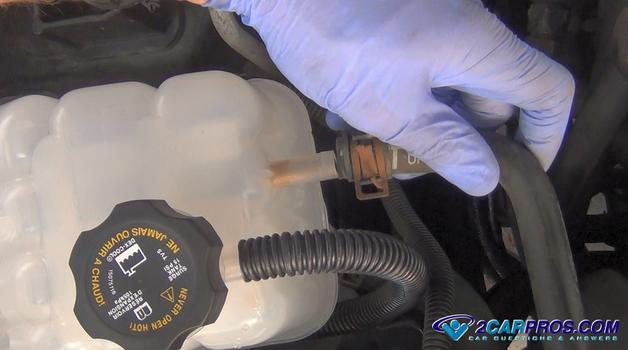
2. Remove Coolant Pressure Hoses: Some coolant reservoirs will have a small upper pressure hose designed to transfer air out of the radiator and into the upper portion of the reservoir. Using a clamp removal tool or pliers remove the upper hose. There will be a lower coolant hose which is designed to transfer coolant into the radiator as well, it too will need to be removed by using a hose clamp removal tool.
Note: There may be a small amount of coolant that will drip from the fitting once the hose has been removed.
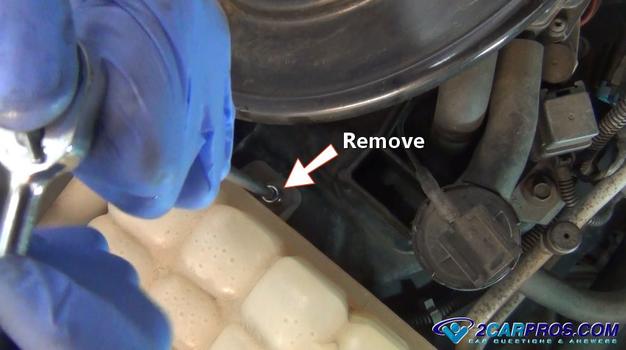
3. Remove Mounting Bolts: There should be two to three mounting bolts or screws holding the coolant reservoir in place. Locate these screws or bolts and remove them using a small socket or screwdriver and turning them counterclockwise. Some mounting bolts could be under the car or in the fender well.
4. Remove Coolant Reservoir Electrical Connector: On some coolant reservoirs there may be an electrical connector to monitor the coolant level. Push the safety clip outward to separate the connector from the sensor. These can be a little stuck due to the weather pack seal which is designed to keep moisture away from the terminals and prevent corrosion.
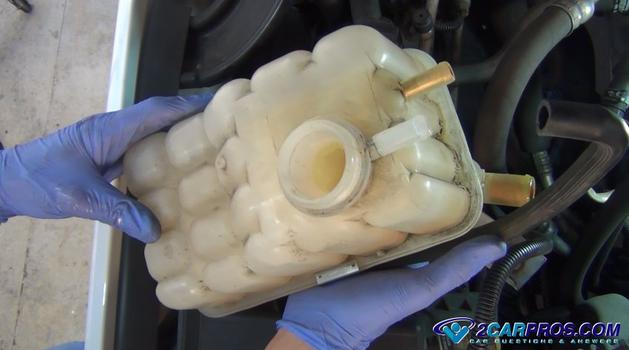
5. Remove Coolant Reservoir: Now the coolant reservoir will be loose in the engine compartment. Grasp the container and maneuver it from the engine compartment. Residual coolant may dribble out of the reservoir so use caution.
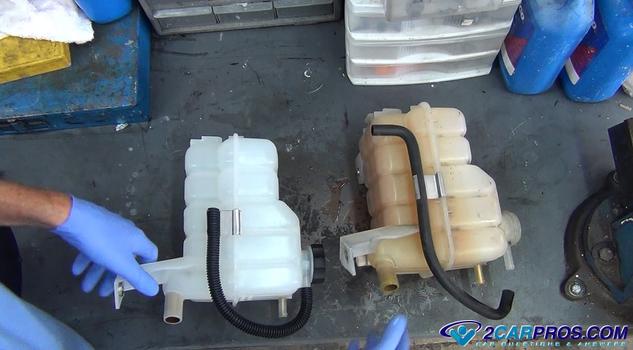
6. New Coolant Reservoir: Remove the new coolant reservoir from the box and lay it next to the old unit. Observe the hose connection, mounting tabs and electrical connectors to make sure they or present and in the same locations. Some reservoirs include a new pressure cap like the one in this example. The overflow tube configuration is a little bit different in the replacement unit but will still work as intended.
7. Reconnect Electrical Connector: Before lowering the reservoir into the engine compartment be sure to reconnect the electrical connector. This will avoid having to try and attach the connector once the installation is complete which can be more difficult.
8. Install the New Coolant Reservoir: Gently lower the new unit into place while maneuvering it into the mounting pins or lining up the screw or bolt holes. Reinstall all of the mounting bolts and screws by hand and then tighten them evenly one at a time.
9. Reconnect Coolant Hoses: Start with the lower coolant hoses and then finish reconnecting the upper hoses to the coolant reservoir. You will need to open the hose clamp by using a clamp tool or a pair of pliers. Position the clamp so it is in the middle of the fitting, this will help the hose seal against the fitting and the hose will not be forced off of when the system is under pressure.
10. Refill the Reservoir: Remove the reservoir cap and refill the cooling system, once the reservoir is about half full, start the engine and allow it to warm up until the thermostat opens and the coolant can fully circulate. Recheck the coolant level and add as needed until it reaches the "full when hot" line on the side of the container. Reinstall the cap and recheck the job for leaks and you are all set.
Conclusion
Most of the time the cooling system will not need to be bleed but is some cases there will will be a bleeder valve near the thermostat housing or upper radiator hose, open this valve to allow the air from the cooling system.
Watch the Video!
Please watch this video of the job being done to glean additional helpful information.
Credits
This guide knowledge base was created by the 2CarPros Team, and by Ken Lavacot: Automobile repair shop owner and certified master automobile technician of over 30 years. If you have question or need help please ask one of our experts we are happy to help. Please visit our 2CarPros YouTube Channel.


