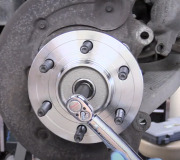
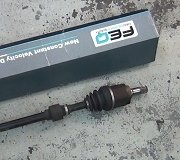
That's why I asked what you unbolted, and you never said anything about those three bolts or that you already replaced the other bearing successfully. Don't expect me to know what you don't tell me. You'd be surprised how many times I've helped do-it-yourselfers who weren't aware of those three bolts.
Using a hub puller suggests there was a pressing bolt that was pushing on the stub axle. That is going to compress the inner CV joint, then push the engine / transmission to the side. Basically, you're putting the effort into pushing out the half shaft, not pulling on the bearing assembly. You would need to push against the spindle, but I've never found a decent way to do that.
There's two ways that have always worked for me. The first is to only remove the three bolts part way, then pound on their heads to push the bearing out. As it starts to come out, back the bolts out some more, then pound some more. Be aware the heads will likely be damaged, so have some replacements from a salvage yard on hand. I've also used an air hammer on those bolts. If the bit is skinny enough to fit through a 1/2"-drive socket, hold that socket on the bolt head to prevent the hammer bit from bouncing off to the side.
The second way is to use an air chisel with a sharp, flat bit, between the spindle and the back of the bearing. The most frustrating part is getting the bearing started coming out. Once you get the first little crack, the worst part is over. Work your way around until the bearing falls off. This is how I get about 99 percent of rusted bearings off old cars and trucks Be sure to wear hearing protection. I've had some that I had to rattle on for as much as a minute or two, and that gets pretty loud. Once the bearing is off, check the spindle for gouges that would prevent the new bearing from sitting squarely. Grind those off with an angle grinder.
In the very worst case, you can disconnect the lower ball joint, then pull the spindle out to the side, then pull the outer CV joint out of the bearing. Turn the spindle out far enough to allow a good swing with a large hammer. I have numerous flat metal discs from various specialty tool sets. One of them fits the opening in the back side of the spindle, but you need a way to hold it there. That gives you a solid place to bang on. The problem is there is really no good way to anchor the spindle from bouncing.
If you've gotten this far with the lower ball joint disconnected, you can remove the entire spindle and strut, then use a hydraulic press to push the bearing out. Be sure to always hang up the brake caliper so it never hangs by the rubber flex hose. Disconnect the outer tie rod end, then the three upper strut mounting plate nuts. Do not touch the two bolts that hold the spindle to the bottom of the strut assembly. That is one of the primary alignment adjustments. If you don't touch those, and if you reattach the upper mount in exactly the same position, there will be no need for an alignment when you're done. The ball joint and tie rod end have no choice but to go back exactly where they were, so the alignment won't change. You can get the upper mounting plate in the same spot by observing the outline of the dust around the bolts. GM likes to use little metal reinforcing plates under those nuts. You might have better luck using a little spray paint or spray grease to make some "witness" marks if that will make reinstallation easier. Another trick is to remove just two of the nuts first, then poke holes in two pieces of masking tape, then stick them over the bolts, onto the body. Those will guide the mount back into its original location.
Be aware that by far the most common cause of repeat bearing failures is improper torquing of the axle nut. GM already has a real big problem with their bearings causing false ABS activation. The wheel speed sensor develop very wimpy signals to start with. With a little normal wear, the tone ring can move away from the sensor enough to cause a signal dropout at low speeds, and the computer incorrectly thinks that wheel is locking up. This can occur to a new bearing in as little as 15,000 miles. The dealer's scrap metal bins are full of them.
The second problem is noise. On cars other than GM products, a buzzing noise, similar to an airplane engine, is the most common failure. The often overlooked point is the new bearing will instantly become noisy too if there is ever any vehicle weight on it before the axle nut is tightened. A lot of do-it-yourselfers install the wheel, then set it on the ground to hold the axle from rotating so they can tighten the nut. At that point it's too late. The damage is done. I even had a GM front-wheel-drive car that was being repaired for crash damage. The engine and transmission had been removed, then the car was pushed outside to wait for parts. That was enough to make both bearings noisy. I found those on the test-drive after I had aligned the car.
To tighten the axle nut, just stick a punch or screwdriver into one of the cooling slots in the brake rotor. Use a click-type torque wrench to tighten the axle nut to specs. The lowest torque setting called for is commonly 180 foot-pounds for small cars, but some GM vehicles call for up to 240 foot-pounds. The correct torque is listed on the sheet that comes with the new bearing. If there was a stamped metal cage around the axle nut, those nuts should be discarded and replaced with the new design. GM uses a lot of "torque-to-yield" axle nuts. Those are one-time-use nuts and must be replaced too once they are loosened. If you have that, the new bearing will have come with the new nut.
You can use some anti-seize compound on the back of the bearing to make it easier to remove next time, but absolutely do not get any of that on the wheel studs. Mechanics will be fired for doing that. Put a light film of lithium-based grease on the hub where the wheel's center hole contacts. That will prevent a crunching noise when cornering. If the new wheel studs are silver, light blue, or light yellow, that is an anodized coating which is a lubricant. Do not use any grease on those. Grease will dissolve that coating. You can use a very light coating of bearing grease or lithium grease on non-coated studs, but then run the lug nuts on all the way by hand. If you spin them on with air tools, that grease can get pushed up onto the nuts' curved friction surfaces where it will prevent them from remaining tight.
Torque the lug nuts to specs with the click-type torque wrench, Most front-wheel-drive cars call for 95 foot-pounds with steel wheels, and around 85 foot-pounds with cast wheels. Over-tightening these nuts will peel the threads. The damage shows up the next time someone tries to remove the nuts, and of course that is the person who gets blamed for that damage.
For my final parting thought, when you buy GM wheel bearings, if the car does not have anti-lock brakes, compare the cost of that bearing with and without ABS. In a lot of applications, the bearing with the wheel speed sensor is less expensive than that bearing without the sensor. The actual bearing is the same. If the bearing with the sensor is less expensive, buy that one, then you can pop the sensor disc off, or leave it on and just don't plug it in.
Wednesday, April 5th, 2017 AT 4:26 PM


