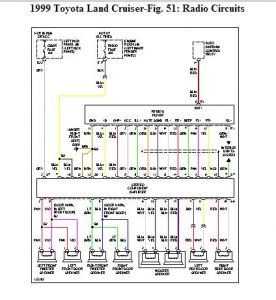
1999 Toyota Landcruiser Radio Wiring

1999 TOYOTA LANDCRUISER
Avatar
GILVAR
  • MEMBER
  • 2 POSTS
1999 Toyota Landcruiser

What do the different colors of wires for the radio mean? For example which color is the power? And Which color is the ground?
Apr 24, 2009 at 8:31 PM
Advertisement
Avatar
MHPAUTOS
  • ASE Certified Mechanic
  • 31,937 POSTS
  • ASE Certified Mechanic
Hi there, see pic for wiring setup. Mark (mhpautos)


https://images.2carpros.com/forum/automotive_pictures/61395_Noname_67.jpg

Apr 24, 2009 at 9:35 PM
Avatar
GILVAR
  • MEMBER
  • 2 POSTS
Thank you for that picture, but would you happen to have a larger version of it because it isn't readable. If not I will try to decipher it. Thanks!
\

updated 4/28/09
In the mean time though, would you happen to know which of the boxes in the picture represents the battery? I'm guessing its one of the 3 on the top, but i'm not sure so if you have any idea that would be great. Also, if you are able to read that chart, would you happen to know which color wires are for the power and the ground wire? Thanks again
Apr 26, 2009 at 12:58 PM
Avatar
MHPAUTOS
  • ASE Certified Mechanic
  • 31,937 POSTS
  • ASE Certified Mechanic
Hi there,

Sorry about the delay, you should be able to copy the pic and enlarge it on your PC, there are a few free programs that will allow you to do this, as i am not on my normal PC i can't access it either just now, but will ASAP, the red wire should be the power supply into the amp, i will check the original and post asap.

Mark (mhpautos)
May 1, 2009 at 6:05 PM
Join 2CarPros for free, one of the most advanced car repair communities on the internet. From first-time drivers to seasoned mechanics, everyone is welcome to reply, share details, and get better answers. You can add a temporary image or video first; uploads are limited to 20 MB.
Ask a Free Question
Repair Safety Notice: This information is for general instructional purposes only. Vehicle repair can be dangerous. Verify all information, follow manufacturer service procedures, use proper tools and safety equipment, and consult a qualified repair shop when needed.