AXLE SHAFTS Removal Raise and support vehicle. Remove front wheel. Apply brakes. Loosen axle shaft flange-to- differential assembly flange nuts. Release brakes. 1. Paint reference marks on axle shaft flange and differential assembly flange for reassembly reference. DO NOT use punch to make reference marks. On models with locking hubs, go to next step. On models without locking hubs, go to step 4). 2. On models with locking hubs, place locking hub in FREE position. Remove bolts, locking hub cover and center hub bolt with washer. See Fig. 1 . If necessary to remove hub body for access to snap ring on end of axle shaft, remove hub body retaining nuts and washers. Remove cone washers by tapping on ends of bolt studs with brass drift and hammer. Remove hub body and gasket. Go to step 5). 3. On models not equipped with locking hubs, remove dust cap from flange and center hub bolt with washer. See Fig. 1 . Remove flange mounting nuts. Remove cone washers by tapping on ends of bolt studs with brass drift and hammer. Thread 2 bolts into flange, opposite each other. Tighten bolts to press flange from front hub. Remove flange gasket. Go to next step. 4. Remove snap ring and spacer from end of axle shaft. Slide axle shaft toward steering knuckle until free of differential assembly. Pull axle shaft downward and out of front hub assembly and steering knuckle. 5.
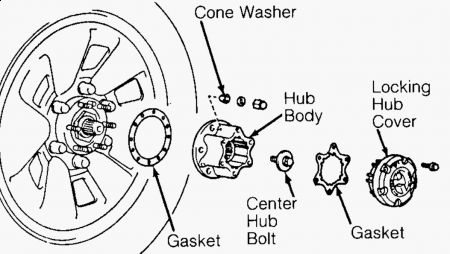
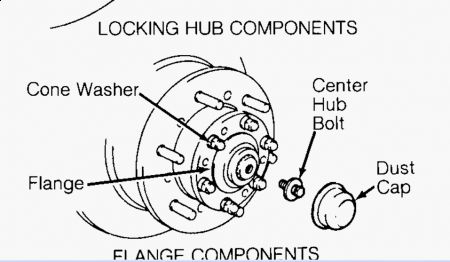
Best I could find for you...Cone washers can be easily removed by tapping the area above them with a ball peen hammer, they will pop right out so leave the nut on loosly to stop it from flying out at you.
SPONSORED LINKS
Friday, May 29th, 2009 AT 3:27 PM


