Hi and thanks for using 2CarPros. Com
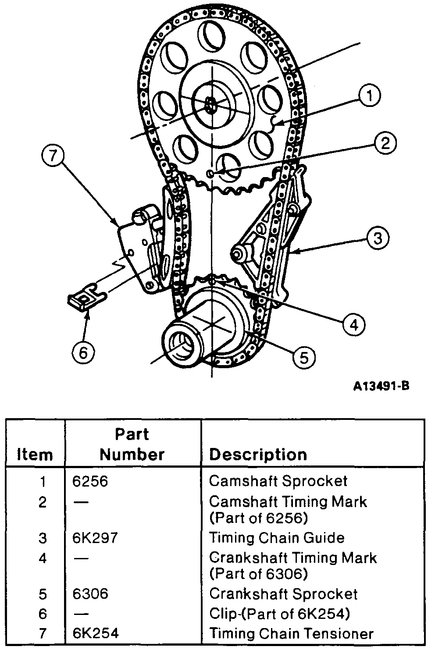
It sounds like you did it right. The cam mark is at 6 and crank at 12. If you have no compression, maybe the chain jumped. That is where I would start. The engine was running and now no compression. If you were 180 out ( and I don't think that is possible on this engine) it never would have run.
________________
I do not know if you need them, but here are the directions for chain replacement. It shows where the marks go. Also, make sure the tension-er is good.
_______________________
REMOVAL
NOTE: It is necessary to replace the oil pan gasket when removing and installing engine front cover. It is necessary to remove the engine to remove the oil pan.
1. Remove engine front cover.
2. Push timing chain tension-er into the retracted position and install retaining clip.
3. Remove the camshaft sprocket retaining bolt and the crankshaft sprocket key.
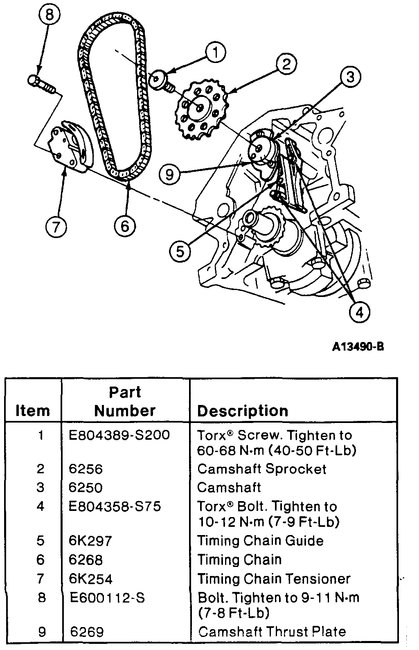
Timing Chain And Gears
4. Remove the crankshaft sprocket and camshaft sprockets with the timing chain.
5. Remove the timing chain and timing chain guide as required.
INSTALLATION
1. Install the timing chain guide to the cylinder block with the pin of the guide inserted into the oil hole in the block. Install the two retaining bolts, and tighten to 10-12 Nm (7-9 ft lb).
2. Position the camshaft so the timing mark will align with the crankshaft. Position the crankshaft so the timing mark will align with the camshaft.
3. Install the crankshaft sprocket, camshaft and timing chain together.
NOTE: Make sure that the tension-er side of the timing chain is held inward, and that the guide side of the chain is straight and tight.
Timing Chain Alignment Marks
4. Install the crankshaft key and check the timing marks on the crankshaft sprocket and camshaft sprocket for correct alignment.
5. Install the camshaft sprocket retaining bolt, and tighten to 60-68 Nm (44-50 ft lb).
6. Remove the clip from the timing chain tension-er.
7. Check the camshaft end play.
CAUTION: Prying against the camshaft gear with the valve train load on the camshaft can break or damage the gear. Therefore, the rocker arm adjusting nuts must be backed off, or the rocker arm and shaft assembly must be loosened sufficiently to free the camshaft. After checking the camshaft end play, adjust the valve clearance.
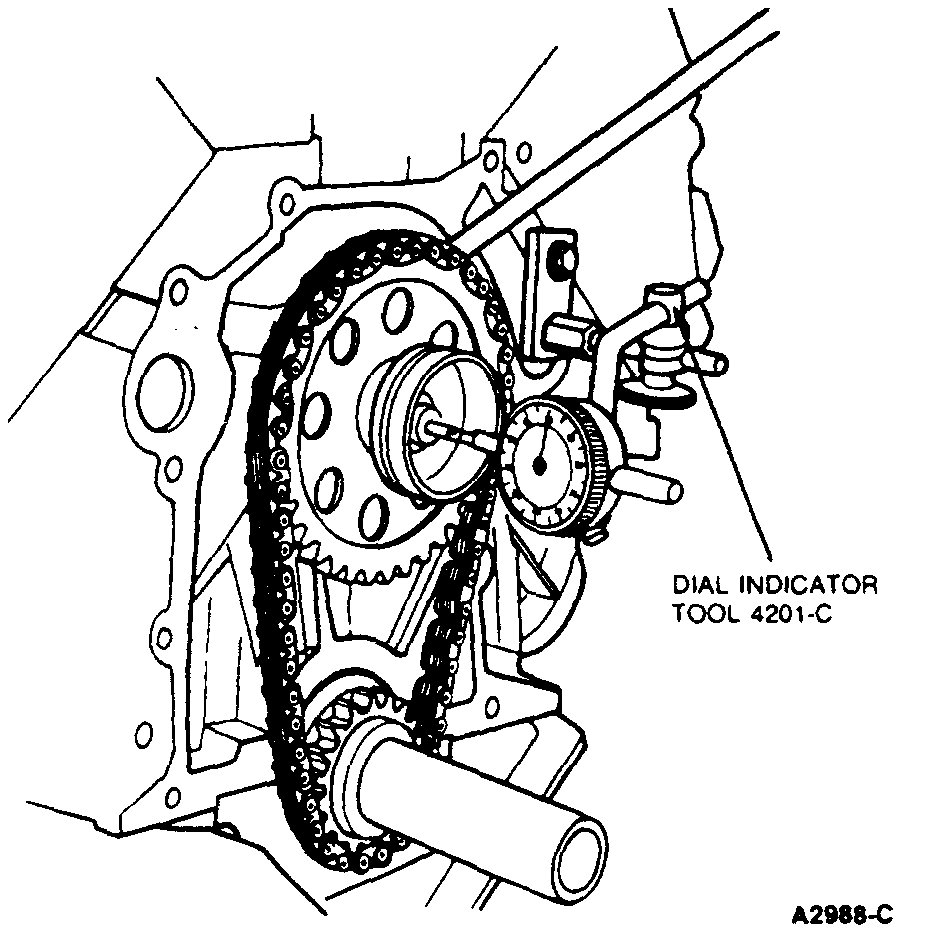
Camshaft End Play
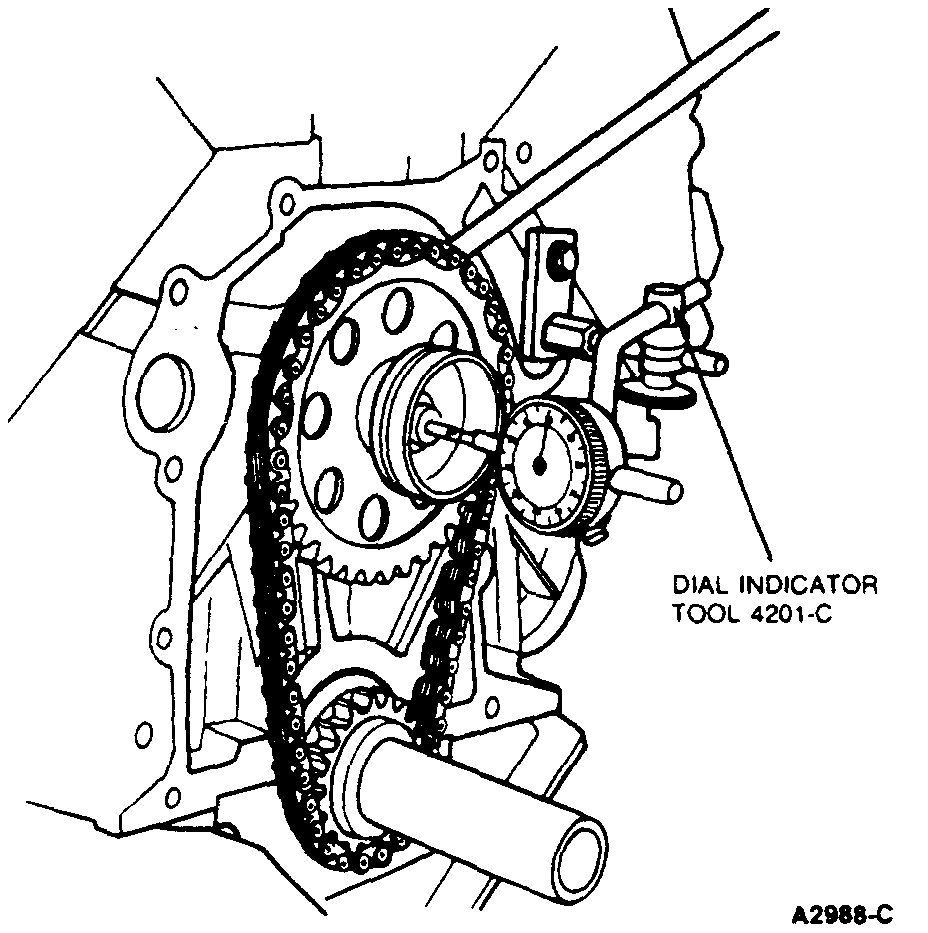
a. Push camshaft toward rear of engine. Install Dial Indicator TOOL-4201-C or equivalent so indicator point is on camshaft sprocket attaching screw.
B. Zero dial indicator. Pull camshaft forward and release it. Compare dial indicator reading with specifications. Camshaft end play specification is 0.0203-0.1016 mm (0.0008-0.004 in) and camshaft end play service limit is 0.2286 mm (0.009 in). If end play is excessive, replace camshaft thrust plate.
C. Remove dial indicator.
D. After replacing thrust plate, check end play again. If it is still out of specified range, inspect camshaft and cylinder head/cylinder block for excessive wear.
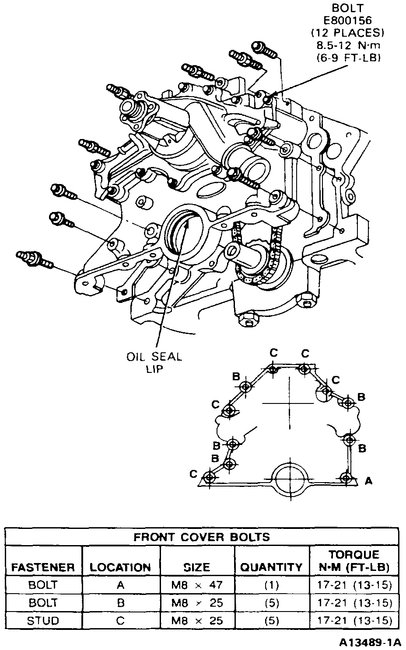
Engine Front Cover
8. Install the engine front cover tighten bolts to 17-21 Nm (13-15 ft lb).
9. Fill and bleed the cooling system.
10. Fill the crankcase with clean engine oil of the recommended grade and viscosity.
11. Start the engine and operate at fast idle. Check for coolant and oil leaks.
_____________________________
Let me know if this helps or if you have other questions.
Take care,
Joe
Images (Click to make bigger)
Wednesday, September 26th, 2018 AT 6:46 PM
