Good afternoon,
This is a sign of a leaking heater core. Coolant will smell like this when it leaks into the cabin.
https://www.2carpros.com/articles/replace-heater-core
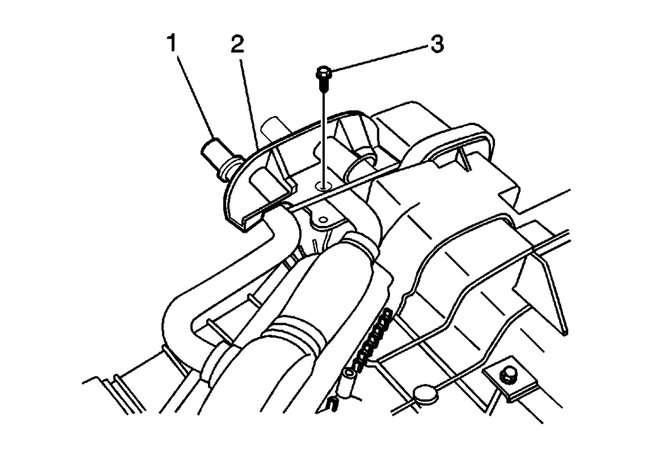
I attached the procedure and some pictures for you of the repair.
Let us know if you have any other questions.
Roy
HEATER CORE REPLACEMENT
REMOVAL PROCEDURE
1. Remove the HVAC module assembly. See: Housing Assembly HVAC > Service and Repair
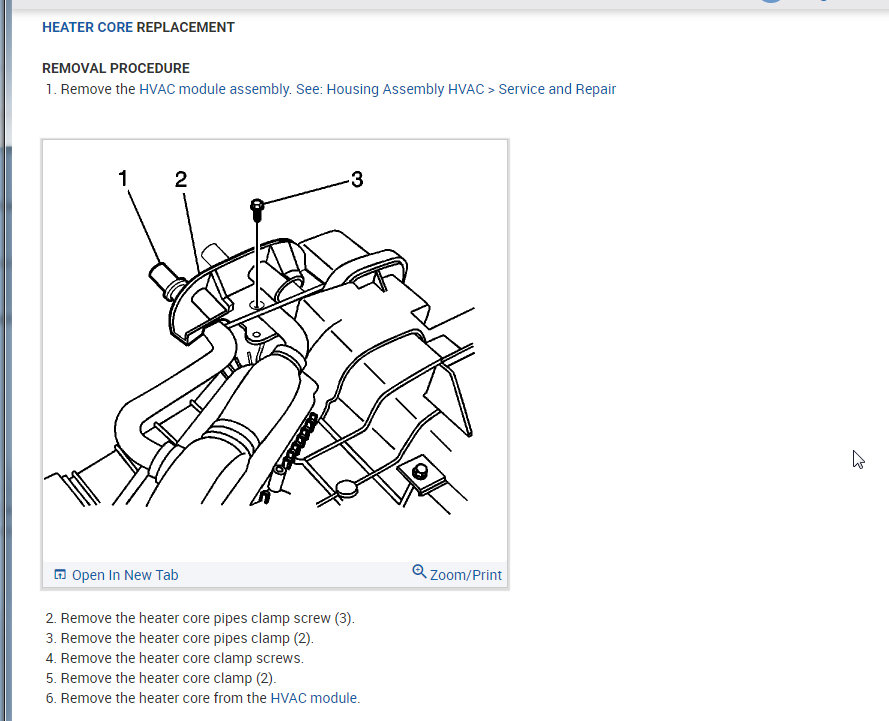
imageOpen In New TabZoom/Print
2. Remove the heater core pipes clamp screw (3).
3. Remove the heater core pipes clamp (2).
4. Remove the heater core clamp screws.
5. Remove the heater core clamp (2).
6. Remove the heater core from the HVAC module.
INSTALLATION PROCEDURE
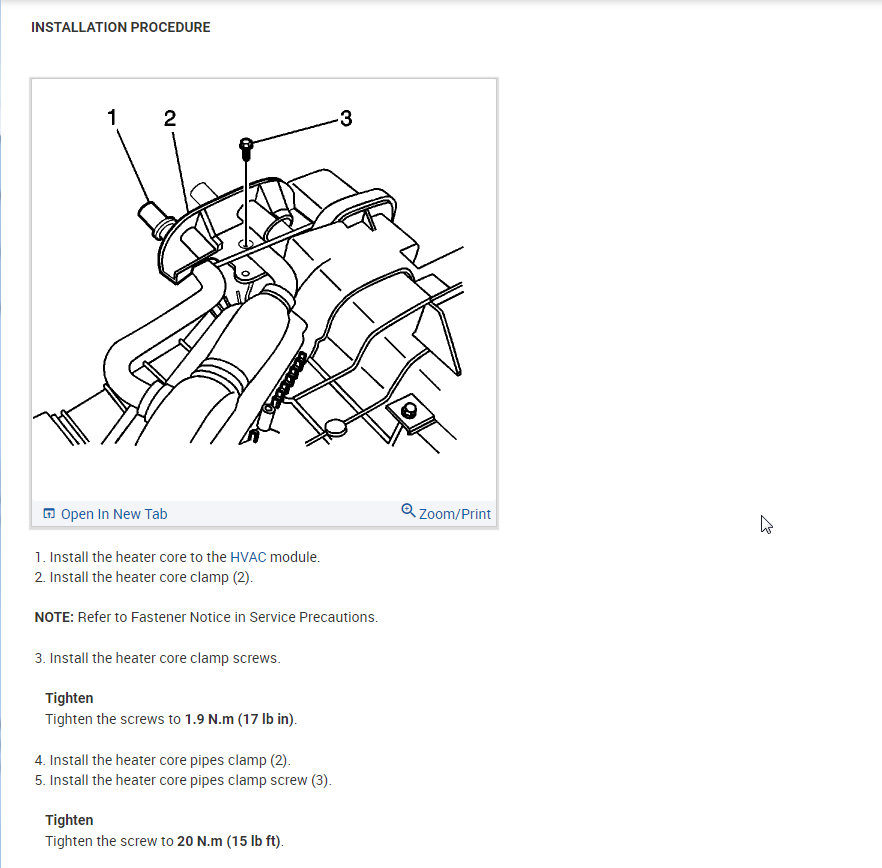
imageOpen In New TabZoom/Print
1. Install the heater core to the HVAC module.
2. Install the heater core clamp (2).
NOTE: Refer to Fastener Notice in Service Precautions.
3. Install the heater core clamp screws.
Tighten
Tighten the screws to 1.9 N.m (17 lb in).
4. Install the heater core pipes clamp (2).
5. Install the heater core pipes clamp screw (3).
Tighten
Tighten the screw to 20 N.m (15 lb ft).
6. Install the HVAC module assembly.
HVAC MODULE ASSEMBLY REPLACEMENT (W/ AIR CONDITIONING)
TOOLS REQUIRED
J 43181 Heater Line Quick Connect Release Tool
J 39400-A Halogen Leak Detector
REMOVAL PROCEDURE
1. Drain the engine coolant. Refer to Draining and Filling Cooling System in Cooling System.
2. Recover the refrigerant. Refer to Refrigerant Recovery and Recharging.
3. Remove the I/P carrier.
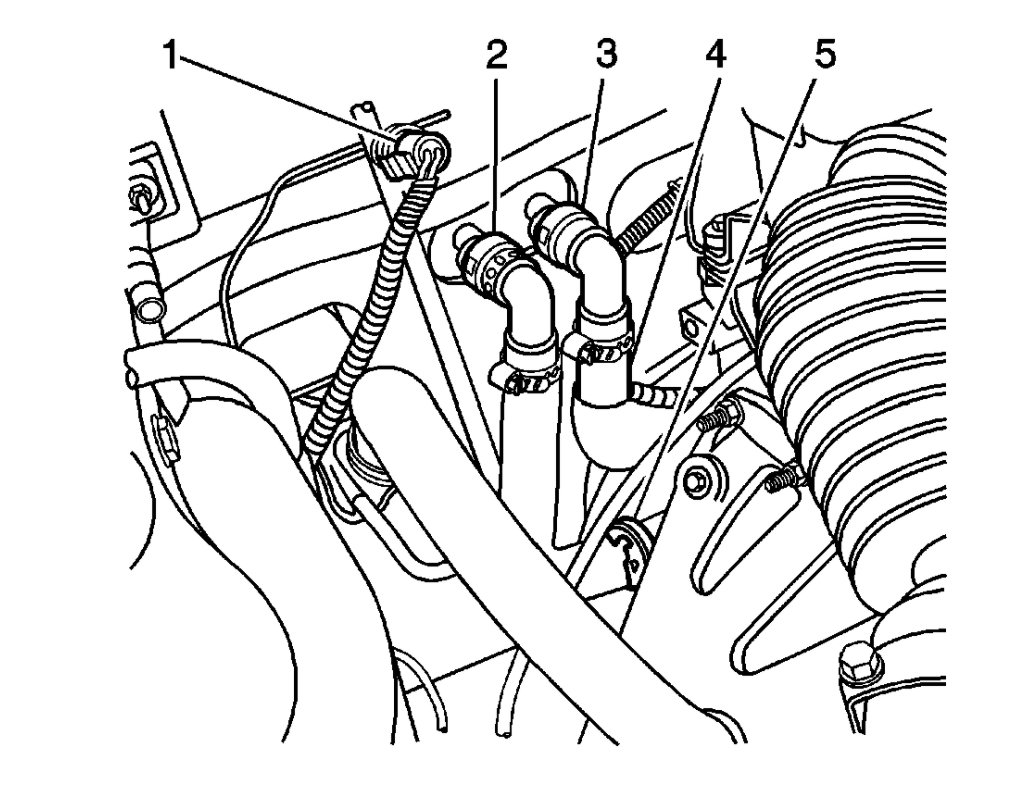
imageOpen In New TabZoom/Print
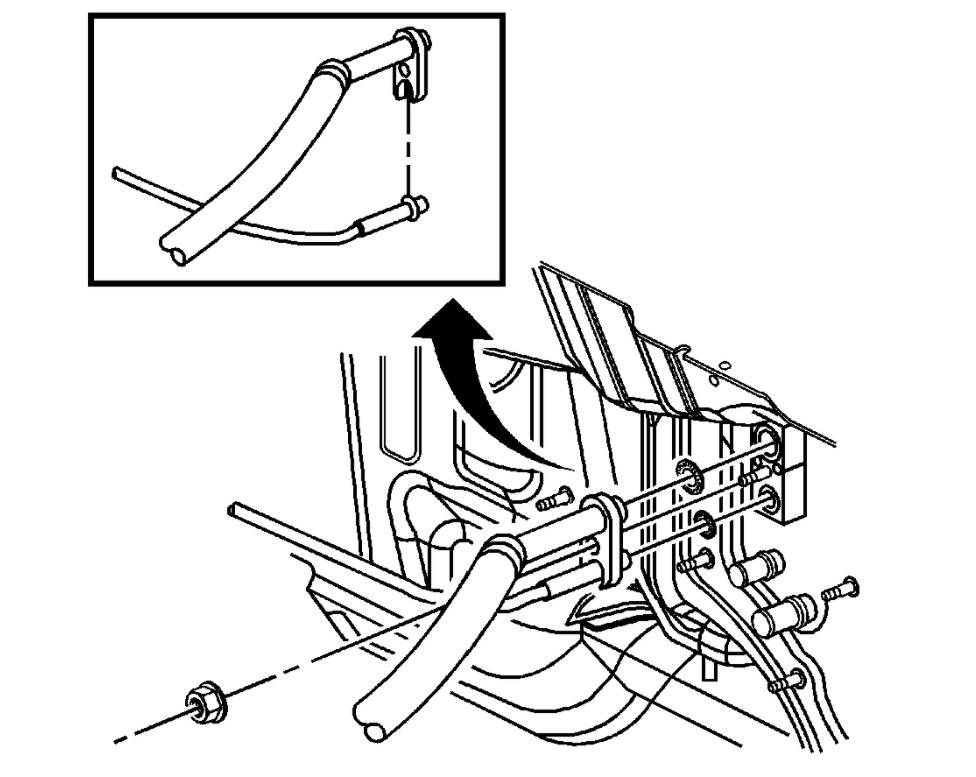
4. Release the heater hose clamps using J 43181.
5. Disconnect the heater hose quick connects (2) and (3) from the heater core.
imageOpen In New TabZoom/Print
6. Remove the retaining nut from the TXV stud.
7. Remove the evaporator tube and suction hose from the TXV.
8. Disconnect all of the electrical connectors to the HVAC module assembly.
9. Remove the HVAC module retaining nuts from the cowl.
10. Remove the HVAC module assembly.
INSTALLATION PROCEDURE
1. Install the HVAC module assembly.
2. Install the HVAC module retaining nuts from the cowl.
NOTE: Refer to Fastener Notice in Service Precautions.
3. Tighten the HVAC module retaining nuts.
Tighten
Tighten the nut to 4.5 N.m (40 lb in).
imageOpen In New TabZoom/Print
4. If replacing the HVAC module assembly (8), transfer the components from the old HVAC module assembly as necessary.
5. Install the HVAC module assembly (8).
6. Connect all of the electrical connectors to the HVAC module assembly.
imageOpen In New TabZoom/Print
7. Connect the heater hose quick connects (2) and (3) to the heater core.
8. Install the evaporator tube and suction hose to the TXV.
9. Install the retaining nut to the TXV stud.
NOTE: Refer to Fastener Notice in Service Precautions.
10. Tighten the retaining nut.
Tighten
Tighten the nut to 4.5 N.m (40 lb in).
11. Install the I/P carrier.
12. Evacuate and recharge the A/C system. Refer to Refrigerant Recovery and Recharging.
13. Leak test the fittings of the components using the J 39400-A.
14. Refill the engine coolant. Refer to Draining and Filling Cooling System in Cooling System.
Images (Click to make bigger)
Wednesday, December 2nd, 2020 AT 1:50 PM
