Hi and thanks for using 2carpros.com
Either you have a bad connection or a starter going bad. Even though you replaced the battery, make sure the connections are clean on the cables. Also, make sure the grounds from the battery to the engine block is clean and tight.
Now, here is a link that discusses a similar condition. See if it helps.
https://www.2carpros.com/articles/everything-goes-dead-when-engine-is-cranked
If that isn't an issue, then I suspect the starter itself if bad. However, we can't be sure unless if fails when it gets checked. If it only clicks once and then works, you won't know when to check it. Regardless, here is a link that shows how to check a starter.
https://www.2carpros.com/articles/starter-not-working-repair
To be honest, since the battery is new, chances are the starter is going bad. If I am correct, it will slowly get worse until it doesn't work. If it leaves you stranded, and this isn't in the repair manual, tap on the starter with a hammer. Tap, not bang. lol Often times that will get you a few more starts from it.
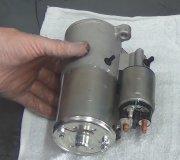
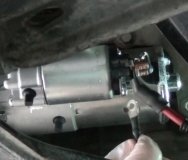
If you determine it is the starter, here are the directions for replacement. All attached pictures correlate with these directions.
_____________________________________________
REMOVAL PROCEDURE
see pic 1
CAUTION: Refer to Battery Disconnect Caution in Cautions and Notices.
NOTICE: Never operate the starter motor for more than 30 seconds at a time. Allow it to cool for at least two minutes. Overheating, caused by too much cranking, will damage the starter motor.
1. Disconnect the battery negative cable.
2. Remove the exhaust manifold pipe.
3. Remove the engine to transmission brace rod mounting bolts.
4. Remove the engine to transmission brace rod.
see pic 2
5. Remove the starter heat shield.
see pic 3
6. Remove the wires from the starter solenoid.
see pic 4
7. Remove the brush end bracket attaching bolt.
see pic 5
8. Remove the starter motor mounting bolts.
9. Remove the starter from the vehicle.
see pic 6
10. Remove the brush end bracket from the starter, if necessary.
INSTALLATION PROCEDURE
see pic 7
1. Install the brush end bracket to the starter motor.
NOTICE: Refer to Fastener Notice in Cautions and Notices.
2. Install the brush end bracket attaching nuts to the starter motor.
Tighten
Tighten the brush end bracket nuts to 11 N.m (97 lb in).
3. Install the starter motor to the vehicle.
see pic 8
4. Install the inboard starter mounting bolt. Do not tighten.
see pic 9
5. Install the brush end bracket mounting bolt to the engine. Do not tighten the bolt.
6. Install the outboard starter mounting bolt.
Tighten
Tighten the starter motor and the brush end bracket attaching bolts to 43 N.m (32 lb ft).
see pic 10
7. Connect the wires to the starter solenoid.
Tighten
- Tighten the battery positive cable to starter nut to 9 N.m (80 lb in).
- Tighten the engine wiring harness to starter nut to 1.9 N.m (16 lb in).
see pic 11
8. Install the starter heat shield.
see pic 12
9. Install the engine to transmission brace rod.
10. Install the engine to transmission brace rod mounting bolts.
Tighten
Tighten the engine to transmission brace mounting bolts to 50 N.m (37 lb ft).
11. Install the exhaust manifold pipe.
12. Connect the negative battery cable.
___________________________________________________
Let me know if this helps or if you have other questions.
Take care,
Joe
Images (Click to make bigger)
Tuesday, January 22nd, 2019 AT 7:45 PM


