Something unplugged and cannot find where it goes

2003 CHEVROLET CAVALIER
253,000 MILES • AUTOMATIC
Avatar
JOSHUA WATSON
  • MEMBER
  • 3 POSTS
Running into an issue where the A/C is stuck on defrost mode and was told to check for a vacuum hose leak in my car.

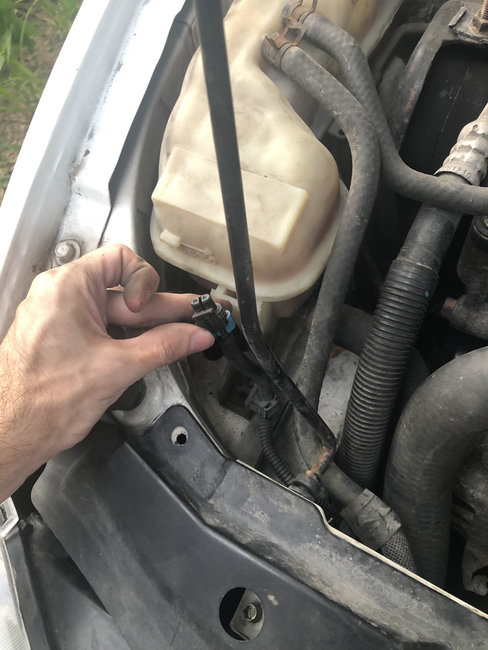
I found this thing that isn't plugged into anything but don't see anywhere to plug it in... any ideas?

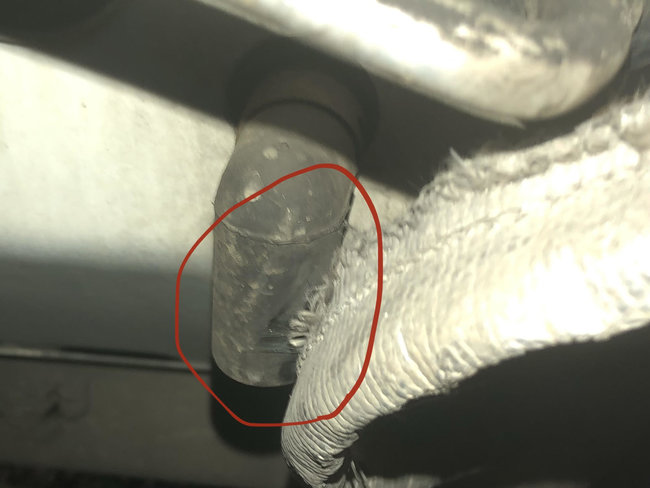
Also, I don't see any hose connected in the second picture, back by the fire wall???

I'm having trouble locating the vacuum hose as well... I don't know what to look for and can't find any manuals or videos of it.
Jul 8, 2020 at 5:50 PM
Advertisement
Avatar
JACOBANDNICKOLAS
  • CERTIFIED EXPERT
  • 110,175 POSTS
Pic 1 is an electrical connector and pic 2 is the A/C drain.

The mode door is what controls air flow direction. I looked it up and found that this one is controlled by a cable. Take a look at these directions for removal and replacement of the cable. Check the cable shown and see if it is disconnected or broken.

Take a look at this link for a better description and what to do when it is stuck in defrost mode:

https://www.2carpros.com/articles/air-vents-stay-in-the-defrost-position

______________________________________

2003 Chevrolet Cavalier L4-2.2L VIN F
Mode Control Cable Replacement
Vehicle Heating and Air Conditioning Air Door Air Door Cable Service and Repair Procedures Mode Control Cable Replacement
MODE CONTROL CABLE REPLACEMENT
REMOVAL PROCEDURE


pic 1

1. Remove the I/P trim plate.
2. Disconnect the mode control cable from the mode door lever.
3. Remove the cable flag retaining screw.
4. Remove the HVAC control assembly.
5. Release the flag from the mode base using the release tab.


pic 2

6. Remove the flag.
7. Remove the cable end form from the lever post.
8. Remove the temperature control cable.

INSTALLATION PROCEDURE


pic 3

1. Install the mode control cable to the HVAC control assembly.
2. Snap the flag into the mode base.
3. Snap the cable end form over the lever post.


pic 4

4. Install the cable to the mode door lever/cam.
5. Install the cable flag and screw to the HVAC module assembly.

NOTE: Refer to Fastener Notice in Service Precautions.

Tighten
Tighten the screw to 2 N.m (18 lb in).

6. Install the HVAC control assembly.
7. Install the I/P trim plate.

___________________________________

Let me know what you find or if you have other questions.

Joe
Jul 8, 2020 at 7:46 PM
Avatar
JOSHUA WATSON
  • MEMBER
  • 3 POSTS
Discovered that connector actually plugs in underneath the coolant reservoir.

As for the A/C issue, is all this located in the dashboard or is it under the hood?
Jul 8, 2020 at 11:39 PM
Advertisement
Avatar
JOSHUA WATSON
  • MEMBER
  • 3 POSTS
Took forever but I got the cable off! That was the issue, it's extremely worn and bent at one end. In fact, it wasn't even hooked around the post!
Jul 9, 2020 at 7:13 PM
Avatar
JACOBANDNICKOLAS
  • CERTIFIED EXPERT
  • 110,175 POSTS
Hi,

I'm glad to hear you got it fixed. I'm confident it wasn't a fun job. LOL There isn't a lot of room to work.

Regardless, please feel free to come back anytime in the future if you have questions or need help.

Take care of yourself.

Joe
Jul 9, 2020 at 10:04 PM