Hi,
I have to be honest, even when it started, it sounded like it turned slowly. I want you to check something for me. Drive the vehicle to a parts store and ask them to load test the battery. Most do it free of charge. If it passes, there is a relay under the hood called the starter cut relay. I'm questioning if it is bad. I attached a pic of the component. The reasoning is it stopped itself from cranking and other times you get nothing.
Here is a test for checking relays:
https://www.2carpros.com/articles/how-to-check-an-electrical-relay-and-wiring-control-circuit
Here are a few other links you may find helpful:
https://www.2carpros.com/articles/how-to-use-a-test-light-circuit-tester
https://www.2carpros.com/articles/how-to-use-a-voltmeter
https://www.2carpros.com/articles/how-to-check-wiring
_____________________
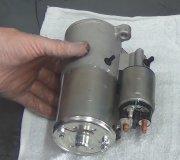
If the relay is good, the battery is good as well as all connections, my next step would be the starter. Here is a link that explains in general how one is replaced:
https://www.2carpros.com/articles/how-to-replace-a-starter-motor
Here are the directions specific to your vehicle for both replacement and testing of the starter. The attached pics correlate with the directions.
____________________
2012 Honda Civic L4-1.8L
Starter Removal, Installation, and Performance Test
Vehicle Starting and Charging Starting System Starter Motor Service and Repair Removal and Replacement Starter Removal, Installation, and Performance Test
STARTER REMOVAL, INSTALLATION, AND PERFORMANCE TEST
Starter Removal, Installation, and Performance Test
Removal
1. Battery Terminal - Disconnection
pic 2
1. Make sure the ignition switch is in LOCK (0).
2. Disconnect and isolate the negative cable and battery sensor (A) from the battery.
NOTE: Always disconnect the negative side first.
3. Disconnect the positive cable (B) from the battery.
2. Vehicle Lift
1. Raise the vehicle on a lift, and make sure it is securely supported.
3. Tire and Wheel-Removal, Front Right
pic 3
1. Remove the right front wheel.
4. Engine Undercover
pic 4
1. Remove the engine undercover (A).
5. Starter
pic 5
1. Remove the intake manifold bracket.
pic 6
2. Disconnect the connector.
pic 7
3. Remove the clamps and the connector.
pic 8
4. Remove the starter.
pic 9
5. Disconnect the cable and the connector.
Test
1. Starter Performance - Test
pic 10
1. Clamp the starter firmly in a vise.
2. Make the connections for this test using the thickest (gauge) wire possible (preferably the same gauge as used on the vehicle).
NOTE: To avoid damaging the starter, never leave the battery connected for more than 5 seconds.
3. Connect the battery as shown, and check for continuity between the B terminal and the starter body. If there is continuity, it is working properly.
pic 11
4. Disconnect the battery from the starter body, and check for continuity between the B terminal and the starter body. If there is no continuity, it is working properly.
pic 12
5. Connect the starter to the battery as shown, and confirm that the motor runs.
6. If the electric current meets the specification when the battery voltage is at 11.5 V, the starter is working properly.
pic 13
Installation
1. Starter
pic 14
1. Connect the cable and the connector. Make sure the starter cable crimped side of the ring terminal faces away from the starter when you connect it.
pic 15
2. Install the starter, then loosely install the upper mounting bolt (A) and the lower mounting bolt (B).
3. Tighten the upper mounting bolt, then tighten the lower mounting bolt.
pic 16
4. Install the clamps and the connector.
pic 17
5. Connect the connector.
pic 18
6. Install the intake manifold bracket.
2. Engine Undercover
pic 19
1. Install the engine undercover (A).
3. Tire and Wheel-Installation, Front Right
pic 20
1. Install the right front wheel.
NOTE: Before installing the wheel, clean the mating surfaces between the brake disc and the inside of the wheel.
4. Battery Terminal - Reconnection
pic 21
NOTE: If the battery performs abnormally, test the battery.
1. Clean the battery terminals.
2. Connect the positive cable (A) to the battery.
NOTE: Always connect the positive side first.
3. Connect the negative cable and battery sensor (B) to the battery.
4. Apply multipurpose grease to the terminals to prevent corrosion.
5. Starter After Install - Check
1. Start the engine to make sure the starter works properly.
_____________________________________
Let me know if this helps or if you have other questions.
Joe
Images (Click to make bigger)
Monday, January 25th, 2021 AT 10:59 AM
(Merged)


