Hi and thanks for using 2CarPros.
If you are seeing it at the crankshaft, my first suspect is that the water pump has failed. The pump is located above the crankshaft pulley. Often times when they go bad, coolant leaks from a weep hole. Take a look through this link:
https://www.2carpros.com/articles/symptoms-of-a-bad-water-pump
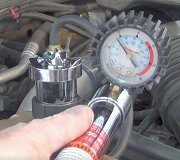
To confirm that is the problem, you really should pressure test the system to see if that is where the coolant is leaking from.
https://www.2carpros.com/articles/radiator-pressure-test
If that is the problem, here is a link that shows in general how one is replaced:
https://www.2carpros.com/articles/water-pump-replacement
__________________________________
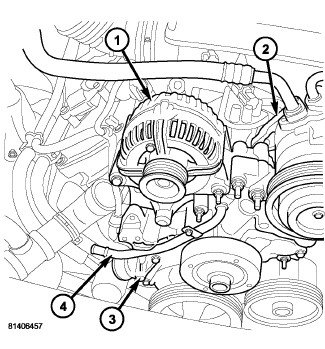
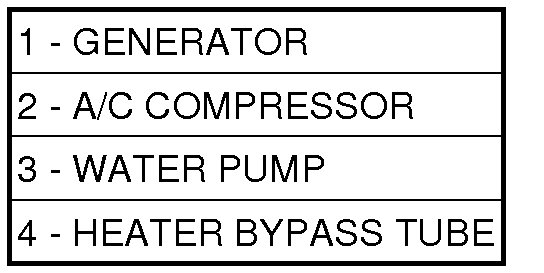
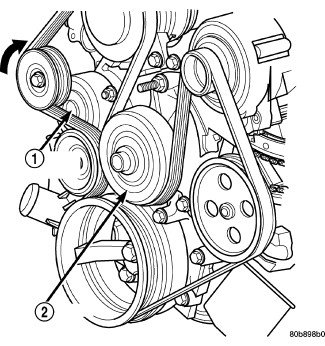
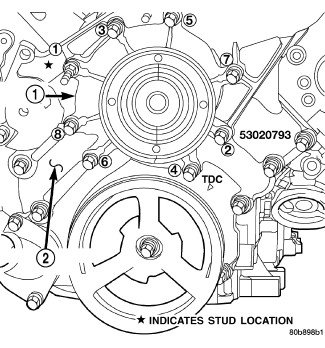
Now, you didn't indicate if the engine is a 4.7L V8 or a 5.7L Hemi V8, so I am going to provide directions for pump replacement for both. All attached pictures correlate with these directions.
_________________________________________________
First, the 5.7L Hemi
5.7L ENGINE Pump Removal
See Picture 1
See Picture 2
1. Disconnect the negative battery cable.
2. Drain the cooling system See: Cooling System > Procedures
3. Remove the fan/viscous fan drive assembly from the water pump . Do not attempt to remove the fan/viscous fan drive assembly from vehicle at this time.
4. If the water pump is being replaced, do not unbolt the fan blade assembly from the thermal viscous fan drive.
5. Remove the two fan shroud-to-radiator screws. Disconnect the coolant overflow hose, windshield washer fluid hose and washer pump electrical connector.
6. Remove the fan shroud and the fan blade/viscous fan drive assembly from the vehicle.
7. Remove A/C compressor and generator brace.
8. Remove idler idler pulleys.
9. Remove the belt tensioner assembly See: Drive Belt Tensioner > Removal and Replacement > Accessory Drive Belt Tensioner - Removal.
10. Remove the upper and lower radiator hoses.
11. Remove the heater hoses.
12. Remove the water pump mounting bolts and remove the pump.
_____________________
5.7L Hemi Pump install
See Picture 1
See Picture 2
1. Install the water pump and the mounting bolts. Tighten mounting bolts to 24 Nm (18 ft. lbs.).
2. Install the heater hoses.
3. Install the upper and lower radiator hoses.
4. Install the accessory drive belt tensioner assembly See: Drive Belt Tensioner > Removal and Replacement > Accessory Drive Belt Tensioner - Installation.
5. Install the idler pulleys and mounting bolts. Tighten the bolts to 54 Nm (40 ft. lbs.).
6. Install the A/C compressor and the alternator brace. Tighten bolt and nuts to 28 Nm (21 ft. lbs.).
7. Install the fan shroud assembly and two fan shroud mounting screws.
8. Install the fan/viscous drive assembly
9. Make sure there is at least 25 mm (1.0 inches) between the tips of the fan blades and the fan shroud.
10. Install the accessory drive belt See: Drive Belt > Removal and Replacement > Serpentine Accessory Drive Belt - Installation.
11. Connect the negative battery cable.
12. Evacuate air and refill cooling system.See: Water Pump > Procedures > Water Pump - Coolant Air Evacuation
13. Check the cooling system for leaks.See: Cooling System > Component Tests and General Diagnostics
__________________________________
Here are the directions for the 4.7L V8
Removal
3.7L/4.7L ENGINE Pump Removal
Picture 3
1. Disconnect the negative battery cable.
2. Drain the cooling system See: Cooling System > Procedures.
3. Remove the fan/viscous fan drive assembly from the water pump . Do not attempt to remove fan/viscous fan drive assembly from vehicle at this time.
4. If the water pump is being replaced, do not unbolt the fan blade assembly from the thermal viscous fan drive.
5. Remove the two fan shroud-to-radiator screws. Disconnect the coolant overflow hose, windshield washer fluid hose and washer pump electrical connector.
6. Remove the fan shroud and fan blade/viscous fan drive assembly from vehicle.
7. After removing the fan blade/viscous fan drive assembly, do not place thermal viscous fan drive in horizontal position. If stored horizontally, silicone fluid in viscous fan drive could drain into its bearing assembly and contaminate lubricant.
8. Remove the accessory drive belt from the water pump pulley (2) See: Drive Belt > Removal and Replacement > Serpentine Accessory Drive Belt - Removal.
9. Remove the lower radiator hose at the water pump.
10. Remove the seven water pump mounting bolts and one stud bolt.
CAUTION: Do not pry on the water pump at the timing chain case/cover. The machined surfaces may be damaged resulting in leaks.
11. Remove the water pump and gasket. Discard the gasket.
_______________________
Pump Install
See Picture 4
1. Clean the gasket mating surfaces.
2. Using a new gasket, position the water pump (1) and install the mounting bolts as shown. Tighten water pump mounting bolts to 58 Nm (43 ft. lbs.).
3. Spin the water pump to be sure that the pump impeller does not rub against the timing chain case/cover.
4. Connect the upper radiator hose to the water pump.
5. Install the accessory drive belt See: Drive Belt > Removal and Replacement > Serpentine Accessory Drive Belt - Installation.
6. Position the fan shroud and the fan blade/viscous fan drive assembly.
7. Install the two fan shroud-to-radiator screws.
8. Make sure there is 25 mm (1.0 inches) between the tips of the fan blades and fan shroud.
9. Install the fan blade/viscous fan drive assembly to the water pump shaft
10. Evacuate air and refill cooling system. See: Water Pump > Procedures > Water Pump - Coolant Air Evacuation
11. Connect the negative battery cable.
12. Check cooling system for leaks.See: Cooling System > Component Tests and General Diagnostics
___________________________________________
If you determine it isn't the pump, here is a link you may find helpful.
https://www.2carpros.com/articles/car-is-leaking-coolant
Please remember, do not drive the vehicle without coolant. Major damage will occur.
Let me know if this helps or if you need help with anything.
Take care,
Joe
Images (Click to make bigger)
SPONSORED LINKS
Thursday, February 21st, 2019 AT 8:48 PM
