I have a feeling sensors would not help the issue. The only way to know if it is related to them is to see how they are responding. The codes you have, however, almost always indicated the need for a new converter.
If you replace it, here are the directions. The attached pics correlate with the directions.
__________________________
DTC P0430:
Location
Front Bank Catalyst System Efficiency Below Threshold (Bank 2)
_________________________
2012 Honda Truck Odyssey V6-3.5L
Warm Up TWC Removal/Installation
Vehicle Powertrain Management Emission Control Systems Catalytic Converter Service and Repair Removal and Replacement Warm Up TWC Removal/Installation
WARM UP TWC REMOVAL/INSTALLATION
Warm Up TWC Removal/Installation
FRONT WU-TWC (Bank 2)
1. Remove the engine cover.
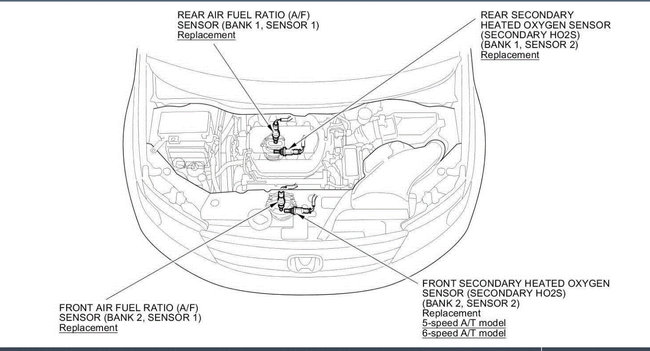
2. Remove the front A/F sensor (Sensor 1) and front secondary HO2S (Sensor 2); 5-speed A/T model, 6-speed A/T model.
3. Remove exhaust pipe A See: Exhaust Pipe > Removal and Replacement > Exhaust Pipe And Muffler Replacement.
4. Remove the EGR pipe See: EGR Tube > Removal and Replacement > EGR Pipe Removal/Installation.
5. Remove the front bumper See: Front Bumper > Removal and Replacement > Front Bumper Removal/Installation.
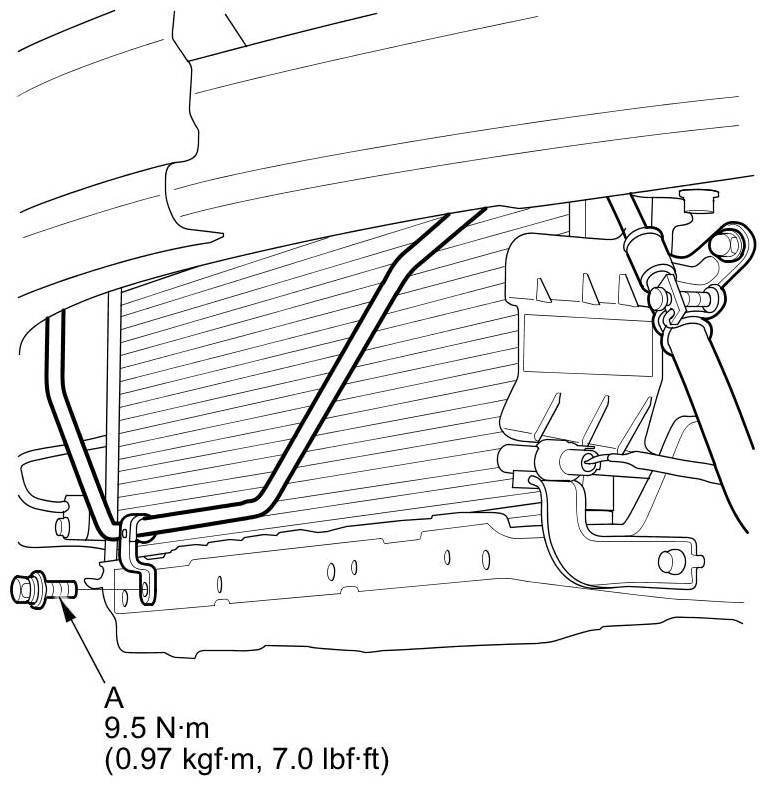
6. Remove the mounting bolt (A) for the P/S cooler line.
Pic
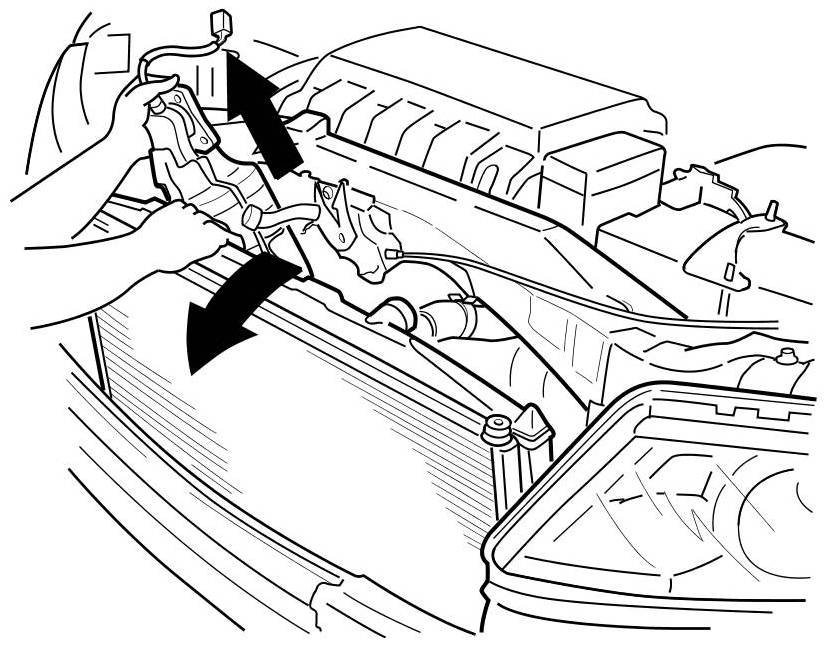
7. Remove the A/C condenser fan shroud assembly.
8. Loosen the radiator drain plug, and drain about 1 liter (1.05 quarts) of coolant from the radiator.
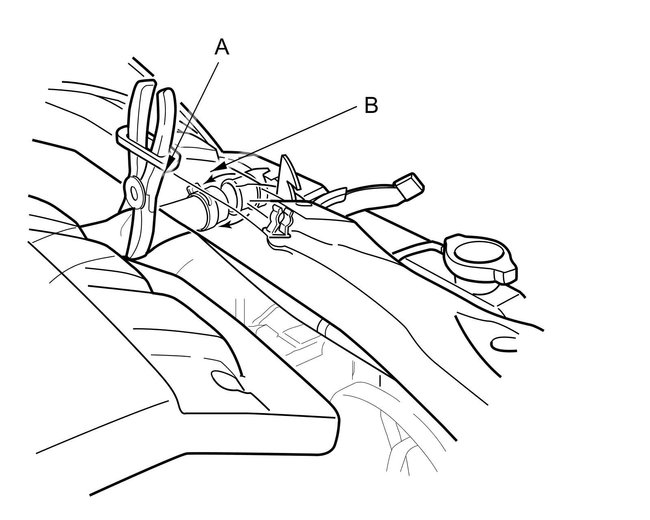
9. Pinch the top radiator hose (A) with hose pinching Pliers. Release the top clamp (B) and remove the top hose from the radiator.
NOTE: Careful not damage the hose.
Pic 2
10. Place an appropriate sized piece of cardboard over the A/C condenser fan area of the radiator to protect the radiator.
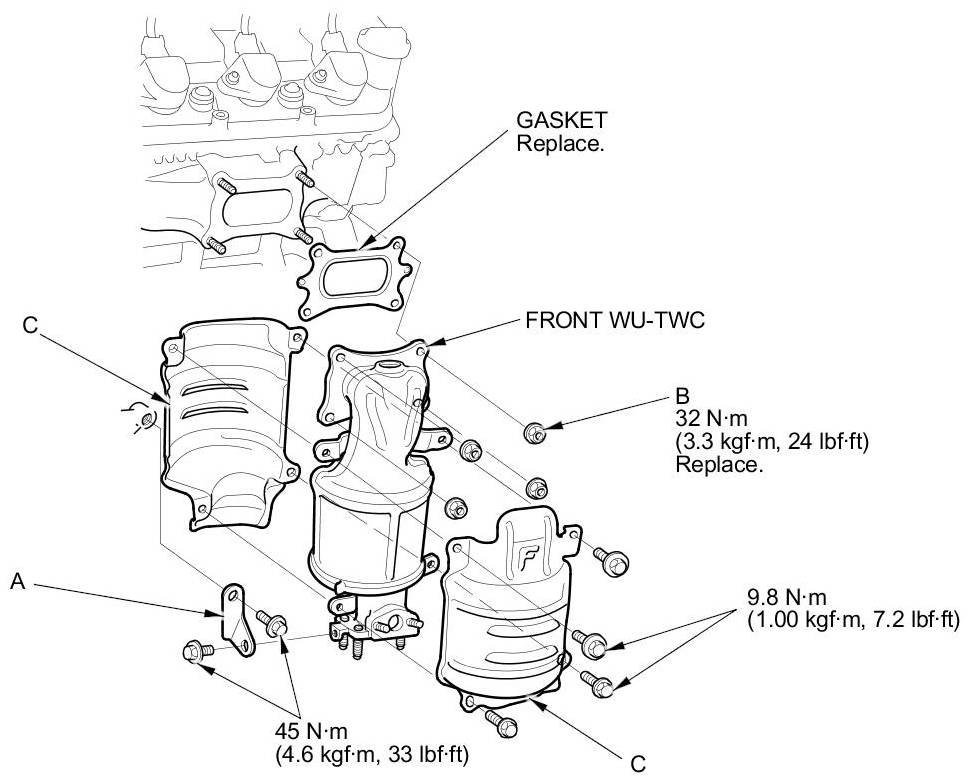
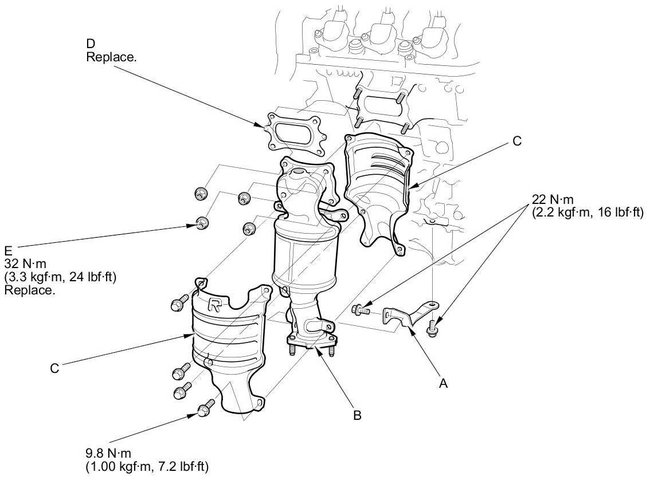
11. Remove the front WU-TWC bracket (A), the front WU-TWC mounting bolts and self-locking nuts (B), then remove the covers (C).
Pic 3
12. Gently pull the radiator away from the front bulkhead and carefully remove the front WU-TWC.
Pic 4
13. Install the front WU-TWC with a new gasket and new self-locking nuts. Tighten the nuts in a crisscross pattern in two or three steps.
14. Install the parts in the reverse order of removal, and note these items:
- Reconnect the top radiator hose and clean up any spilled engine coolant.
- Install the EGR pipe with new gaskets.
- Install exhaust pipe A with new gaskets and self-locking nuts. Tighten the nuts in the proper sequence.
- Refill the radiator with engine coolant as needed, and bleed the system.
REAR WU-TWC (Bank 1)
1. Remove the rear A/F sensor (Sensor 1) and rear secondary HO2S (Sensor 2).
2. Remove exhaust pipe A See: Exhaust Pipe > Removal and Replacement > Exhaust Pipe And Muffler Replacement.
3. Remove the driveshaft support base See: Axle Shaft Assembly > Removal and Replacement > Driveshaft Support Base Replacement.
4. Remove the rear WU-TWC bracket (A), carefully remove the rear WU-TWC (B), then remove the covers (C).
Pic 5
5. Carefully install the rear WU-TWC with a new gasket (D) and new self-locking nuts (E). Tighten the nuts in a crisscross pattern in two or three steps.
6. Install the remaining parts in the reverse order of removal.
_________________________________________-
Let me know if this helps or if you have other questions.
Joe
Images (Click to make bigger)
Tuesday, December 15th, 2020 AT 5:36 PM
