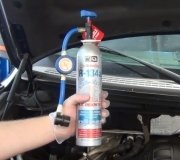
Once the gauges are connected, attach the first can. You can open both the high and low side valves when the engine is not running to try to empty the can faster, but never have the high side open with the engine running. If the compressor doesn't start running on its own you will have to find the low-pressure cutout switch near the accumulator, unplug it, and jump the two terminals in the connector together.
Keep the can upright so only vapor boils off and gets drawn into the low side going to the compressor. If liquid sloshes in it can cause hydro-lock and damage the compressor. The can will get very cold so be sure to wear gloves. Escaping refrigerant can cause frostbite to your eyes too so a face shield is always used by professionals.
If the can doesn't empty within a few minutes, place it upright in a pot of hot water. Look at the sticker under the hood to see how many ounces of refrigerant the system needs. If you're starting with a partially-charged system there is no accurate way to know how much you're starting with. You'll have to go by gauge readings to determine when it's close to fully charged. Unlike home refrigerators, automotive systems can handle a small amount of overcharge, but the system will not cool any better. The tolerance for a slight overcharge is built in to prevent liquid, (unvaporized) refrigerant from reaching the compressor if you drive over slanted or bumpy roads.
Be sure to close the low side valve before you remove the empty can to replace it with the next one. Also be sure to install the plastic caps on the ports when you're done. The valves in those ports usually do not seal perfectly and they'll let the refrigerant escape within a few weeks. They are only meant to hold the refrigerant in while you remove the gauges. The caps have rubber rings inside to seal the ports.
SPONSORED LINKS
Monday, January 6th, 2020 AT 5:58 PM
(Merged)


