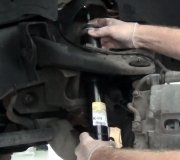
It's calles the transverse spring, and to install a new one you need the spring compressor tool for it. here's how anyway!
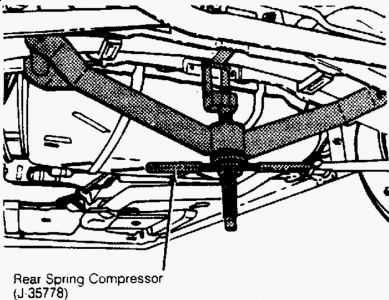
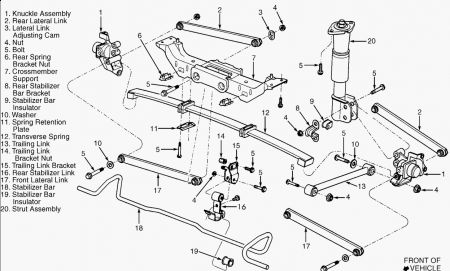
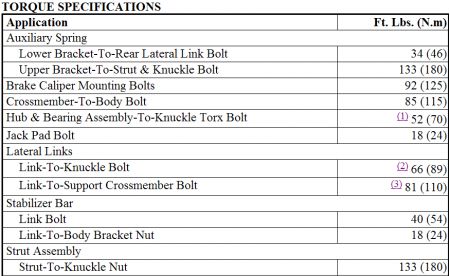
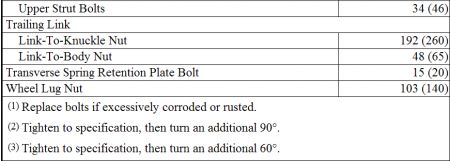
TRANSVERSE SPRING ASSEMBLY Removal 1. Raise and support vehicle. If vehicle is equipped with dual exhaust, drop rear sections. Remove jack pad located on bottom center of crossmember support. 2. Remove 4 bolts on left and right spring retention plates. See Fig. 1 . Disconnect anti-lock brake wheel speed sensor electrical harness (if equipped). 3. Remove trailing link nut and bolt at knuckle. Position Rear Spring Compressor (J-35778 ) on rear transverse spring by hanging center shank of spring compressor from vehicle's front side of transverse spring. See Fig. 5 . 4. Attach spring compressor body to transverse spring. Ensure spring compressor rollers are in center of transverse spring. Compress transverse spring to release spring pressure from knuckles. 5) Slide spring to left side. It may be necessary to carefully pry spring to left using a pry bar against right knuckle for leverage. 5. Slowly relieve spring tension until there is enough clearance to slide spring out of right side of vehicle. Installation To install, reverse removal procedure. Tighten all bolts to specification. See TORQUE SPECIFICATIONS table at the end of this article. CAUTION: DO NOT use corrosive cleaning agents, degreasers or solvents on fiberglass leaf spring. These materials will damage spring. CAUTION: Spring retention plates have tabs on one end. Ensure tabs are aligned with crossmember support to prevent fuel tank damage.
3/14/2010 ...
Sunday, March 14th, 2010 AT 10:32 AM


