Hello
Thanks for the donation.
Below are instructions for adjustments as well as the removal/installation procedures for your parking brake.
ADJUSTMENT
Raise the rear of the vehicle until the rear wheels clear the ground.
Loosen the locknut at the parking cable lever assembly mounted on the driveshaft center bearing crossmember.
Turn the adjusting nut until the parking brake control lever operating stroke is 10-12 notches (center lever and 2wd with stick lever) and 9-11 notches (4wd with stick lever) on 1986-87 models (D21-D series); Notches are measured from the rest position (in or down) to the full-on position (out or up).
Release the parking brake and make sure that the rear wheels turn freely with no drag.
On 1986-88 models (D21-D series), the brake warning light should come on after 1 notch (pickups with center lever) or 2 notches (pickups with stick lever and Pathfinders with center lever). If not, adjust the switch.
Lower the vehicle.
REMOVAL & INSTALLATION
Fully release the parking brake control lever.
Loosen the adjusting nut at the cable lever mounted to the frame crossmember.
Disconnect the cable from the control lever.
Remove the rear brake drums, and disconnect the parking brake cables from the parking brake toggle levers of the rear service brake assemblies.
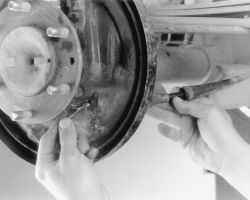
Remove the lockplate, spring and clip, and pull the parking brake cable out toward the cable lever.
Remove the cotter pin at the cable lever and disconnect the cable.
Install the cables in the reverse order of removal. Apply a light coat of grease to the cables to make sure that they slide properly. Adjust the parking brakes.
Installing the parking brake cable into the backing plate
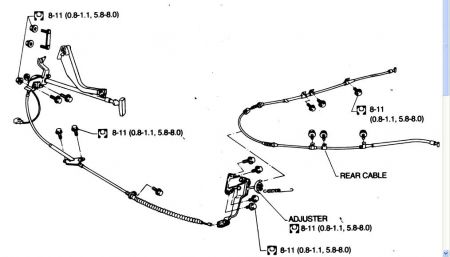
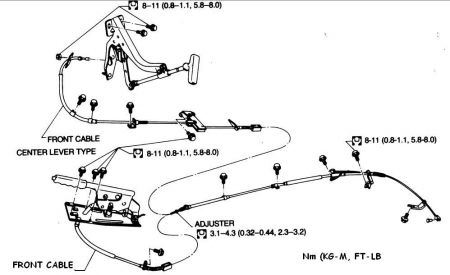
Parking brake cable routing
2WD
4WD
Friday, December 12th, 2008 AT 8:18 PM


