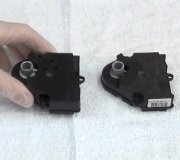
I found myself frustrated with this annoying and potentially dangerous issue on my wife's car, but I couldn't find that part anywhere on the internet either, unless I wanted to spend a lot to replace the entire visor. Taking matters into my own hands, I have come up with a home-made solution. I just did this on my own and it works! (See photo link below) If yours broke in the same manner that mine did, leaving the back portion of the sleeve in place (see photo link below), you can do this to yours. First, you're going to need a few simple tools:
a) phillips screw driver
b) approx 1/16" diameter metal wire (I used picture-hanging wire)
c) exact-o knife / razor blade
d) needle-nose pliers
e) electric drill w/ approx 1/16" drill bit
I know it's kind of rigged, but if you're handy, you should be able to look at the picture and see what I did. Also, here's a shot an explaining the process: The idea is to re-join the bracket and the visor post using two wires, without the post slipping out of the broken bracket, so you need to have some of the part of the bracket that surrounds the post in-tact for this to work. After removing the bracket, I drilled a hole through the two little flanges behind the broken part of the bracket to hold the lower wire in place. I wrapped two 3" pieces of wire around the bracket, one on top, just under the head of the post, and one about 1/2" under that. Then, marked where the wires were touching the plastic and temporarily removed the wires. At those marks, using an exacto, I made small notches / grooves, about 1/2 of the diameter of the wire deep, where the wire touches the bracket and around the post, to help keep the wire from slipping up or down. The upper wire rests just under the "head"
of the post, so it already has a nice little place to grab. Then, wrap the wires around again, seating them into your notches and tighten with the pliers about three rotations or when it feels really tight. Then, cut off any excess wire, as there is not a lot of room for these when you go to install. Your assembly should resemble mine when finished. This is ready for installation, just screw it back in place and have a great day!
Image (Click to make bigger)
Thursday, May 31st, 2012 AT 4:34 AM


