Welcome to 2CarPros.
Based on if you do or don't have variable camshaft phasing (VVT) location differs. I am going to provide the directions for both.
First will be without. The pictures correlate with the directions.
++++++++++++++++++++++++++++++++++++++++++
WITHOUT VARIABLE CAMSHAFT PHASING
Crankshaft Position Sensor Replacement
Removal Procedure
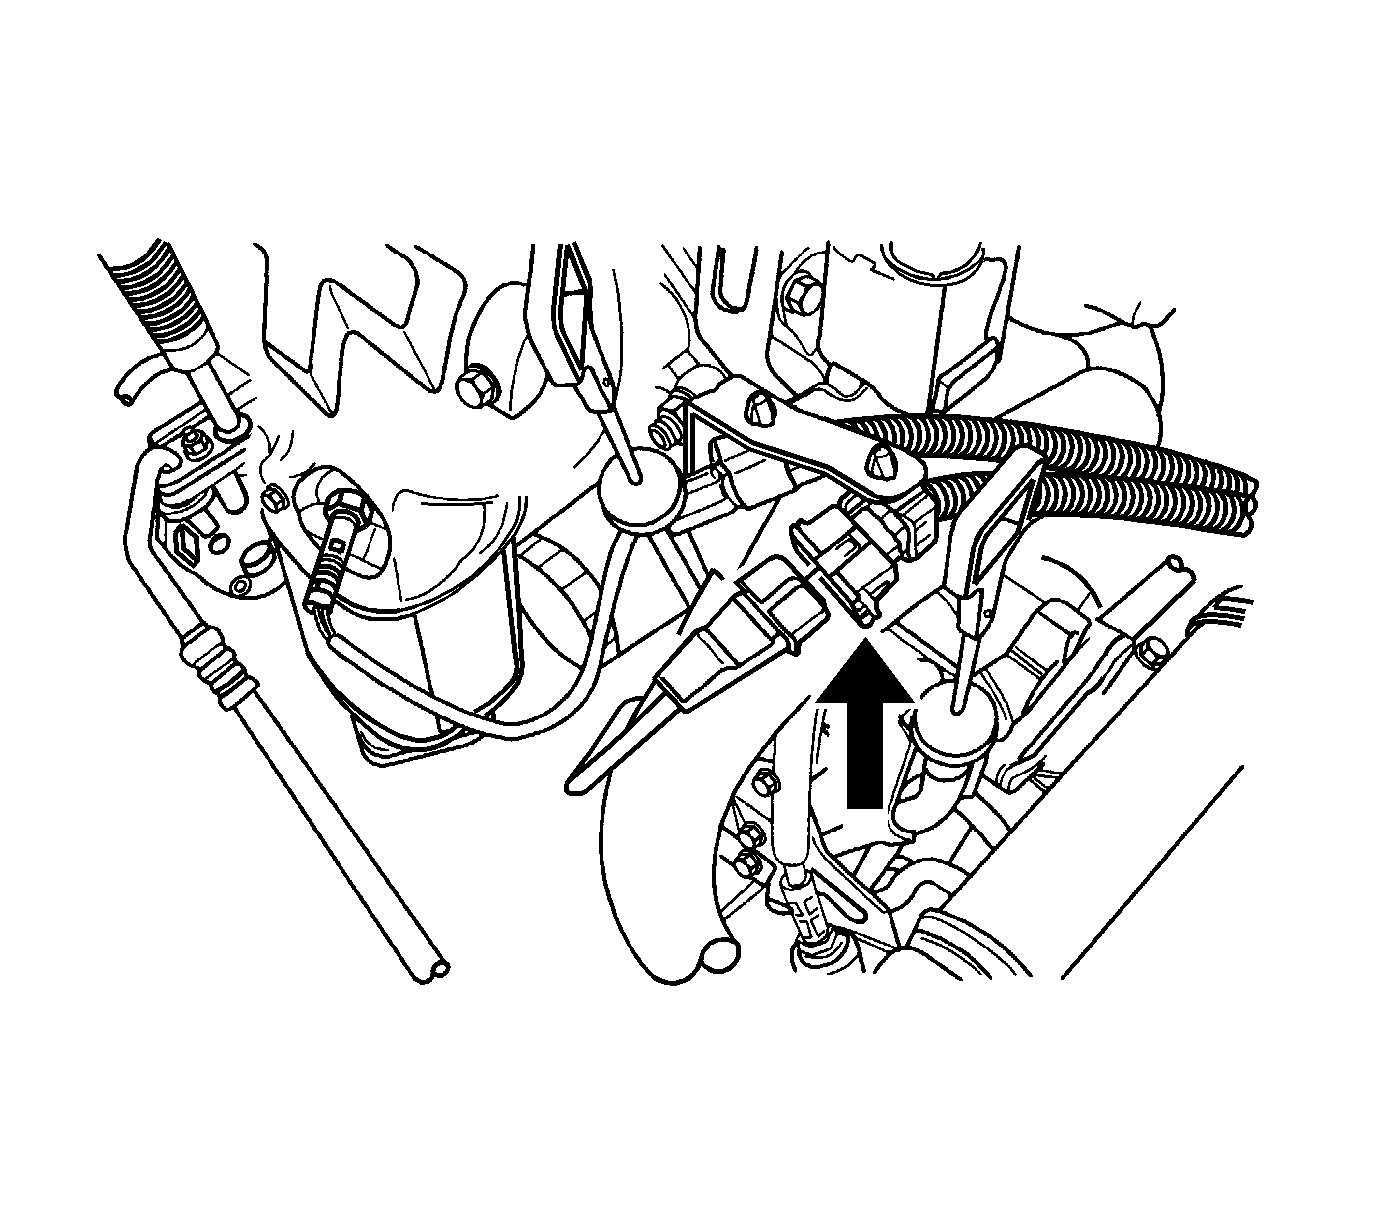
pic 1
Warning: Refer to Battery Disconnect Warning (See: Battery > Technician Safety Information > Battery Disconnect Warning).
1. Disconnect the negative battery cable.
2. Disconnect the crankshaft position (CKP) sensor electrical connector.
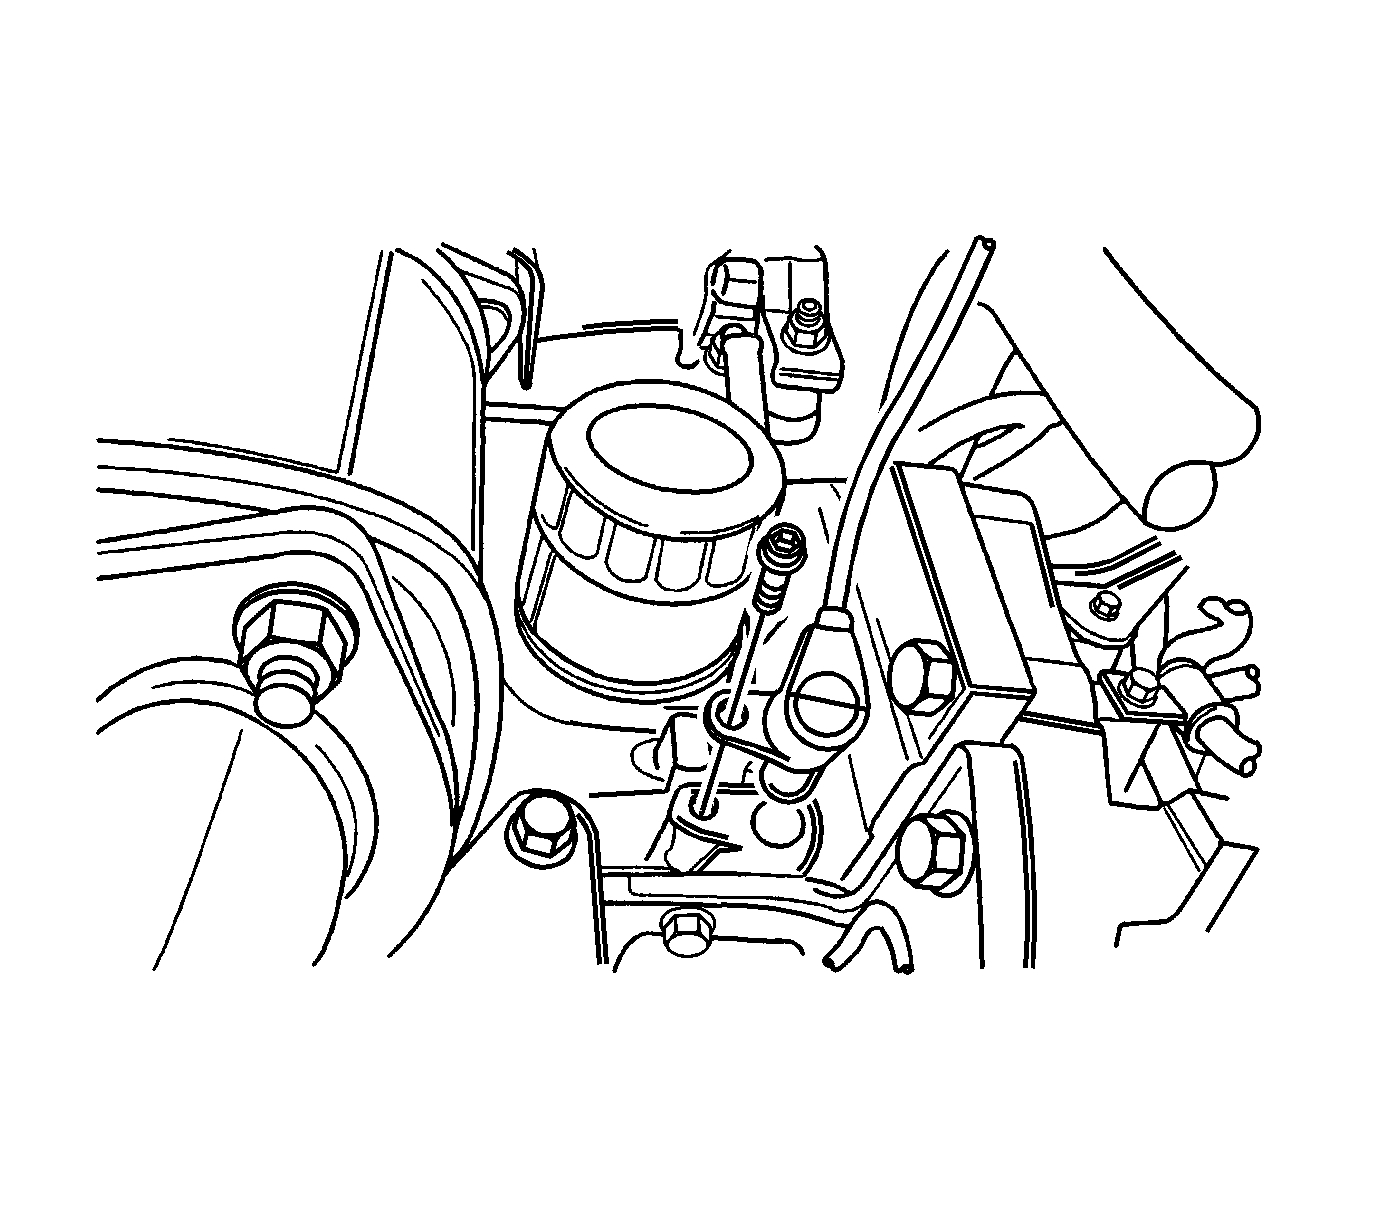
pic 2
3. Remove the CKP sensor bolt.
4. Remove the CKP sensor.
Installation Procedure
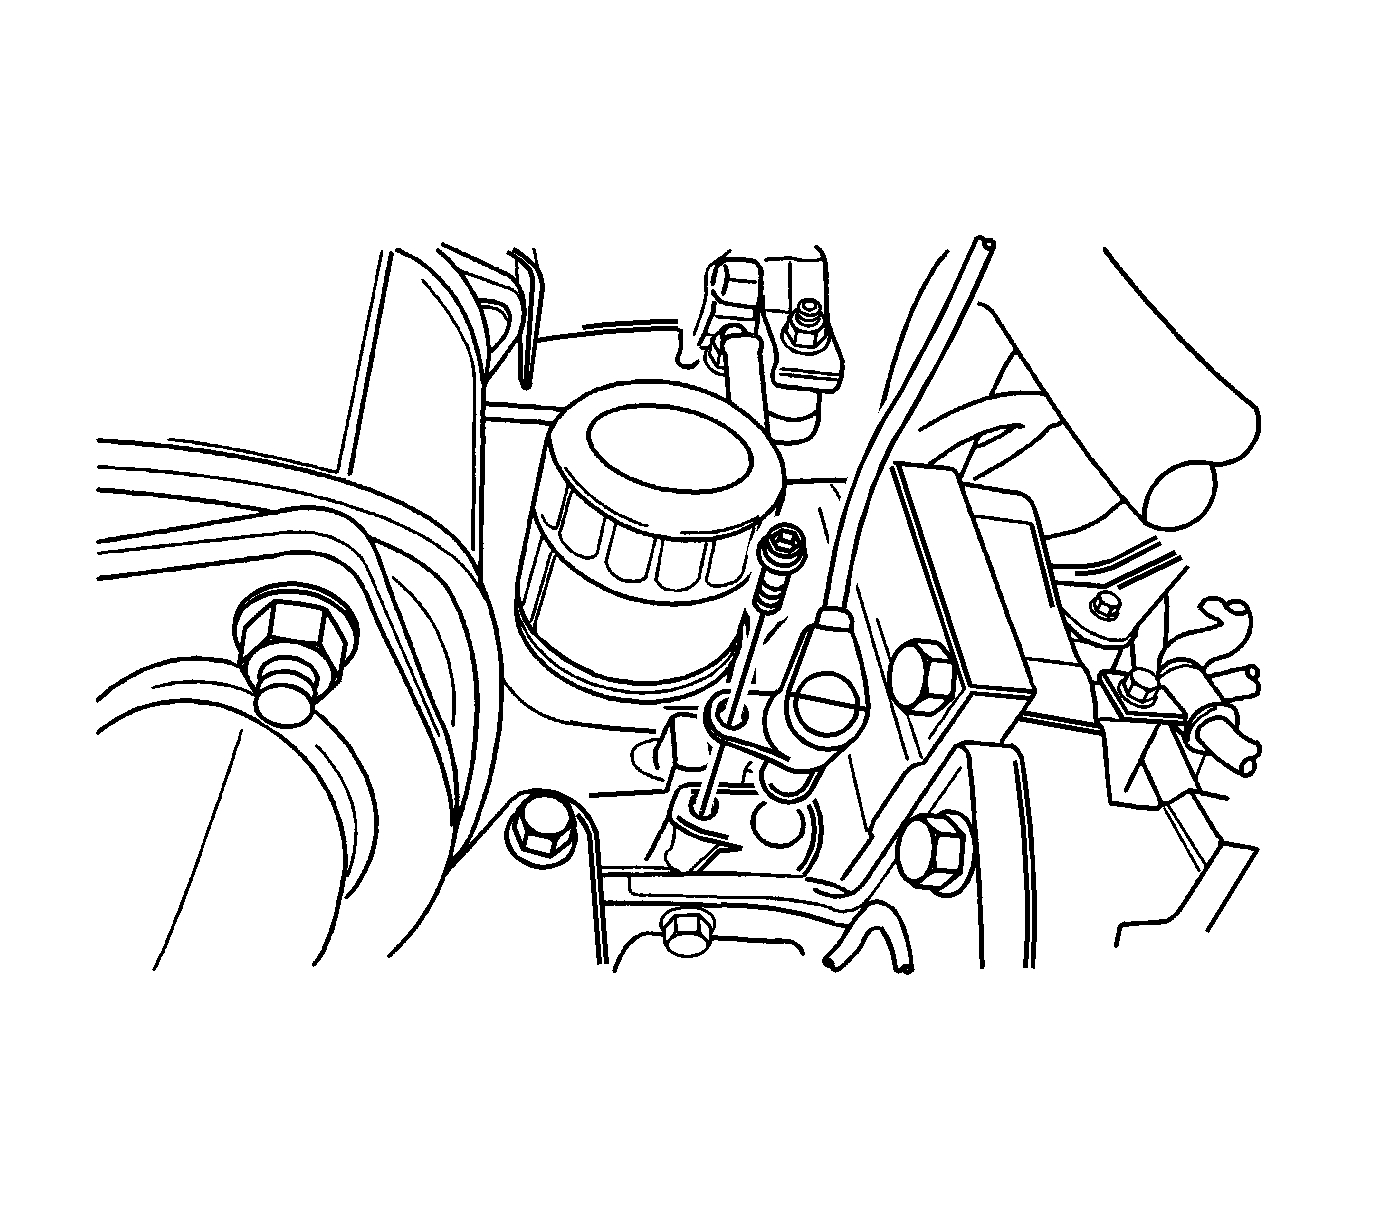
pic 3
Caution: Refer to Fastener Caution (See: Vehicle > Vehicle Damage Warnings > Fastener Caution).
1. Install the CKP sensor with the bolt.
Tighten the CKP sensor bolt to 6.5 Nm (58 lb in).
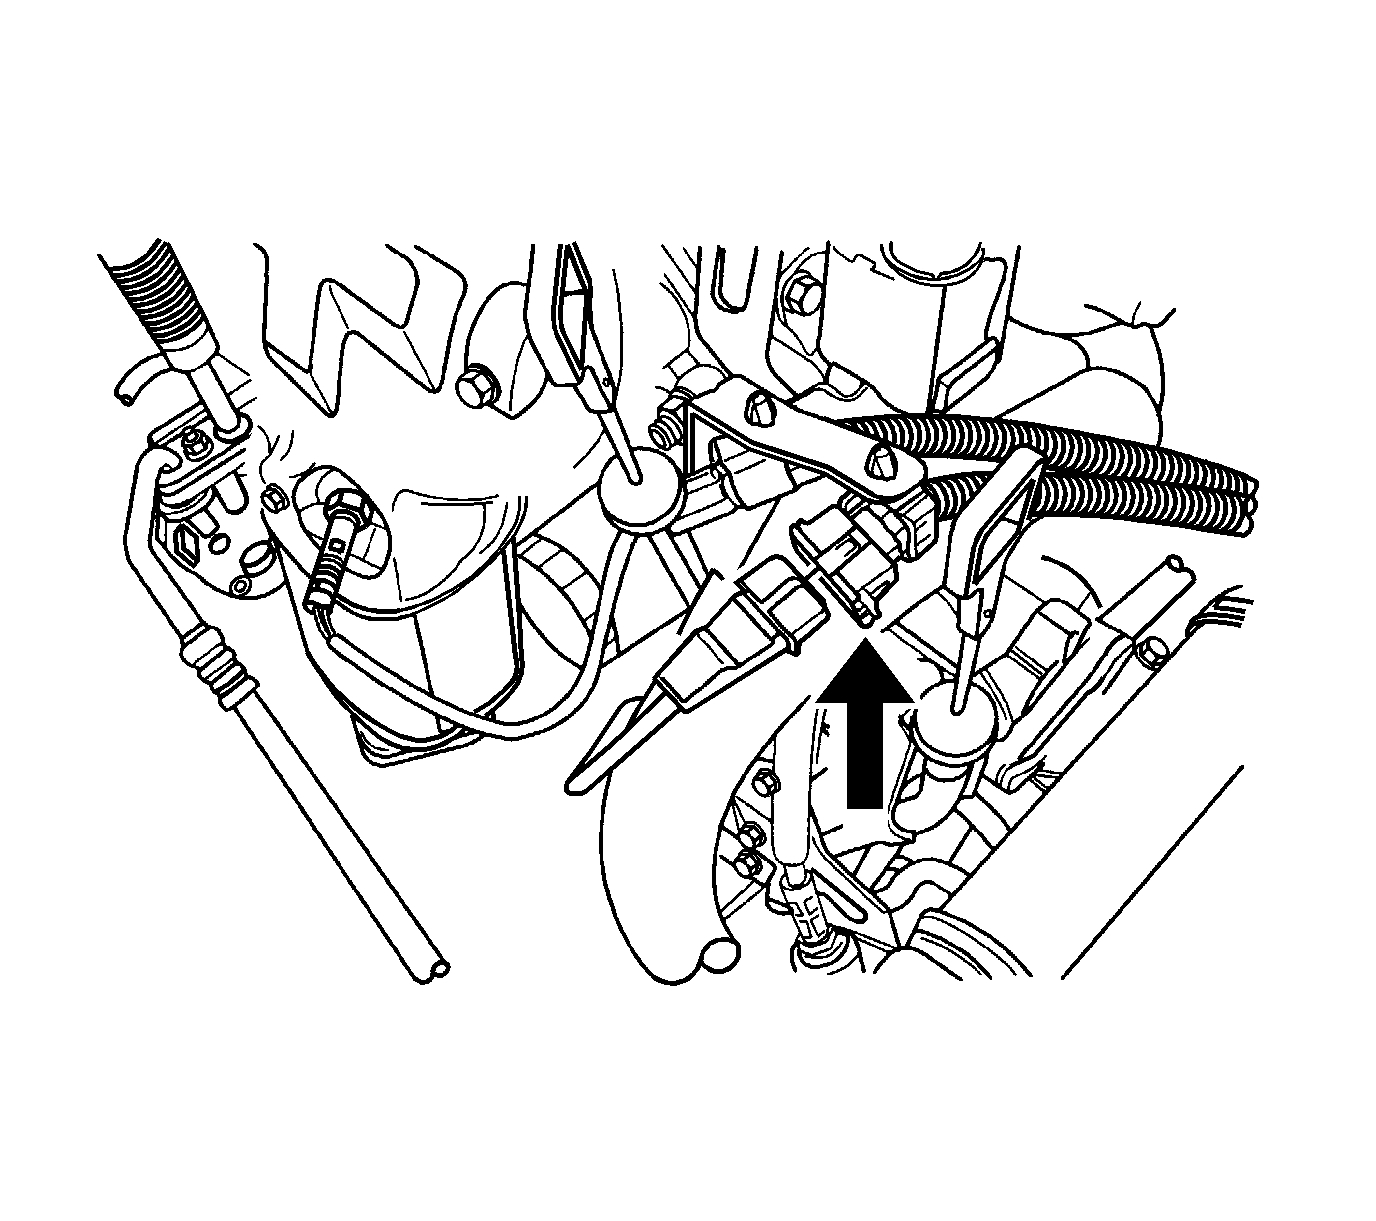
pic 4
2. Connect the CKP sensor electrical connector.
3. Connect the negative battery cable.
_____________________________________________
WITH VARIABLE CAMSHAFT PHASING
Crankshaft Position Sensor Replacement
Removal Procedure
pic 5
Warning: Refer to Battery Disconnect Warning (See: Battery > Technician Safety Information > Battery Disconnect Warning).
1. Disconnect the battery negative cable. Refer to Battery Negative Cable Disconnection and Connection (See: Battery Cable > Removal and Replacement).
2. Remove the starter. Refer to Starter Replacement (1.4L) (See: Starter Motor > Removal and Replacement > Starter Replacement (1.4L LDT, 1.6 LXV))Starter Replacement (1.2L DOHC) (See: Starter Motor > Removal and Replacement > Starter Replacement (1.4L LDT, 1.6 LXV))Starter Replacement (1.4L LDT, 1.6 LXV) (See: Starter Motor > Removal and Replacement > Starter Replacement (1.4L LDT, 1.6 LXV)).
3. Remove the CKP sensor bolt (1).
4. Remove the CKP sensor (2).
Installation Procedure
pic 5
1. Install the CKP sensor (2).
Caution: Refer to Fastener Caution (See: Vehicle > Vehicle Damage Warnings > Fastener Caution).
2. Install the CKP sensor bolt (1).
Tighten the CKP sensor bolt (1) to 4.5 Nm (39.8 lb in).
3. Install the starter. Refer to Starter Replacement (1.4L) (See: Starter Motor > Removal and Replacement > Starter Replacement (1.4L LDT, 1.6 LXV))Starter Replacement (1.2L DOHC) (See: Starter Motor > Removal and Replacement > Starter Replacement (1.4L LDT, 1.6 LXV))Starter Replacement (1.4L LDT, 1.6 LXV) (See: Starter Motor > Removal and Replacement > Starter Replacement (1.4L LDT, 1.6 LXV)).
4. Disconnect the battery negative cable. Refer to Battery Negative Cable Disconnection and Connection (See: Battery Cable > Removal and Replacement).
+++++++++++++++++++++++++++++++++++++++
Let me know if this helps.
Take care,
Joe
Images (Click to enlarge)
Jun 23, 2019 at 4:07 PM