Hello -
Thanks for the info. . .. . .. . ..
First please check PWR NO 4 fuse and make sure it is good
If it is good here is the info on the door panel removal. . .. . .. . .this is for an overhall so I only gave you up to the point of the door panel being removed.
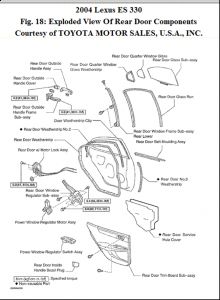
The first pic is an overall pic of the door
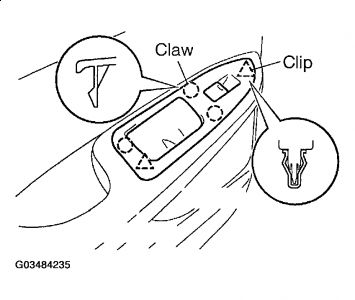
1. REMOVE POWER WINDOW REGULATOR SWITCH ASSY REAR
a. Using a screwdriver, remove the power window regulator switch assy rear, then disconnect the connector.
HINT:
Tape up the screwdriver tip before use.
Fig. 25: Removing Power Window Regulator Switch Assy Rear
Courtesy of TOYOTA MOTOR SALES, U.S.A., INC.
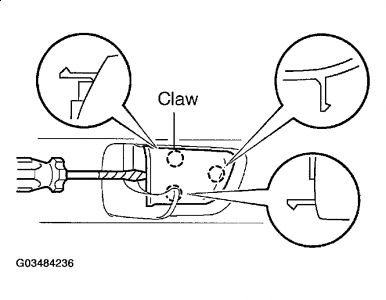
2. REMOVE REAR DOOR INSIDE HANDLE
BEZEL PLUG LH
a. Using a screwdriver, remove the rear door inside handle bezel plug.
HINT:
Tape up the screwdriver tip before use.
Fig. 26: Removing Rear Door Inside Handle Bezel Plug LH
Courtesy of TOYOTA MOTOR SALES, U.S.A., INC.
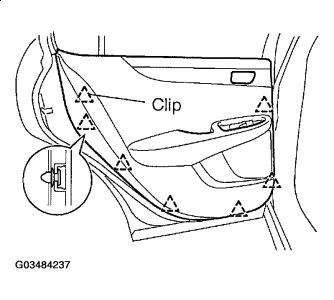
3. REMOVE REAR DOOR TRIM BOARD SUB-ASSY LH
a. Remove the 2 screws.
b. Using a screwdriver, remove the rear door trim board.
HINT:
Tape up the screwdriver tip before use.
c. Remove the inside handle, then disconnect the 2 cables from the rear door lock assy.
Fig. 27: Removing Rear Door Trim Board Sub-Assy LH
Courtesy of TOYOTA MOTOR SALES, U.S.A., INC.
4. REMOVE REAR DOOR SERVICE HOLE COVER LH
a. Disconnect each connector and remove the rear door service hole cover.
NOTE: Remove the remained tape on the body side.
On step 3 where you are removing the door panel. . .. . ...the do make a tool for this also. . ...I have attached the pic
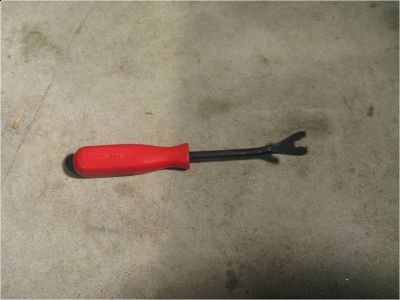
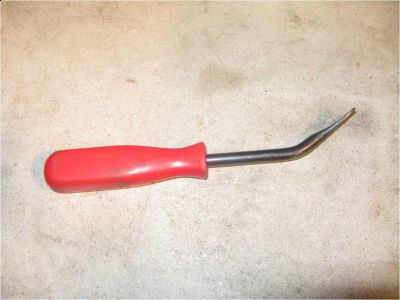
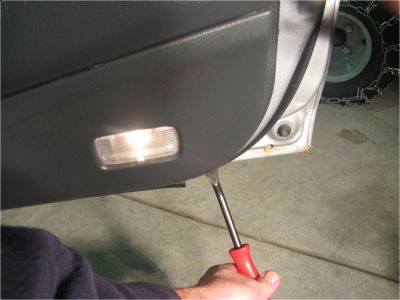
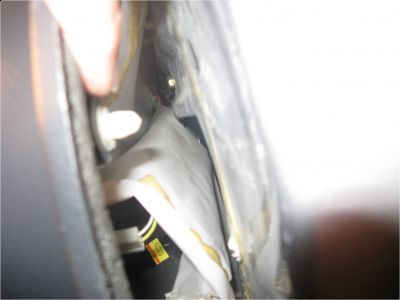
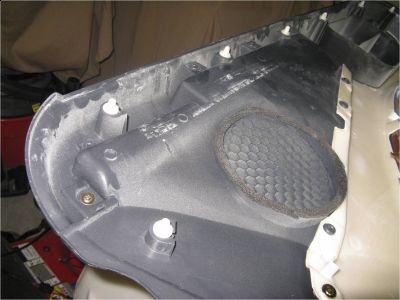
Also, I have attached a door panel showing the clips that you are pulling out. . ...for me, I purchase enough for the door panel first. They always break for me. . ..maybe not all of them but for the cost it is better to have them on hand to put the panel back on when ready. . ..you can always take them back.
Just work slow if you have never done this before. . .. . ..you might consider after you check it remove the other door (after calling the parts department to make sure both sides have the same part number) and put the right one on the left and see if that corrects the problem. If so, great. You will have to purchase extra clips though.
Please let us know how it goes
Saturday, August 22nd, 2009 AT 5:14 PM


