HVAC Mode Door Actuator replacement ?

2010 FORD FUSION
166,000 MILES • 2.5L • 4 CYL • 2WD • AUTOMATIC
Avatar
CMAK1008
  • MEMBER
  • 1 POST
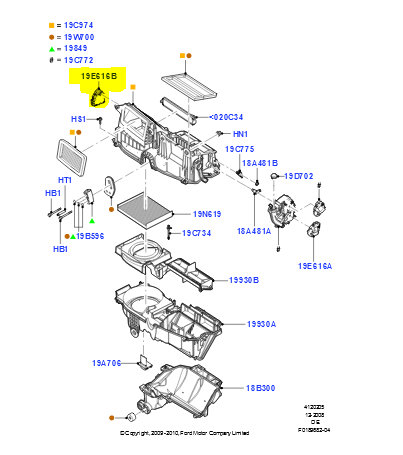
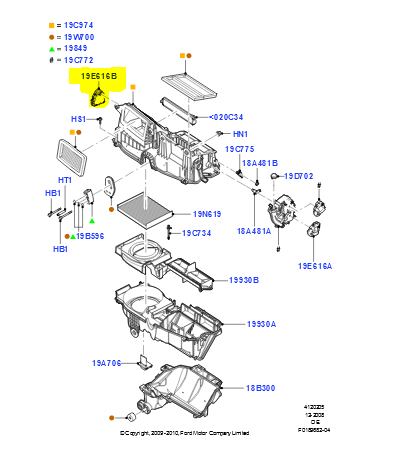
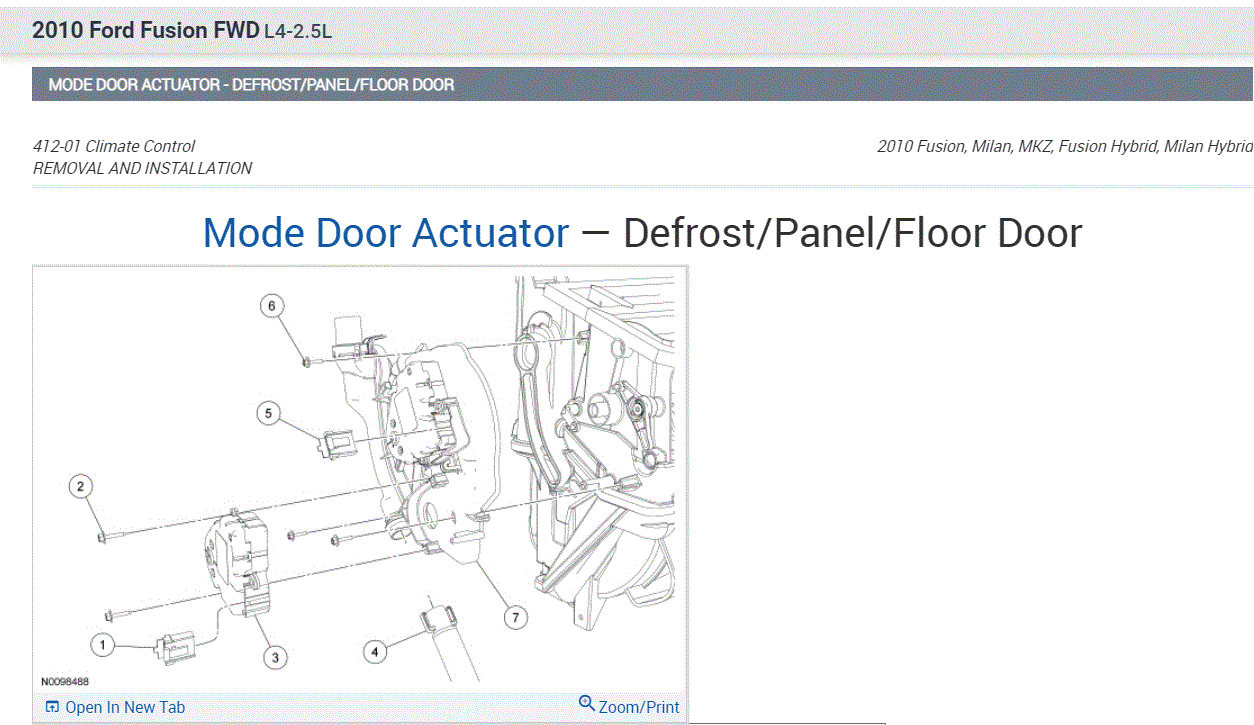
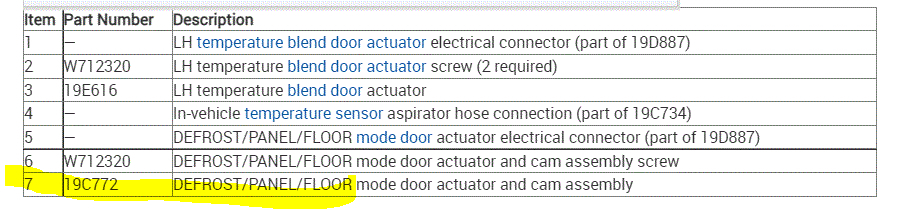
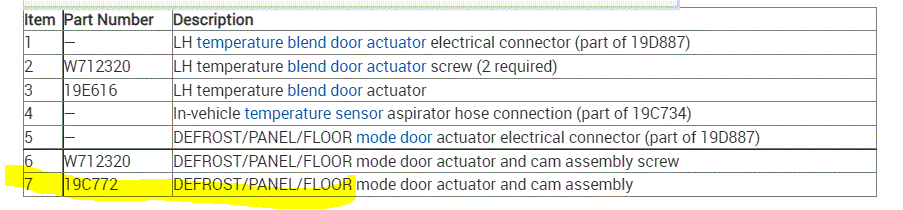
Hey everyone. There is a loud noise that comes from behind the dash in my car every time I hit the air position selector (change air vent position to blow on feet or to defrost). I removed the upper glove box in the center console and used a stethoscope to find that it's the mode door actuator. Googling around, there are lots of videos on how to replace the blend door actuator as this one is easy to get to. But I do not have a hot/cold air problem. It is most definitely the mode door actuator. Ford's diagrams show this to be PN 19E616B. It still functions but it is very loud and sounds like it will stop working any day now.

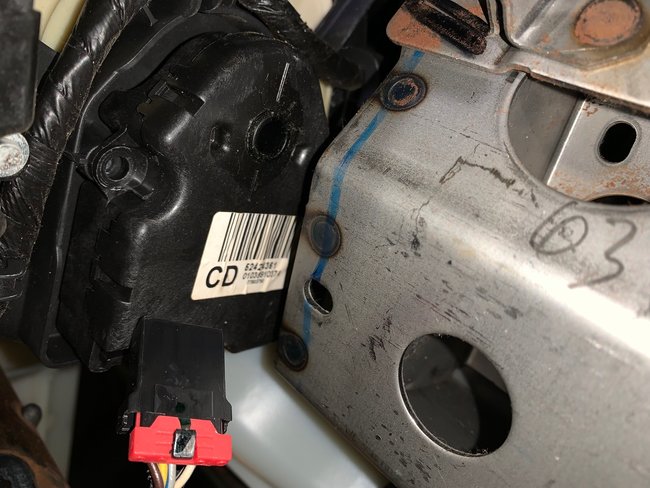
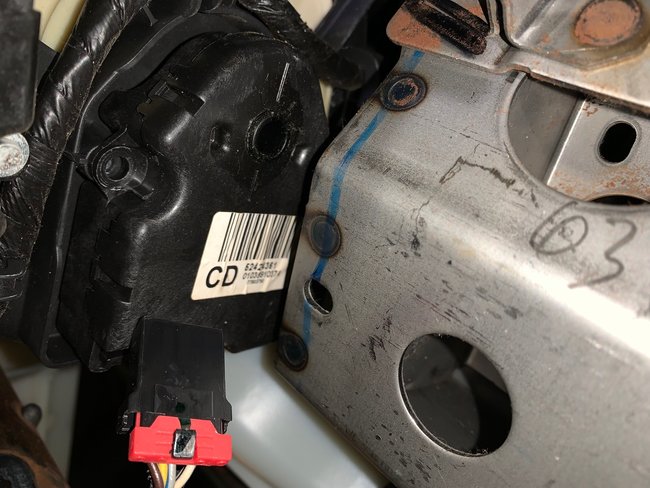
The problem I have is that this actuator is nestled right next to some frame structure that is right behind the main driver's side display. I can get to one screw holding this actuator by laying down next to the gas pedal. But there is another upper screw that can't be reached by looking up through the gas pedal. With the upper glove box removed, I can wiggle my hand in to touch the upper screw, but there's no way I can get a socket on it.

Does anyone know how to get to this mode door actuator to replace it? I would be most appreciative of any help you can give.

The car listed above is an SE model.
Dec 22, 2021 at 8:56 PM
Advertisement
Avatar
JACOBANDNICKOLAS
  • Experienced Mechanic
  • 110,240 POSTS
Hi,

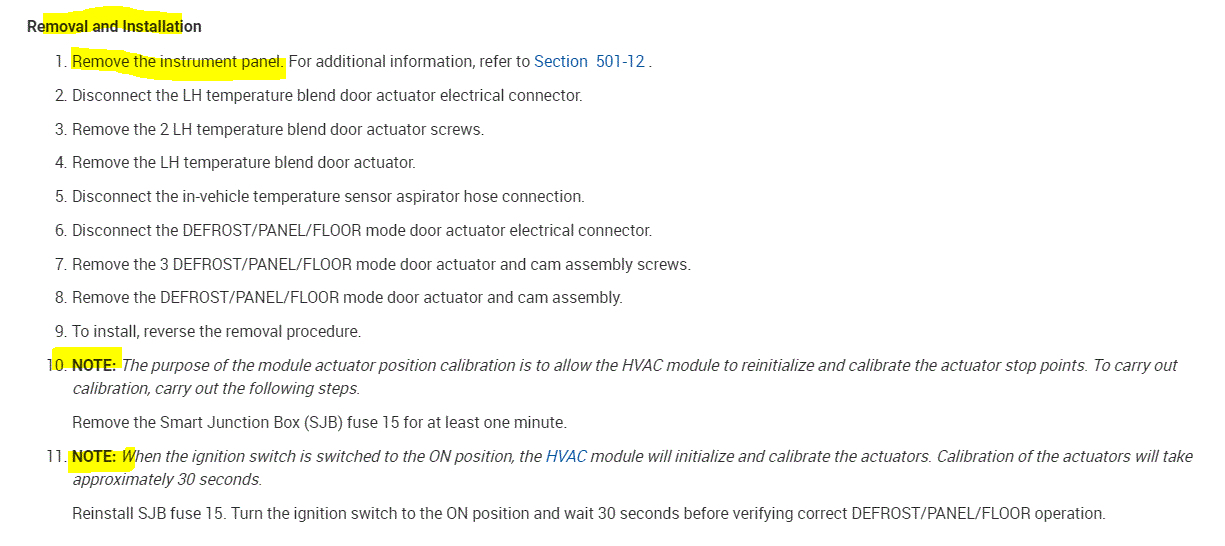
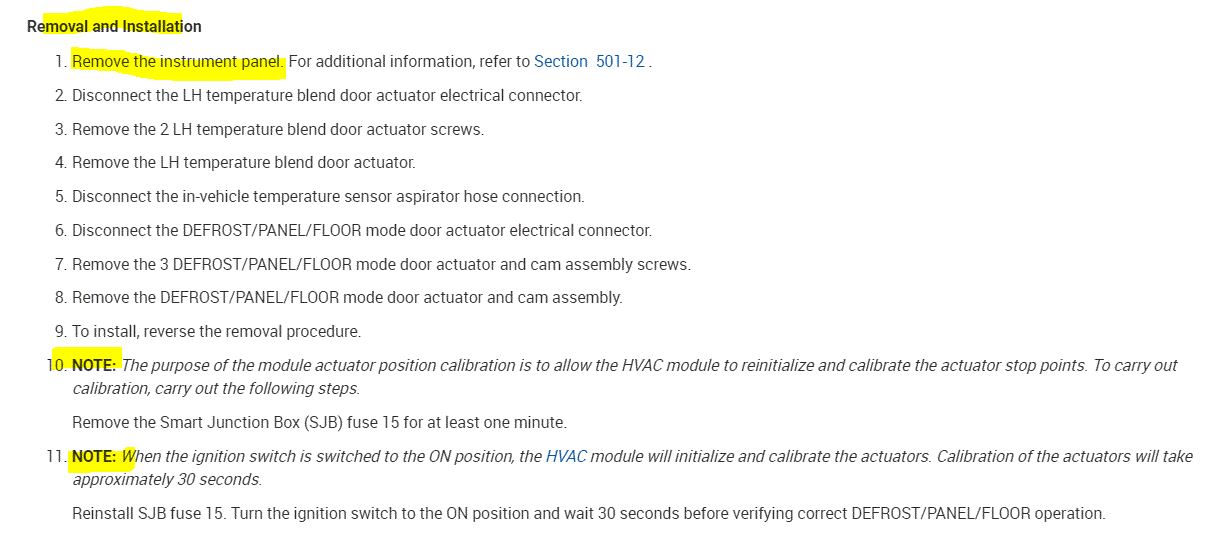
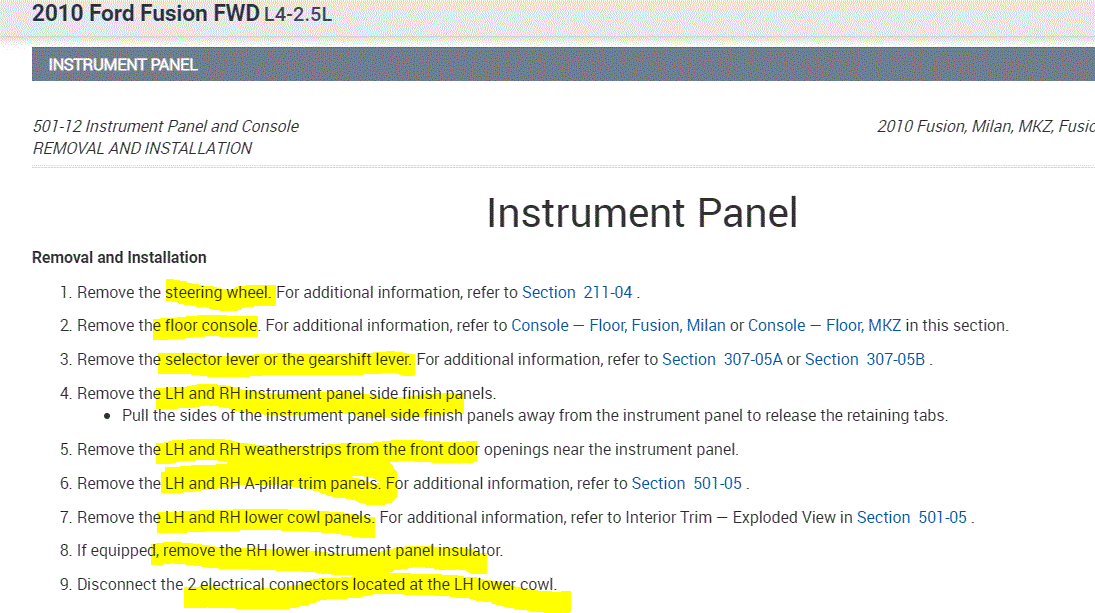
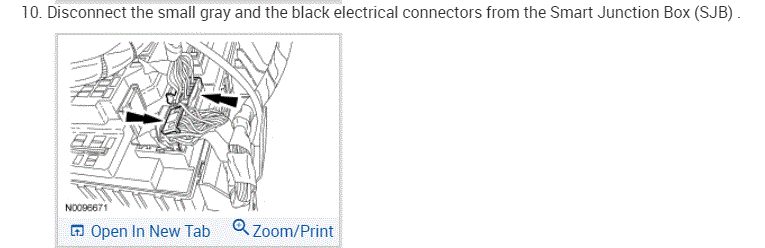
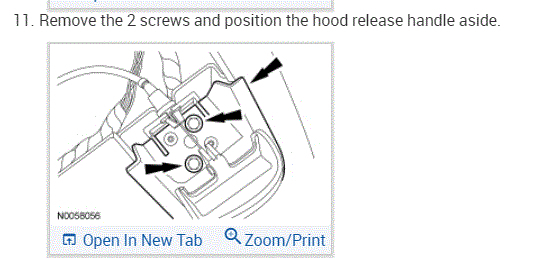
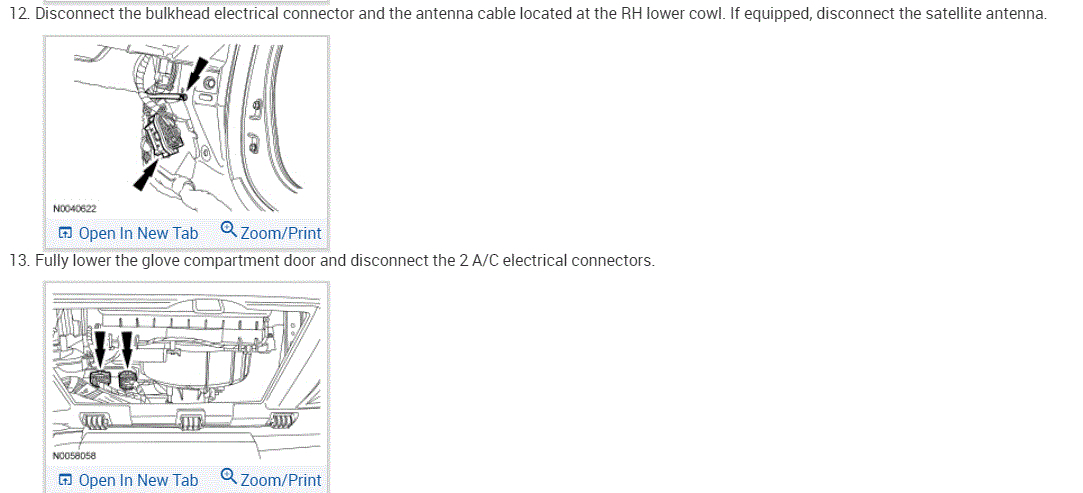
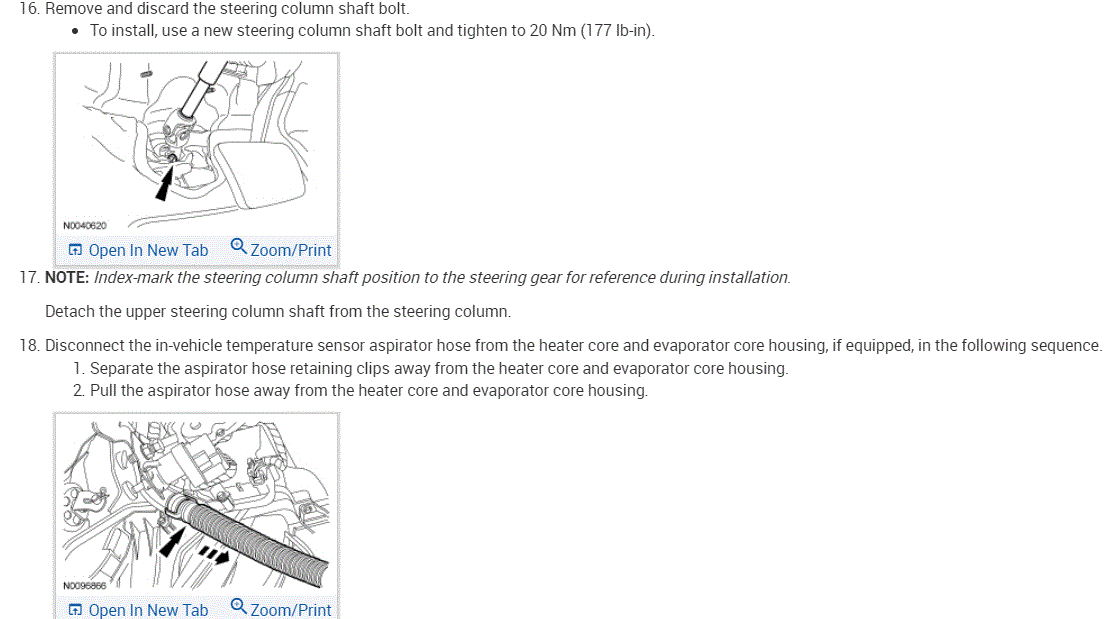
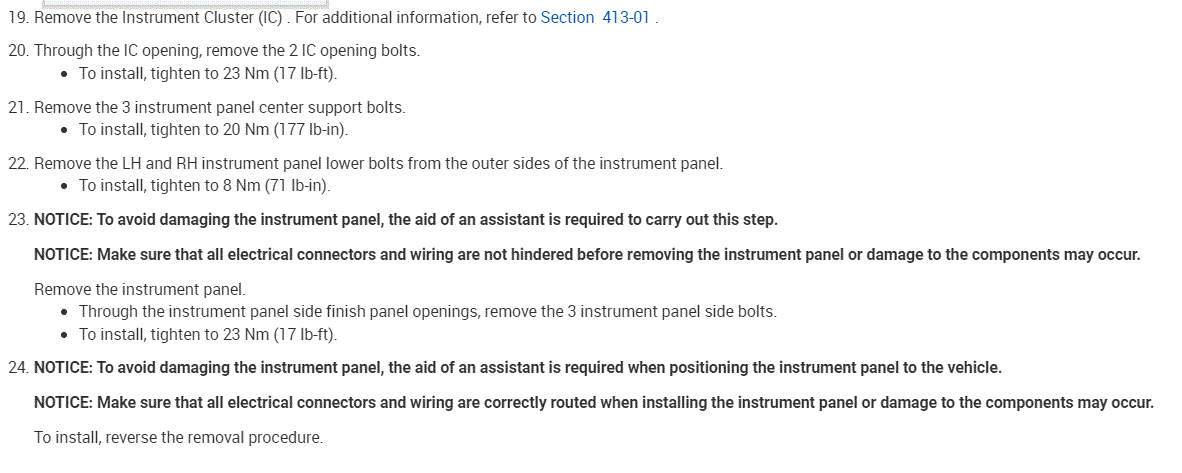
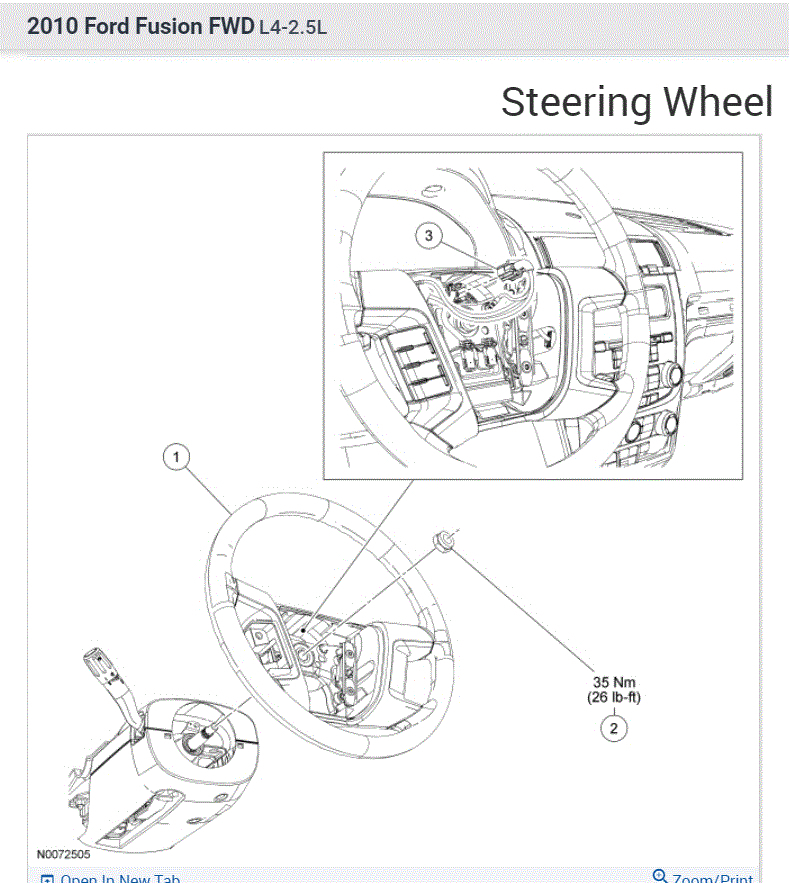
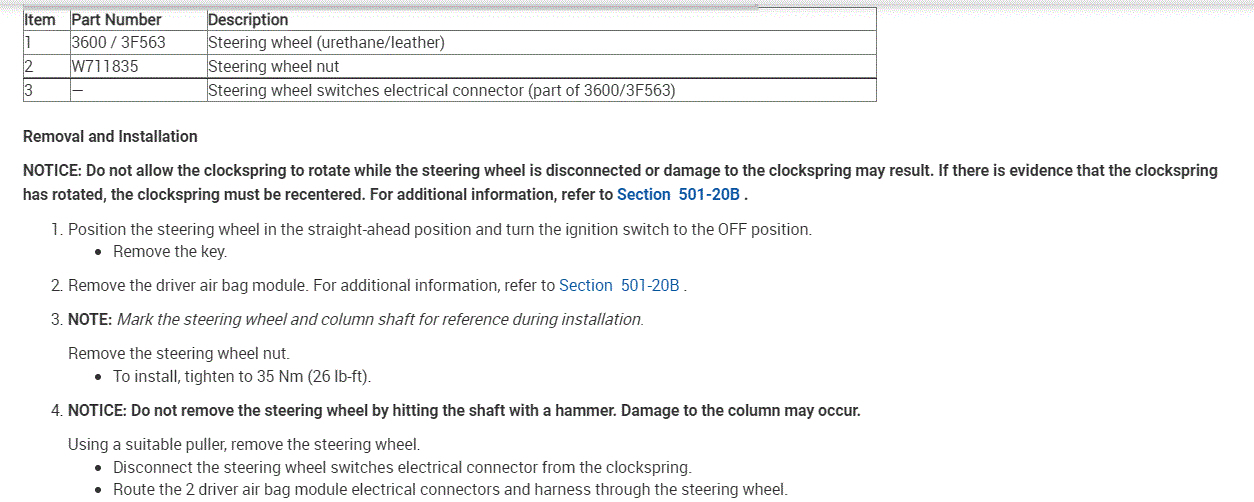
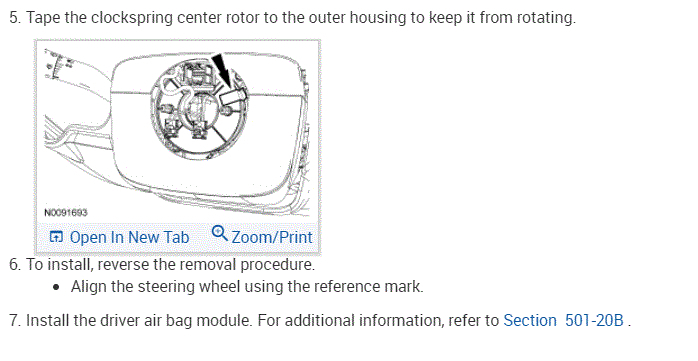
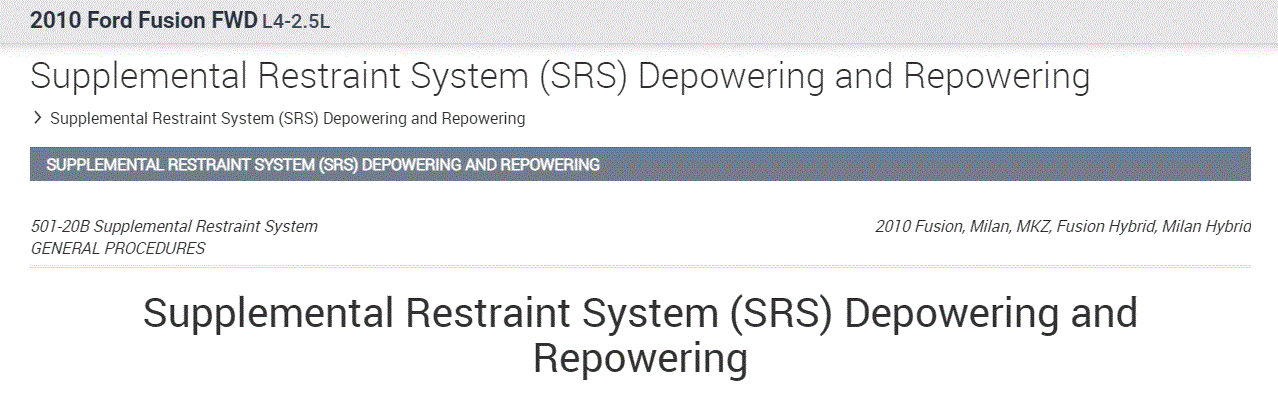
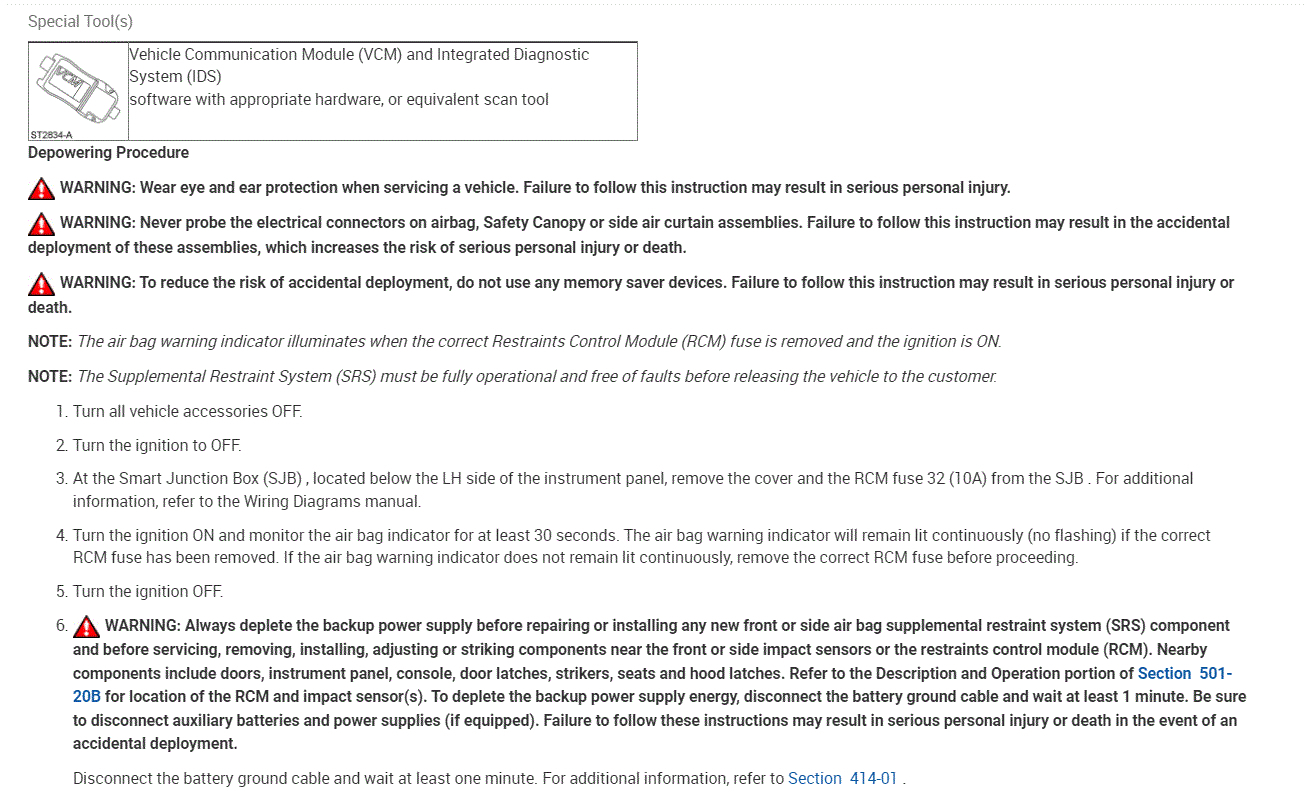
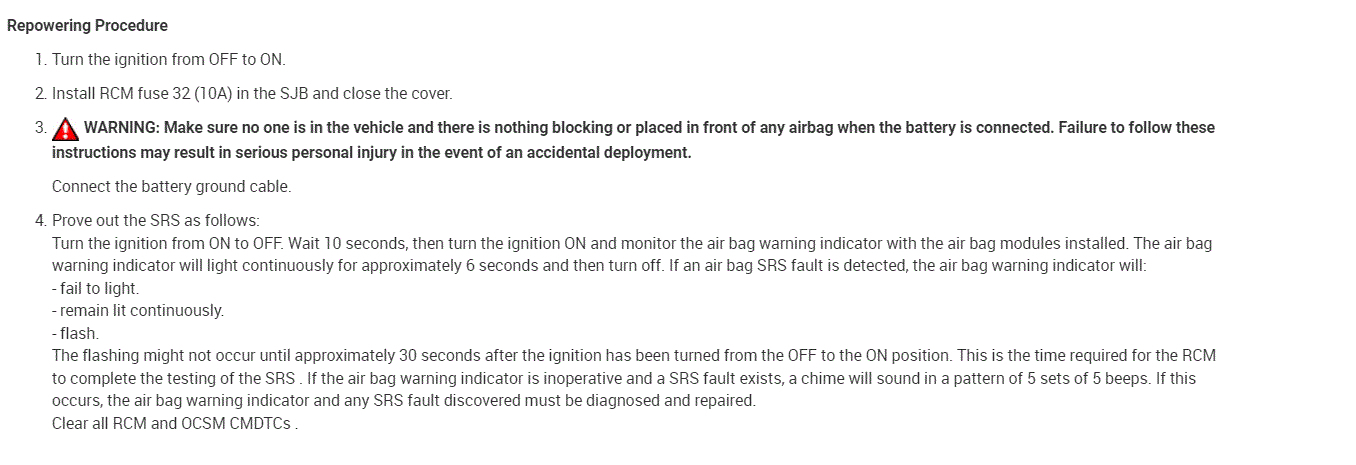
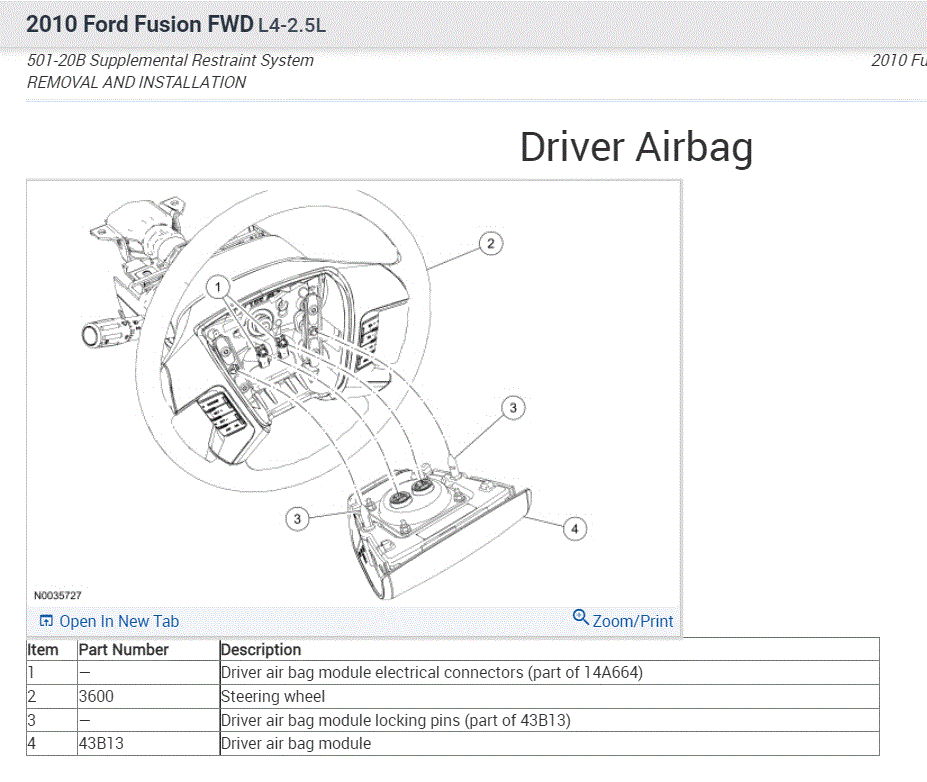
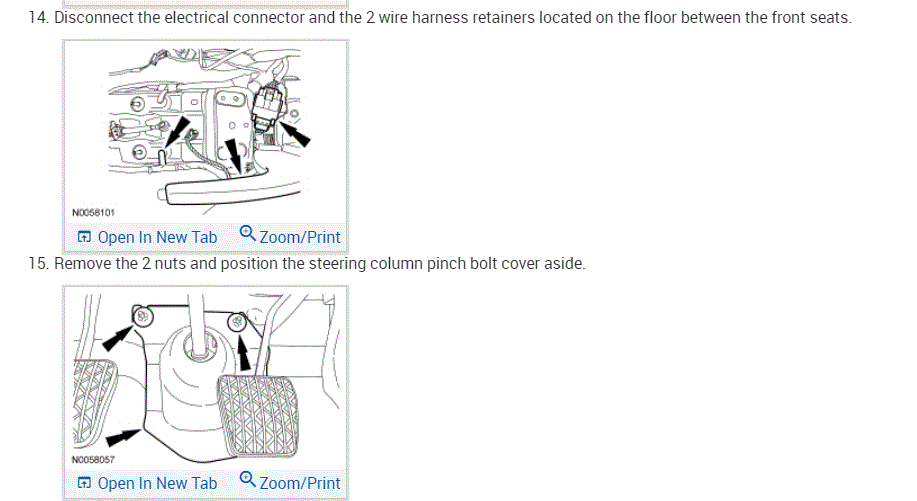
According to the manual, the instrument panel needs to be removed. To remove the IP, the steering wheel, gear shift lever, center console, and the list goes on. I can't make this stuff up. Ugh!!!

So, I am going to provide the directions from my manual. However, if you can find an easier way to do it, by all means, do it.

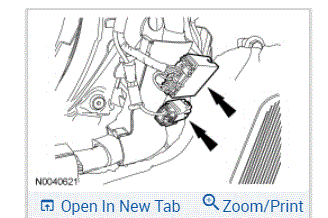
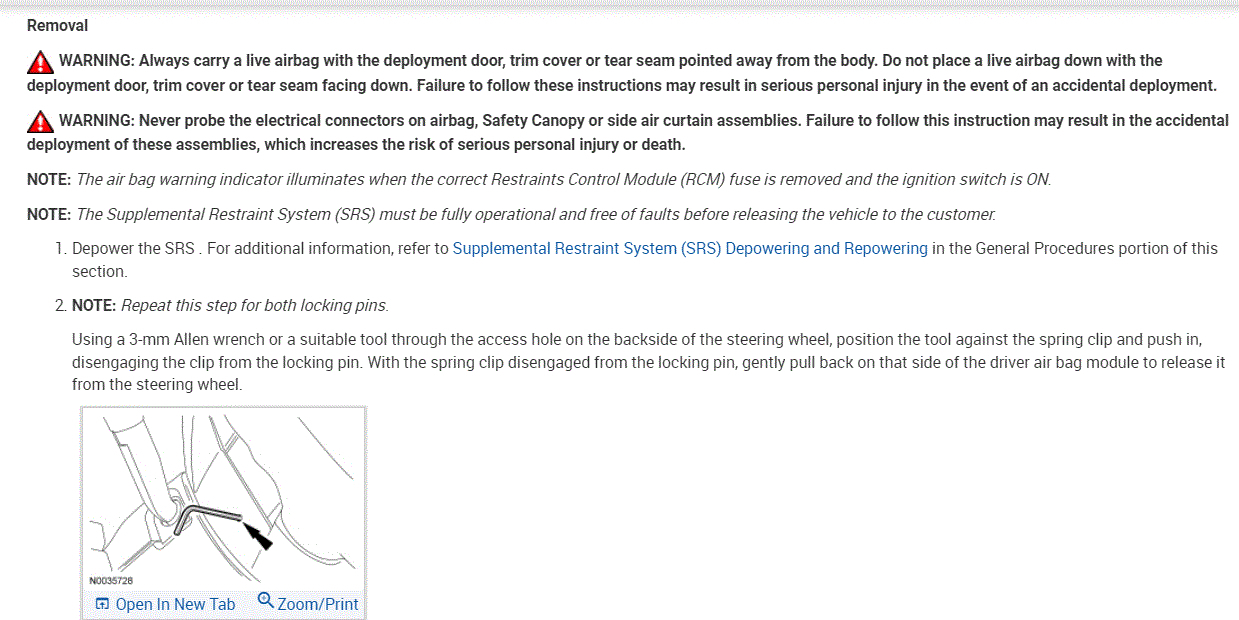
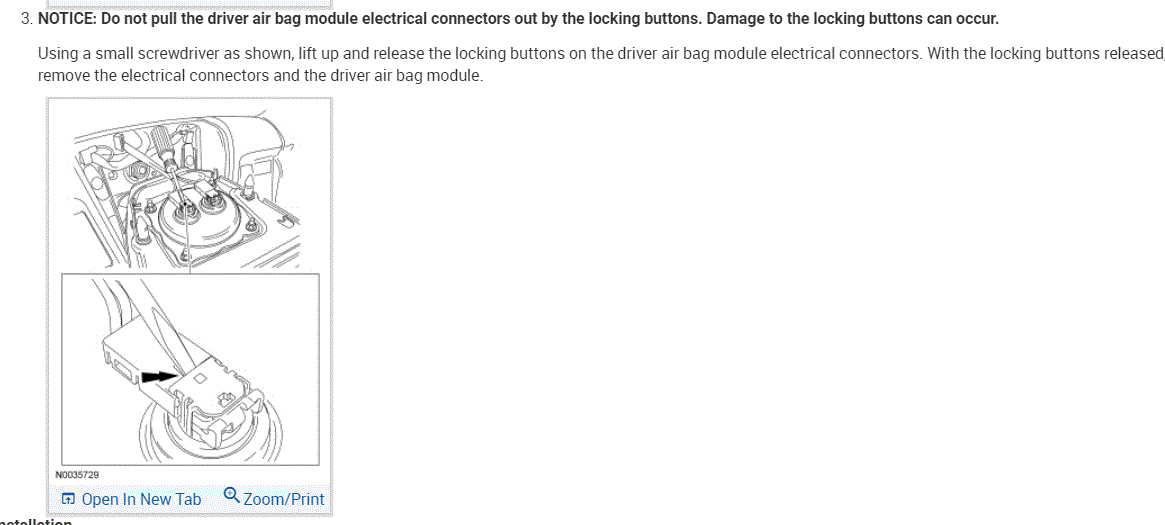
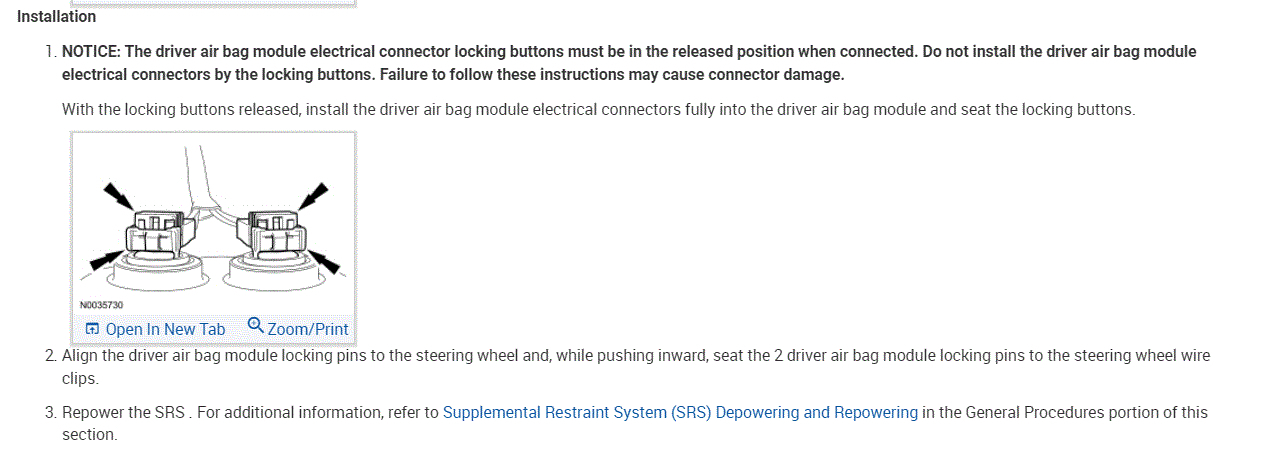
I started with the mode door actuator, then the IP, then the steering wheel. Please follow the directions specific to the steering wheel carefully since it has an air bag. Additionally, the relearn procedures are provided in pic 3. The remaining pics are for the air bag, turning power on and off to it, and so on.

I actually feel bad sending this. Do me a favor. Take as many pics from different angles of the actuator so I can see if we can do it a different way. Also, the metal cover in your first pic, do you see any way to remove it?

One last thing. The directions indicate the removal of the steering wheel. When I went to the section indicated, it explains removing the entire column. Again, only do what you need to for the removal of the IP.

Let me know.

Joe

See pics below.
Dec 23, 2021 at 2:49 PM
Avatar
ARIBERT
  • MEMBER
  • 2 POSTS
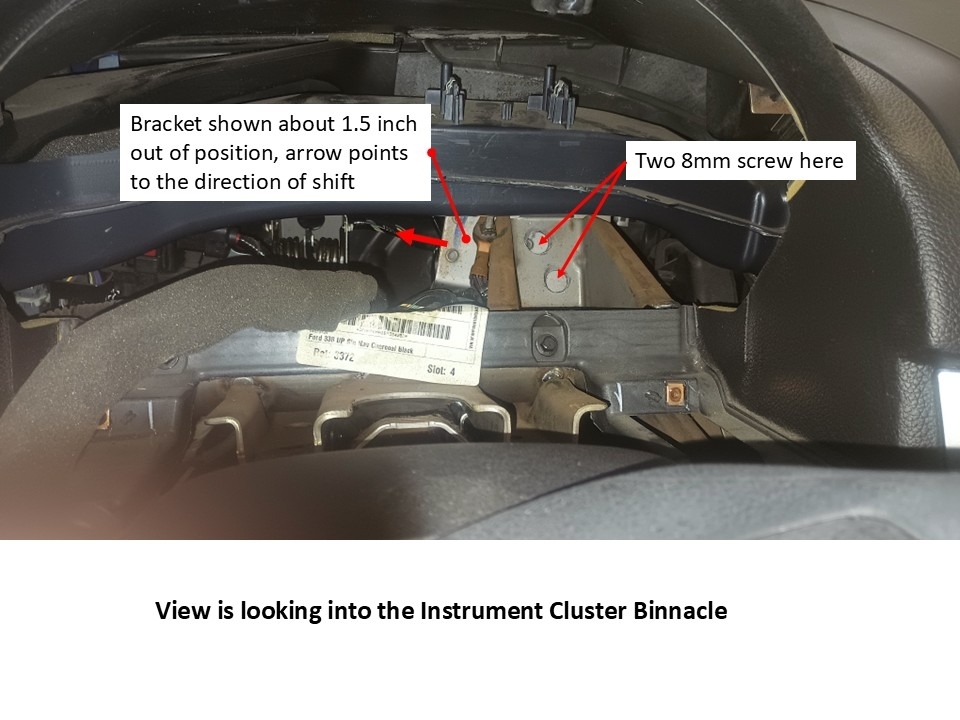
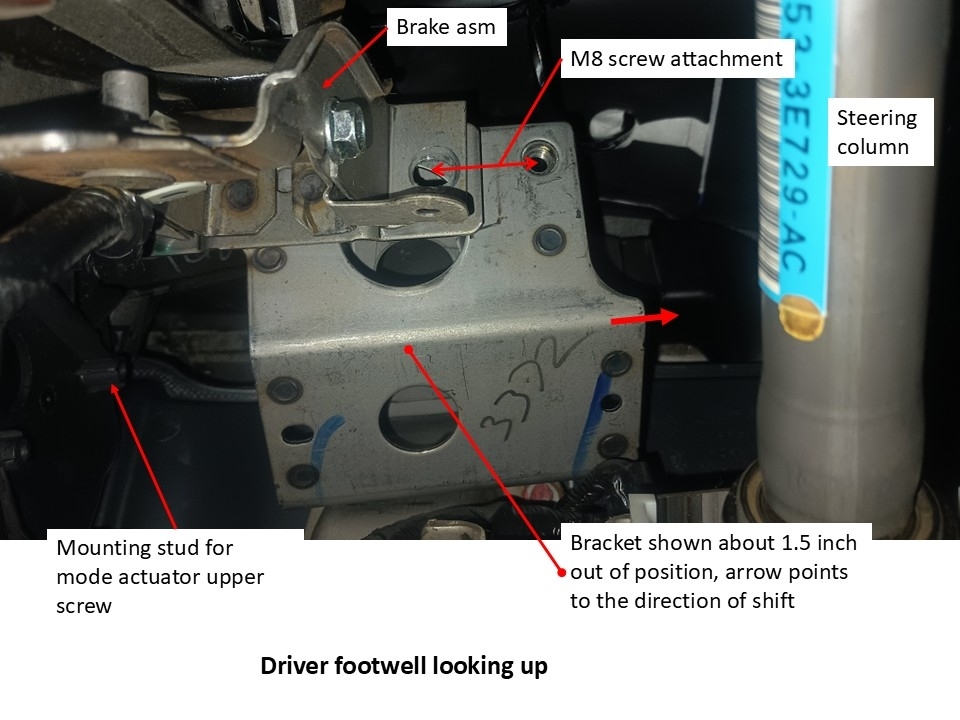
I am struggling with the same issue. First I will give my advice as to what I **should**have done. After removing the instrument cluster there are two 8mm bolts (14mm socket) that attach a bracket to the cross car beam. Remove these two bolts. From underneath, there are two 8mm bolts (10mm socket) that secure the same bracket to the brake pedal asm. Remove these two bolts. Shift this bracket away from the HVAC module about 1.5 inches. Now one can access the 2nd, upper, screw on the mode door actuator and pry the actuator off of the HVAC mode cam shaft WITHOUT DOING STEPS 7 & 8 (REMOVING THE COVER WITH THE CAM)!

My problem is that I followed the instructions in the first block, misunderstood that instrument panel was the entire dash. Removed the instrument cluster and was able to access the 3rd screw for the mode cover (fishing a 6 inch long extension thru the cluster opening). Once I had the cover loose, I started to attempt to separate it from the HVAC asm and the mode cam disassociated itself from the three linkages that were traveling in the cam slots. Now I don't know the orientation (clocking) of the mode cam relative to the three linkages with pins. That is when I realized I could have left the cover in place and simply shifted the metal bracket for ratchet access to the mode actuator upper screw. Once I shifted the bracket I was able to remove the mode actuator easily - now I just need to figure out the mode cam position (clocking) to be able to reassemble the car.
Jun 15, 2026 at 8:22 PM
Avatar
STRAILER
  • Experienced Mechanic
  • 55,273 POSTS
Yep, this happens, what I would do is connect the actuator wiring and turn the system on, then work the controls to defrost, then move the cam so the defrost is working, then install the actuator. This way the timing is correct. You should turn the blower motor on to help confirm the cam position. Thanks for the images they help.
Jun 17, 2026 at 7:29 PM
Avatar
ARIBERT
  • MEMBER
  • 2 POSTS
Thank you for your response. My issue is that the cam became disassociated from the three articulated links (links with pins that ride in the cam slots). I was focused on removing the mode actuator and did not pay any attention to the cam orientation as I tried to remove the HVAC end cover. At the moment, the cam is sitting on my desk, next to my laptop. If I can figure out which pin goes in which slot on the cam, then I cam proceed with your suggestion.
Jun 18, 2026 at 6:26 PM
Avatar
STRAILER
  • Experienced Mechanic
  • 55,273 POSTS
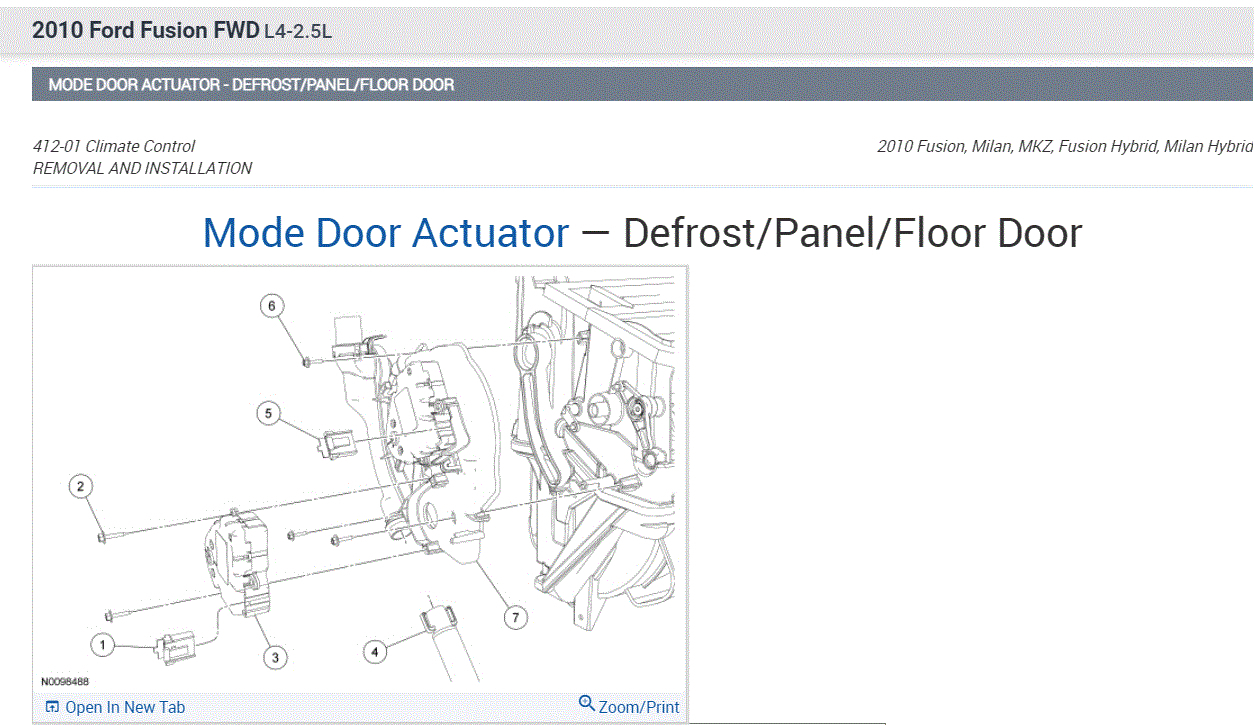
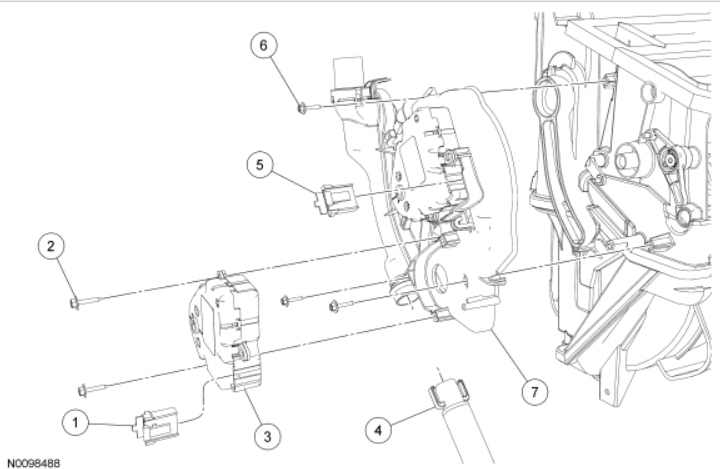
Gotcha, this is the only diagram they give us. Let me know if it helps.
Jun 19, 2026 at 8:22 AM
Join 2CarPros for free, one of the most advanced car repair communities on the internet. From first-time drivers to seasoned mechanics, everyone is welcome to reply, share details, and get better answers. You can add a temporary image or video first; uploads are limited to 20 MB.
Ask a Free Question
Repair Safety Notice: This information is for general instructional purposes only. Vehicle repair can be dangerous. Verify all information, follow manufacturer service procedures, use proper tools and safety equipment, and consult a qualified repair shop when needed.