Heater assembly rebuild

Tiny
PAPAW51
  • MEMBER
  • 1984 JEEP CJ7
  • 4.2L
  • 6 CYL
  • 4WD
  • MANUAL
  • 167,000 MILES
While I have the dash out and spring has almost sprung in my area. I'm going to pull out the entire heater assembly and clean and refurbish it. Would you Jeep guys like to or mind at all walking through the process with me here. I can provide pictures and such. Maybe it will help somebody in the future?
Saturday, March 16th, 2019 AT 9:37 AM

8 Replies

Tiny
CJ MEDEVAC
  • MECHANIC
  • 11,004 POSTS
This will be a simple task as far as the fixing part. Getting it out will be a bit harder.

I suggest a a new heater core for sure!

Maybe the cables if they are not moving well

The rest is going to be replacing the thin foam that seals the doors, you will see what I mean when you get in.

Somewhere over the years that have passed, someone decided to engineer a different blower motor into the equation. The replacement motor has a larger body diameter. The original motor protrudes through the firewall through a hole about the same size. In order to install the new style one, you must make the firewall hole bigger.

While the heater is out, this would be a good time to get a new blower motor and make the modification.

My daily driver (1977) had the crappy heater box in it.

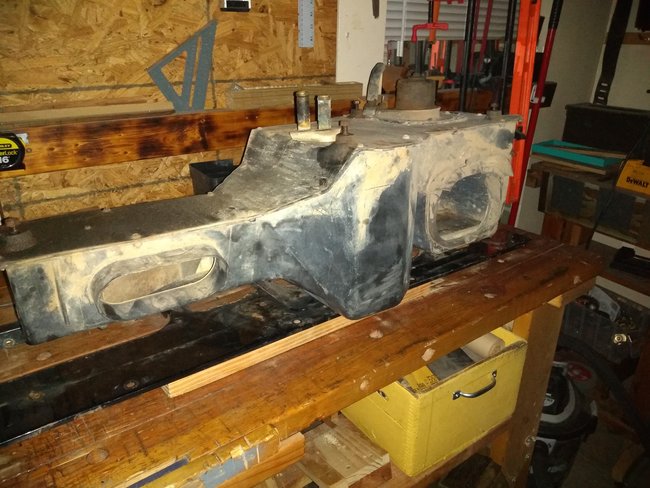
I found an 1982 in the salvage yard, I snagged the newer heater out of it (same heater from 1979-1986). Cool thing is that while I was swapping/ upgrading my 1977 I did some measuring off of CJ body/ firewall. I was able to cut my heater box and firewall so that my heater core could be accessed through the firewall. I also chopped my firewall so that the whole blower motor could be removed the same way.

So now, If I remove my battery tray and two homemade covers. The core and blower will come out in minutes, without removing the whole heater. (I have measurements)

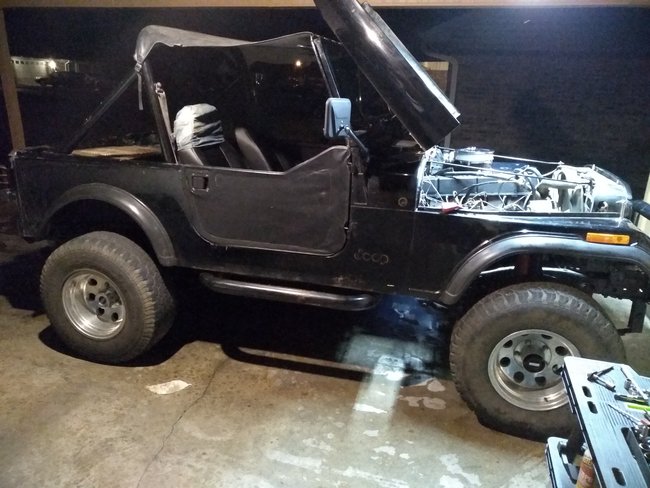
I'm going to send my mod pics now. There's a few more, I'm sure you get the idea and other heater pictures on the next answer block.

The Medic
Was this
answer
helpful?
Yes
No
+1
Saturday, March 16th, 2019 AT 5:50 PM
Tiny
CJ MEDEVAC
  • MECHANIC
  • 11,004 POSTS
When I did my mod, I did not keep my info. Later someone else wanted the measurements, so I tore back into the firewall and remeasured. There are more pics of my mod. That's why you see some of where I painted things the second go round.

Below are pics I grabbed and labeled from the net, as I am contemplating another mod. Just ain't got that far yet.

Let me know if you need anything.

The Medic
Was this
answer
helpful?
Yes
No
+1
Saturday, March 16th, 2019 AT 6:23 PM
Tiny
PAPAW51
  • MEMBER
  • 21 POSTS
Sweet. Gimme a lil bit to study these pictures. And I will holler back at you soon. In the mean time I know you like Jeep pics CJ. So here are a few. The manifold plugs were tonight's project.
Was this
answer
helpful?
Yes
No
Saturday, March 16th, 2019 AT 8:15 PM
Tiny
PAPAW51
  • MEMBER
  • 21 POSTS
You can see the EGR valve delete cover plate there also.
Was this
answer
helpful?
Yes
No
Saturday, March 16th, 2019 AT 8:21 PM
Tiny
CJ MEDEVAC
  • MECHANIC
  • 11,004 POSTS
I'm here when you get caught up.

Your plate looks good.

As long as we are discussing heater.

Scope this out too.

Picture 1) Traditional heater hose routing
Feeding intake "full, hottest" coolant (red)
Cooled somewhat and now enters heater core (red/ blue dotted line)
Returns to water pump cool (blue)

Picture 2) Set up similar to a steam system is. Hottest water feeds intake and heater core at the same time, then returns cooler to the water pump. Hence more/ hotter heat from the heater core.

Picture 3) parts explanation

Picture 4) parts

Picture 5) This is my CJ-5 (Mr. Jeep) A little more involved, I made a heater to go in the rear. ("The Sahara Breeze") I have a little more piping, but still plumbed in like a steam system (everything gets fed from the thermostat housing-then returns to the water pump).

Picture 6) Explanation.

The Medic
Was this
answer
helpful?
Yes
No
+2
Monday, March 18th, 2019 AT 7:48 PM
Tiny
PAPAW51
  • MEMBER
  • 21 POSTS
Heater is out. Got plugs wires and cap and rotor in today. Back to work in the morning. You beat me to the question with the answer already. Was going to ask about routing the hoses and the direction of flow. Thanks Sarge. I studied the previous pictures of how you made your heater core accessible through the firewall. I appreciate the idea, but I'm not willing to cut my firewall beyond the larger hole for the bigger blower motor. Going to work on getting the dash and my gauges right this week. And take my time on the heater. Then tackle the challenge of simplifying the wiring harness more. Get rid of unnecessary wires as much as I dare. This are subjects for another question thread later. Thanks for your help. I'm actually not sure I would have gotten this far without your encouragement. You, CJ MEDEVAC, and this website have been very helpful.
Was this
answer
helpful?
Yes
No
Monday, March 18th, 2019 AT 8:31 PM
Tiny
CJ MEDEVAC
  • MECHANIC
  • 11,004 POSTS
Thanks for the compliments!

Keep us posted with progression.

The Medic
Was this
answer
helpful?
Yes
No
+1
Wednesday, March 20th, 2019 AT 6:07 PM
Tiny
PAPAW51
  • MEMBER
  • 21 POSTS
Will do. Heater is on the bench. No hurry. Got some painting and rust to treat. Right now I'm changing gear oil in all the boxes with gears.
Was this
answer
helpful?
Yes
No
Wednesday, March 20th, 2019 AT 6:35 PM

Please login or register to post a reply.

Sponsored links