One side has cold air

Tiny
CHUCK NIEMANN
  • MEMBER
  • 2011 FORD F-150
  • 3.5L
  • 6 CYL
  • 2WD
  • AUTOMATIC
  • 47,676 MILES
What could be the cause? I replaced the dual heat part this last summer located under the passenger side dash next to the blower housing.
Wednesday, December 11th, 2019 AT 9:03 PM

5 Replies

Tiny
JACOBANDNICKOLAS
  • MECHANIC
  • 109,885 POSTS
Hi,

If you have heat on one side, the heater core is good and working. That leaves only the blend air door for the passenger side. Here is a link that explains in general how one is replaced:

https://www.2carpros.com/articles/replace-blend-door-motor

Here are the directions specific to your vehicle/right side:

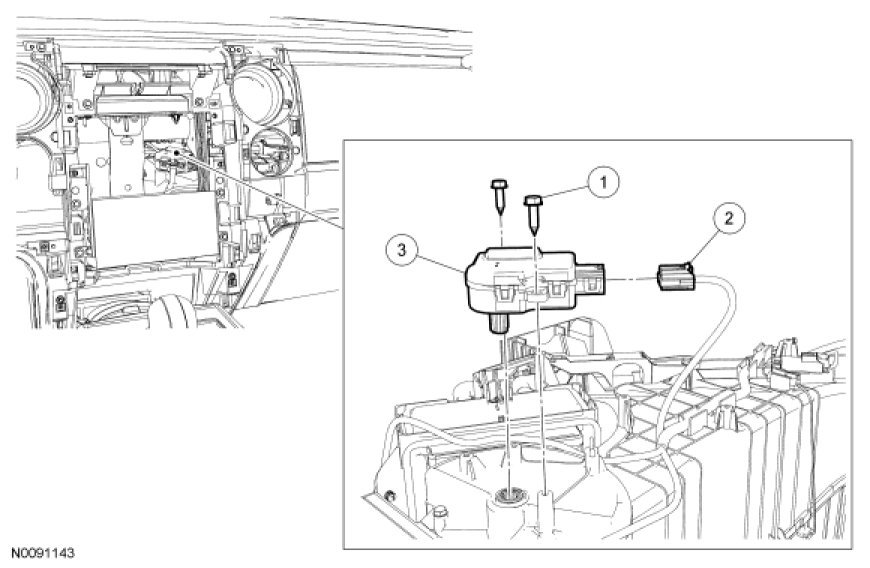
Removal and Installation

1. Remove the Audio Control Module (ACM). For additional information, refer to Information and Entertainment Systems See: Communications Control Module > Removal and Replacement > Audio Control Module (ACM).

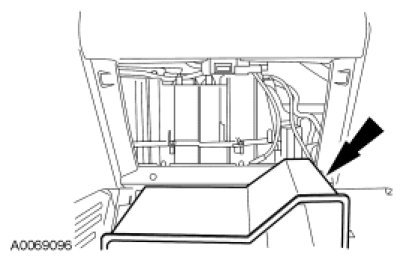
2. While pushing the glove compartment door tab, position the glove compartment downward.

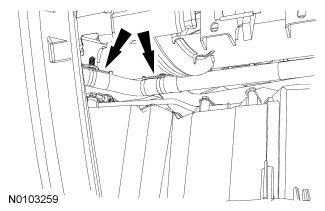
3. Detach the 2 wire harness pin-type retainers and position the wire harness aside.

4. NOTE: The forward RH temperature blend door actuator screw can be removed with a combination wrench. With one hand working through the ACM opening, hold the top end of the combination wrench. With the other end of the combination wrench pointing away (toward the right front corner of the vehicle), and with the other hand working through the glove compartment opening, the combination wrench can be manipulated.

Remove the 2 RH temperature blend door actuator screws.

5. Detach the temperature blend door actuator.

6. Disconnect the temperature blend door actuator electrical connector.

7. Remove the temperature blend door actuator.

8. NOTICE: The ignition key must be off when replacing the actuator. Energizing the actuator before installation will cause the part to become positioned incorrectly and proper orientation will be lost. Incorrect actuator operation will result.

To install, reverse the removal procedure.

9. NOTE: The purpose of the module actuator position calibration is to allow the HVAC module to reinitialize and calibrate the actuator stop points. To carry out calibration, carry out the following steps.

Remove Smart Junction Box (SJB) fuse 15 for at least one minute.

10. NOTE: When the ignition switch is switched to the ON position, the HVAC module will initialize and calibrate the actuators. Calibration of the actuators will take approximately 30 seconds.

Reinstall SJB fuse 15. Turn the ignition switch to the ON position and wait 30 seconds before verifying correct mode door actuator operation.

Check out the diagrams (Below). Please let us know what you find.
Was this
answer
helpful?
Yes
No
Thursday, April 15th, 2021 AT 2:05 PM
Tiny
CHUCK NIEMANN
  • MEMBER
  • 4 POSTS
Is the acm removal the radio, and the center of the dash plastic?
Was this
answer
helpful?
Yes
No
Thursday, April 15th, 2021 AT 2:05 PM
Tiny
JACOBANDNICKOLAS
  • MECHANIC
  • 109,885 POSTS
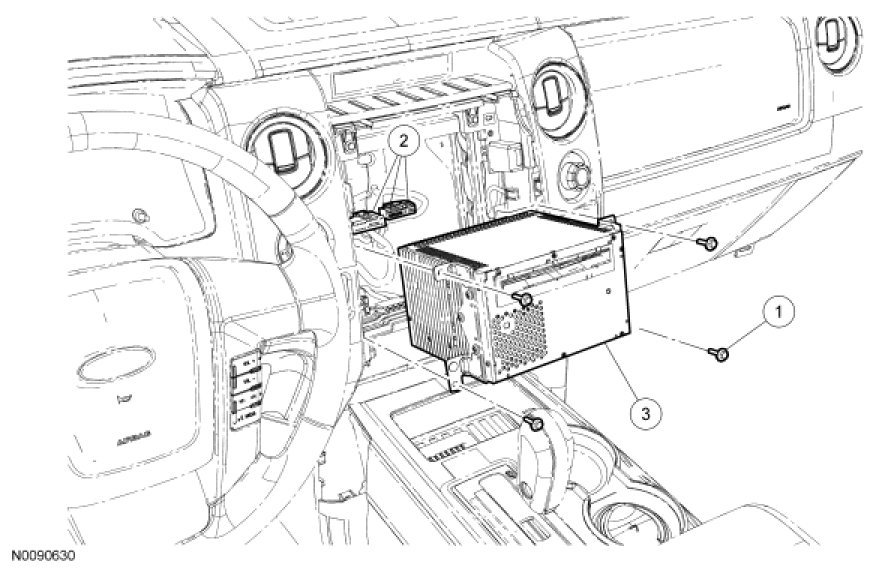
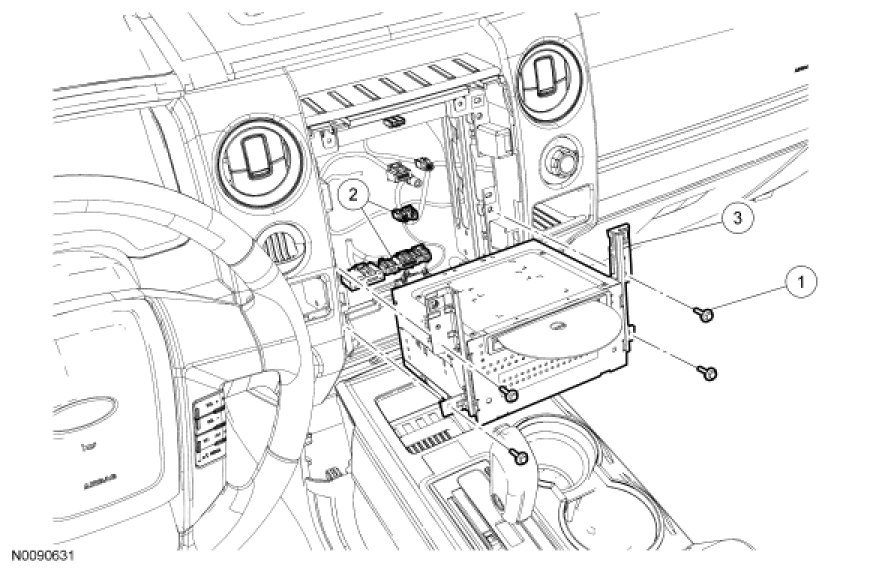
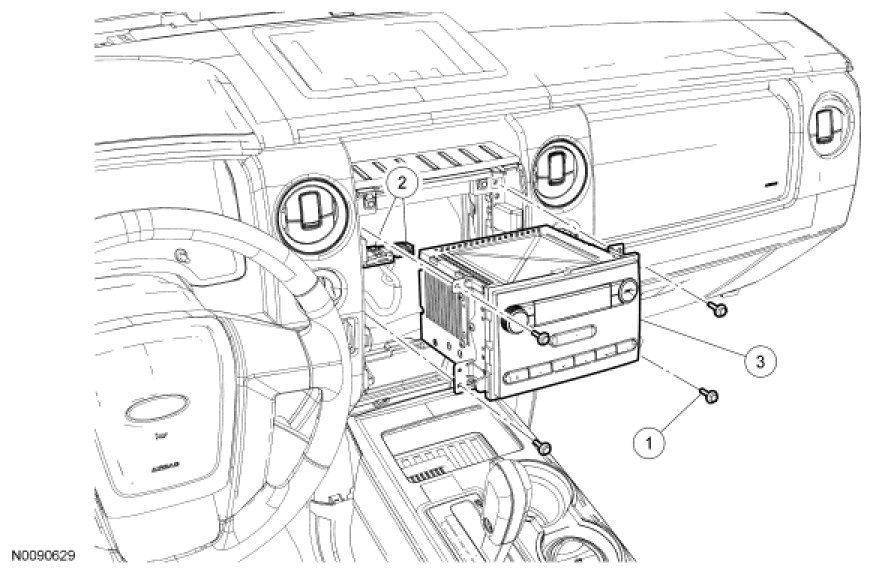
Yes. Here are the directions. Attached pictures correlate with the directions.

NOTE: It is not necessary to remove the Audio Control Module (ACM) to retrieve the part number. For additional information, refer to Audio Control Module (ACM) Self-Diagnostic Mode See: Communications Control Module > Procedures > Audio Control Module (ACM) Self-Diagnostic Mode.

All except base AM/FM

1. NOTE: Module configuration is required when a new ACM is being installed.

Upload the ACM configuration information to the scan tool. For additional information, refer to Programmable Module Installation (PMI) in Module Configuration See: Information Bus > Programming and Relearning > Programmable Module Installation (PMI).

Base AM/FM

2. Remove the center instrument panel finish panel. For additional information, refer to Instrument Panel and Console See: Dashboard / Instrument Panel > Removal and Replacement > Instrument Panel Finish Panel.

Single CD, CD6

3. Remove the Front Controls Interface Module (FCIM). For additional information, refer to Front Controls Interface Module (FCIM) See: Entertainment System Control Panel > Removal and Replacement > Front Controls Interface Module (FCIM).

Navigation

4. Remove the Front Display Interface Module (FDIM). For additional information, refer to Front Display Interface Module (FDIM) See: Entertainment System Control Panel > Removal and Replacement > Front Display Interface Module (FDIM).

All Audio Control Modules (ACMs)

5. Remove the 4 screws and the ACM.
- Disconnect the electrical connectors.

6. To install, reverse the removal procedure.
- For all ACMs except base AM/FM, download the configuration information to the ACM. For additional information, refer to PMI in Module Configuration See: Information Bus > Programming and Relearning > Programmable Module Installation (PMI).

Check out the diagrams (Below). Please let us know what you find.
Was this
answer
helpful?
Yes
No
+1
Thursday, April 15th, 2021 AT 2:05 PM
Tiny
CHUCK NIEMANN
  • MEMBER
  • 4 POSTS
I I took two hours to get the part out and the new actuator in. I know have heat on both sides of my truck. Thanks for the help
Was this
answer
helpful?
Yes
No
Thursday, April 15th, 2021 AT 2:05 PM
Tiny
JACOBANDNICKOLAS
  • MECHANIC
  • 109,885 POSTS
Glad to hear it's working for you. Honestly, things used to be so much easier, but in all honesty, if you did it in 2 hours, you did well.

Take care and have a nice holiday season. Let us know if you have questions in the future.

Joe
Was this
answer
helpful?
Yes
No
Thursday, April 15th, 2021 AT 2:05 PM

Please login or register to post a reply.

Sponsored links