When the problem acts up, use a test light and start at the battery with the clip lead on the negative bolt and the probe on the positive bolt. The light should be bright. Move one probe at a time until the light no longer is bright. In particular, move the clip lead from the negative post to a shiny / clean spot on the body. A bare bolt head is a good place to use. If the voltage disappears, look closely at the small black wire from the negative battery cable where it attaches to the body. Be sure it's clean and tight.
Do the same test with the negative lead attached to a clean bare spot on the engine. If voltage is missing there, the negative cable is loose or corroded.
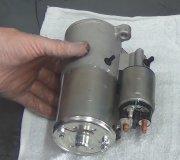
Next, move the probe of the test light to the large terminal on the starter. Probe on the cable's terminal end, then on the copper bolt on the starter solenoid. If voltage is missing on the stud but not on the terminal, that connection is loose or arced and pitted.
A fast way to check the integrity of the high-current circuit is to use a screwdriver or heavy wire to jump between the large starter terminal with the battery cable attached to it and the small solenoid terminal. The starter should crank. If it does not, you have something wrong in those two large cables from the battery that should have shown up in the previous tests.
If it does crank, but the rest of the system is still dead, move the probe of the test light to the large stud on the back of the generator. If voltage is missing there, look again at the wires on the starter. GM like to confuse things by using the large stud on the starter solenoid as a tie point. It is common for them to work loose.
The next suspect is a loose or corroded electrical terminal in a connector, typically where they go through the firewall.
Caradiodoc
Friday, May 7th, 2010 AT 5:09 PM


