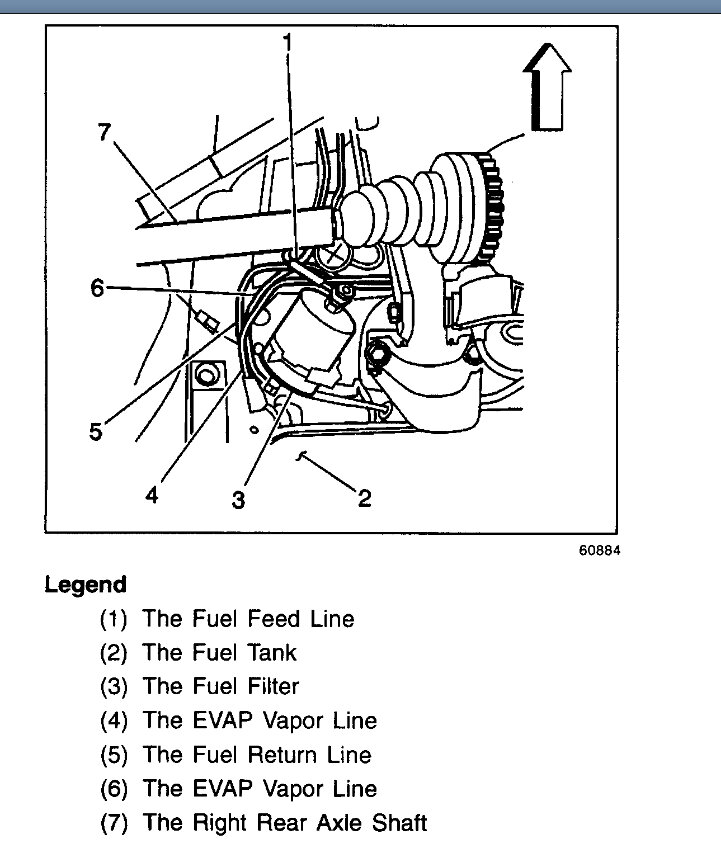
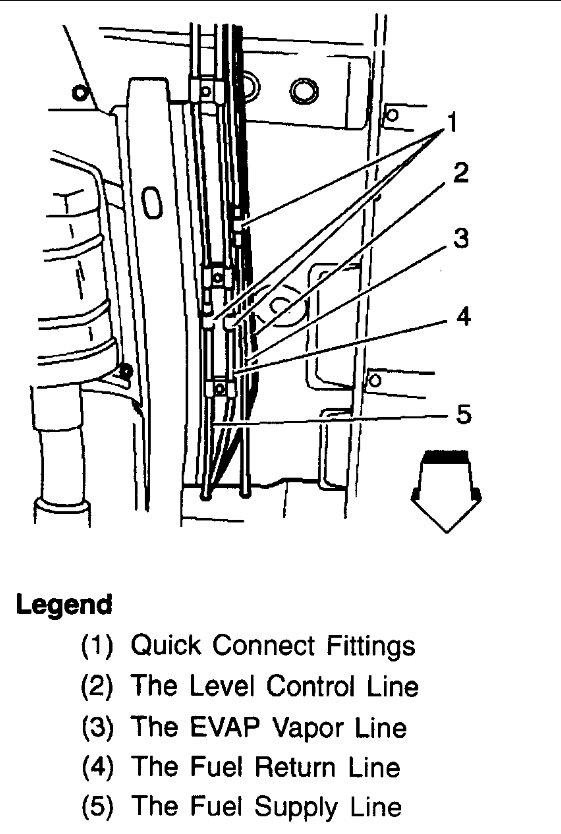
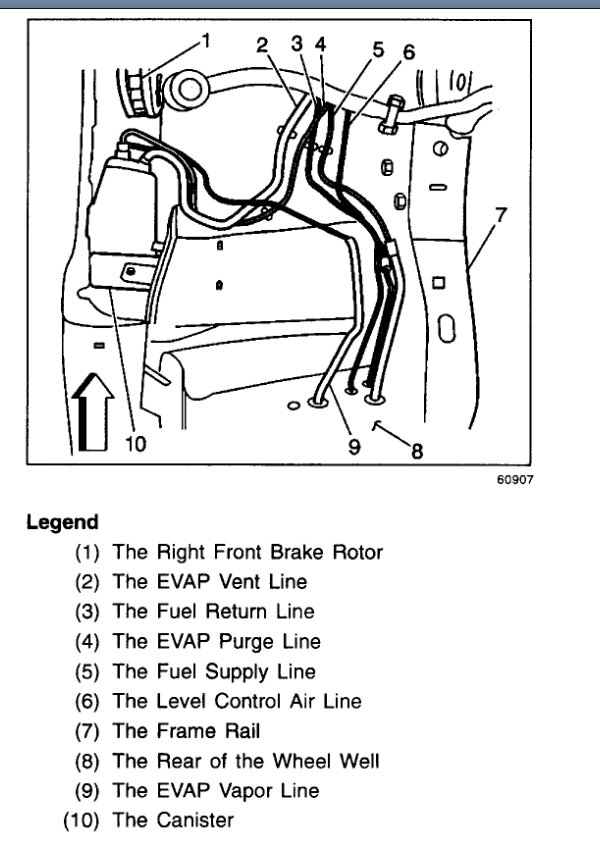
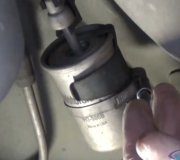
There is a fuel filter behind the engine near the firewall that can be leaking as well, here is the location and some information on the fuel lines:
The nylon fuel lines are designed to perform the same function as the steel or rubber fuel lines. The nylon lines are constructed to withstand the maximum fuel system pressure, exposure to any fuel additives, and changes in temperature.
The fuel feed, the return, the vacuum and the EVAP lines are assembled as a harness. The retaining clips hold the lines together and provide a means for attaching the lines to the vehicle. The sections of the lines that are exposed to any chafing, high temperature or vibration are protected with a heat resistant rubber hose and/or a co-extruded conduit.
The nylon fuel lines are somewhat flexible and can be formed around gradual turns under the vehicle. However, if the nylon lines are forced into sharp bends, nylon lines will kink and restrict the fuel flow. Also, once the fuel lines are exposed to fuel, the fuel lines may become stiffer and more likely to kink if bent too far. Take special care when working on a vehicle with any nylon fuel lines.
REMOVAL
1. Disconnect the negative battery cable.
2. Perform the Fuel Pressure Release procedure.
3. Raise and suitably support the vehicle.
4. Remove the plastic shield over the lines (the underbody center section).
5. Remove the front fuel feed-return lines from the attaching hardware.
6. Pull the fuel feed-return lines through the underbody frame support.
7. Lower the vehicle.
8. Disconnect the fuel lines from the fuel rail.
9. Pull the fuel lines through the fender well and out of the engine compartment.
INSTALLATION
1. Remove the protective caps from the replacement lines.
2. Install the fuel lines through the fender well from the engine compartment.
IMPORTANT: Wherever the lines pass through the metal, be sure that the grommets (where used) are installed and in good condition.
3. Clean the contamination, if any, from the male line ends and apply a few drops of clean engine oil.
4. Reconnect the fuel lines to the fuel rail.
5. Raise the vehicle.
IMPORTANT: Wherever the lines pass through the metal, be sure that the grommets (where used) are installed and in good condition.
6. Feed the lines through the underbody frame support.
7. Reconnect the Quick-Connect fittings to the center section lines (on the right side almost in line with catalytic converter). Refer to Servicing Quick-Connect Fittings.
8. Install the retaining hardware.
9. Lower the vehicle.
10. Connect the negative battery cable.
11. Crank the engine for a few seconds. Turn off the engine if the engine starts.
12. Check for any fuel leaks.
13. Reinstall the underbody plastic shield over the lines if no leaks are present.
Check out the images (below). Let us know what happens and please upload pictures or videos of the problem.
Images (Click to make bigger)
Monday, October 3rd, 2022 AT 3:18 PM
