Hi,
How low is the fuel level? If it is low, there could be enough dirt in the sock at the bottom of the fuel pump preventing the fuel from making it to the engine. When you turn sharp, the fuel in the take will surge in one direction.
Let me know. Since it is a diesel, it will likely be related to a fuel issue. I have a feeling it is dealing with the fuel pick up filter, but I will need more info.
If you haven't replaced the fuel filter, here are the directions for replacement. The attached pics correlate with the directions.
____________________
2005 Dodge or Ram Truck RAM 2500 Truck 2WD L6-5.9L DSL Turbo VIN C
Procedures
Vehicle Powertrain Management Fuel Delivery and Air Induction Fuel Filter Service and Repair Procedures
PROCEDURES
REMOVAL
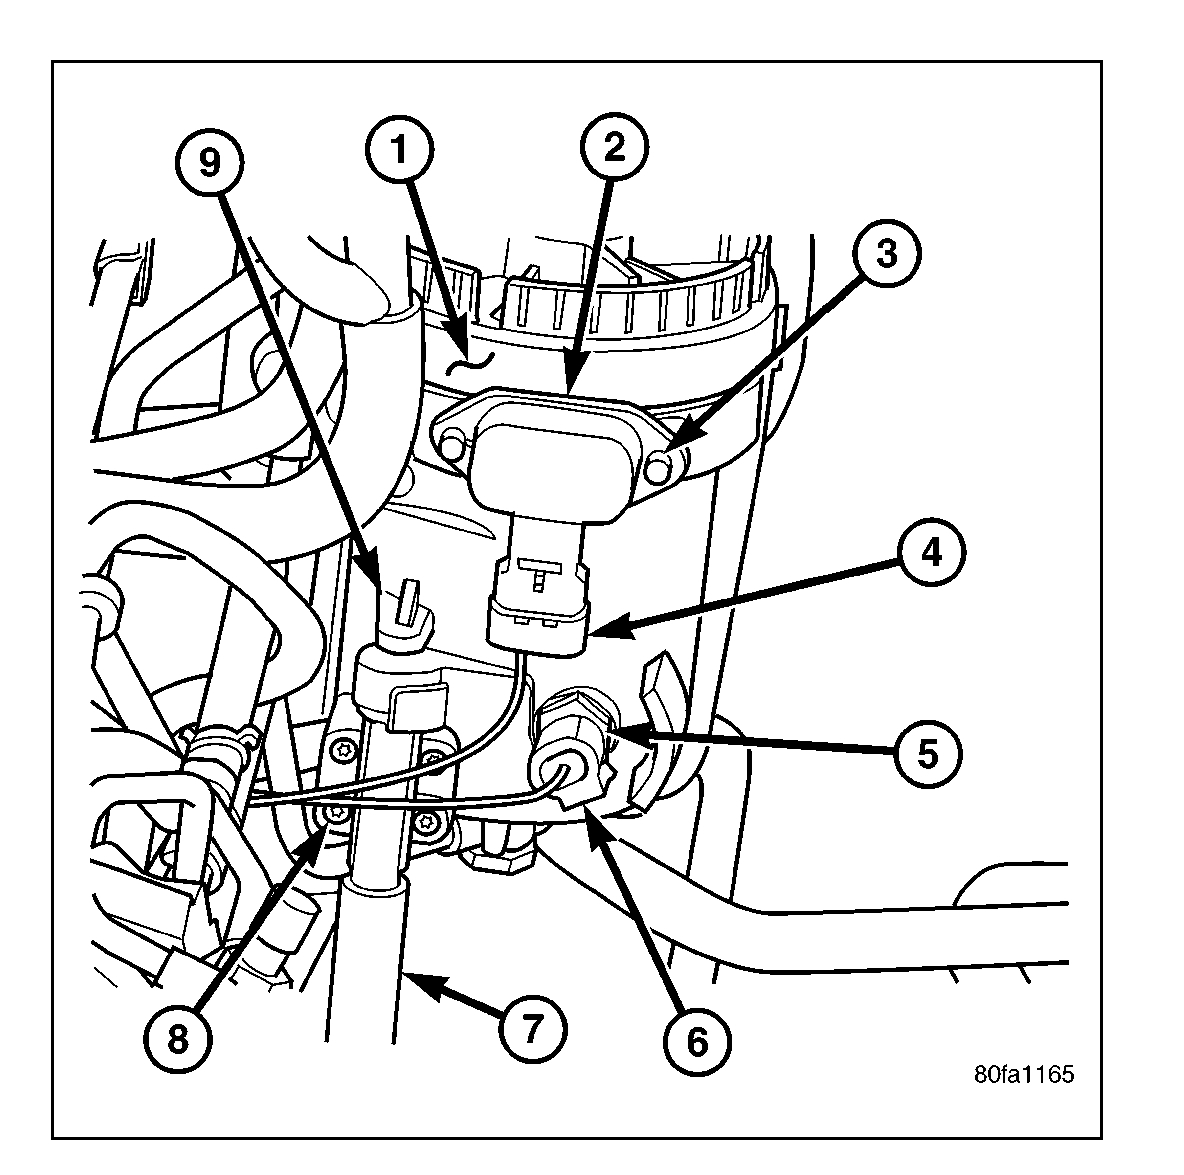
pic 1
Refer to maintenance schedules for recommended fuel filter replacement intervals.
Draining water from fuel filter/water separator housing:
The housing drain valve (9) serves two purposes. One is to partially drain the filter housing of excess water. The other is to completely drain the housing for fuel filter, drain valve, heater element or water-in-fuel sensor replacement.
The filter housing should be partially drained whenever the water-in-fuel warning lamp remains illuminated. (Note that lamp will be illuminated for approximately two seconds when ignition key is initially placed in ON position for a bulb check).
1. A drain hose (7) is located at the bottom of drain valve. Place drain pan under drain hose.
2. With engine not running, rotate drain valve handle counter-clockwise (rearward) to OPEN (DRAIN) position. Hold drain valve open until all water and contaminants have been removed and clean fuel exits.
3. If drain valve, fuel heater element or Water-In-Fuel (WIF) sensor is being replaced, drain housing completely. Dispose of mixture in drain pan according to applicable regulations.
4. After draining operation, rotate valve handle clockwise (forward) to the CLOSE position.
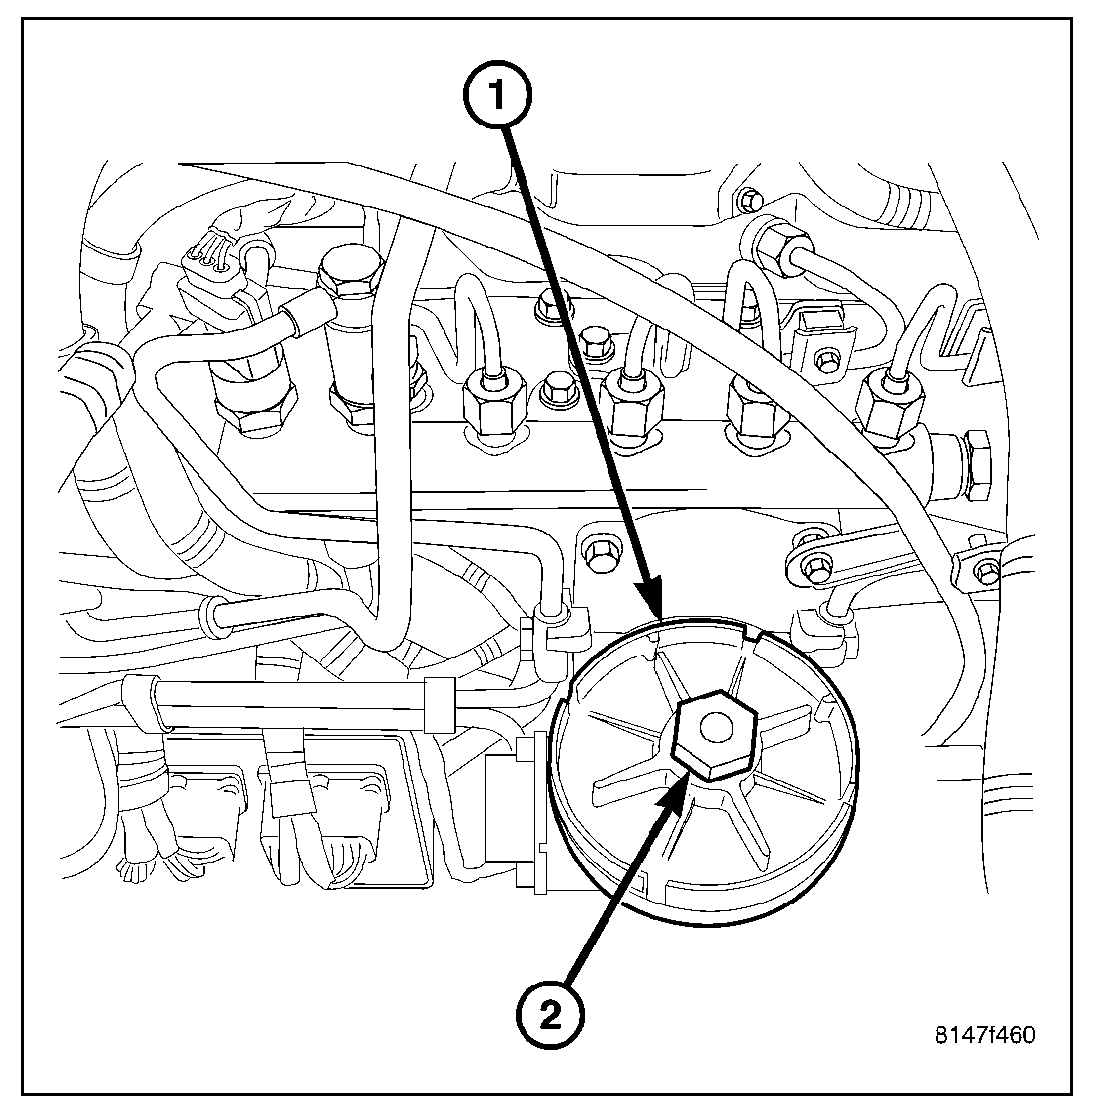
Pic 2
5. Fuel Filter Replacement: The fuel filter is located inside of the fuel filter housing.
A. Clean all debris from around canister.
B. Remove filter lid (1) using a socket. Attach socket to large hex (2) on top of lid. Rotate counter-clockwise for removal. Remove O-ring. Discard O-ring.
C. Remove filter element by twisting element sideways from filter lid.
Pic 3
6. Water-In-Fuel (WIF) Sensor Replacement: The WIF sensor (5) is located on the side of the fuel filter housing.
A. Disconnect electrical connector at sensor.
B. Clean area around sensor.
C. Remove sensor by rotating counter-clockwise.
D. Check condition of sensor O-ring. Replace if damaged.
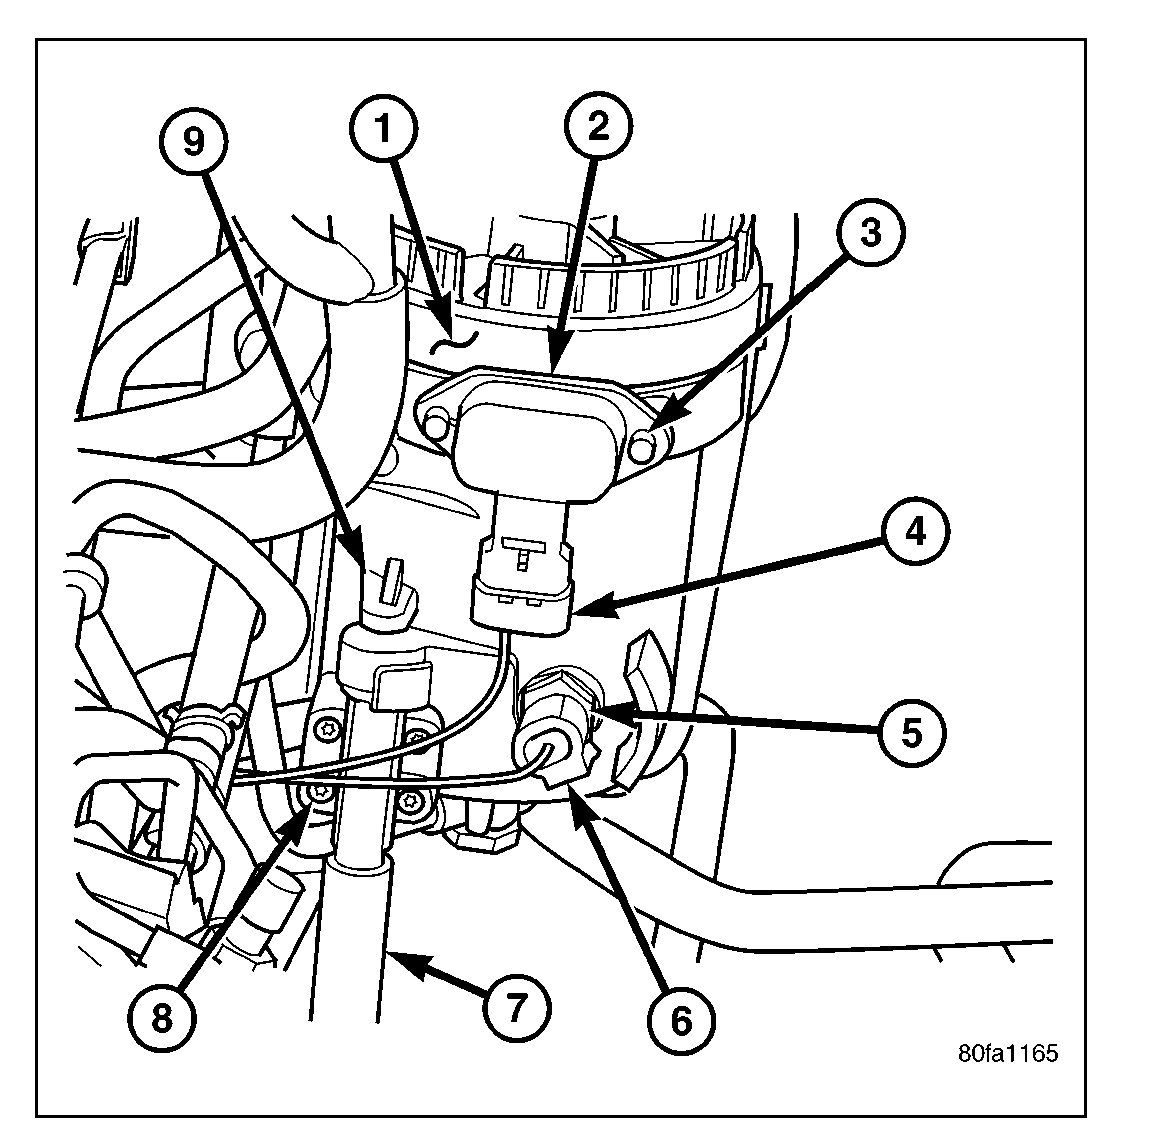
Pic 4
7. Fuel Heater Element Replacement: The heater element (2) is located in the fuel filter housing.
A. Remove fuel filter. See previous steps.
B. Disconnect electrical connector.
C. Remove two T-15 Torx head mounting screws (3) from fuel heater element.
D. Remove fuel heater.
Pic 5
8. Drain Valve Replacement: The drain valve assembly (9) is located on the side of the fuel filter housing.
A. Disconnect drain hose (7) from the fuel drain valve.
B. Remove 4 drain valve mounting screws (T-15 Torx head) (8).
C. Remove drain valve from filter housing.
INSTALLATION
Refer to maintenance schedules for recommended fuel filter replacement intervals.
1. Thoroughly clean inside of filter housing, filter cap and all related components.
2. Fuel Filter:
a. The engine has a self-priming low-pressure fuel system. Refer to Standard Procedures-Fuel System Priming.
B. Install new O-ring to canister lid and lubricate O-ring with clean engine oil.
C. Position new element to canister lid. Place this assembly into canister by rotating clockwise.
D. Tighten cap to 34 Nm (25 ft. Lbs.) Torque. Do not overtighten cap.
3. Water-In-Fuel (WIF) Sensor:
a. Install new O-ring seal to WIF sensor.
B. Apply a light film of clean oil to O-ring seal.
C. Install sensor into housing.
D. Tighten sensor to 2.5 Nm (25 in. Lbs.) Torque.
E. Connect electrical connector to WIF sensor.
4. Fuel Heater Element:
a. Install fuel heater into fuel filter housing.
B. Install fuel heater thermostat into fuel filter housing.
C. Install fuel heater mounting screws and tighten to 1-1.5 Nm (13 in. Lbs.) Torque.
D. Connect electrical connector to fuel heater thermostat.
E. Install new filter cover O-ring onto fuel filter housing cover and lubricate with clean engine oil.
F. Tighten fuel filter housing cover (lid) to 34 Nm (25 ft. Lbs.).
5. Drain Valve:
a. Install 2 new O-rings to valve.
B. Lubricate with silicon grease.
C. Install fuel drain valve.
D. Install 4 mounting screws and tighten to 1-1.5 Nm (8-13 in. Lbs.) Torque.
E. Connect drain hose to drain valve.
6. Start engine and check for leaks.
_______________
Let me know if this helps.
Take care,
Joe
Images (Click to make bigger)
Sunday, December 13th, 2020 AT 9:48 PM