2002 Ford Explorer removal of exterior door handle

2002 FORD EXPLORER
89,000 MILES • 6 CYL • 4WD • AUTOMATIC
Avatar
JOHN MATZ
  • MEMBER
  • 1 POST
How to remove rear exterior door handle
Sep 8, 2010 at 11:48 AM
Advertisement
Avatar
SATURNTECH9
  • ASE Certified Mechanic
  • 30,869 POSTS
  • ASE Certified Mechanic


https://images.2carpros.com/forum/automotive_pictures/416332_2002_ford_explorer_rear_door_panel_removal_part1_1.jpg


https://images.2carpros.com/forum/automotive_pictures/416332_2002_ford_explorer_rear_door_panel_removal_part2_1.jpg


https://images.2carpros.com/forum/automotive_pictures/416332_2002_ford_explorer_rear_door_panel_removal_part3_1.jpg


https://images.2carpros.com/forum/automotive_pictures/416332_2002_ford_explorer_rear_door_panel_removal_part4_1.jpg


https://images.2carpros.com/forum/automotive_pictures/416332_2002_ford_explorer_rear_door_panel_removal_part5_1.jpg


https://images.2carpros.com/forum/automotive_pictures/416332_2002_ford_explorer_rear_door_panel_removal_part6_1.jpg

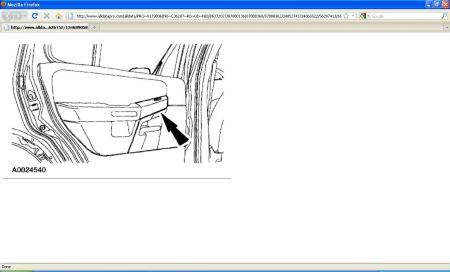
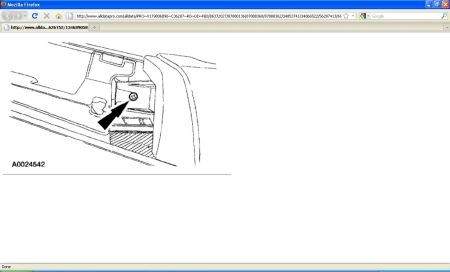
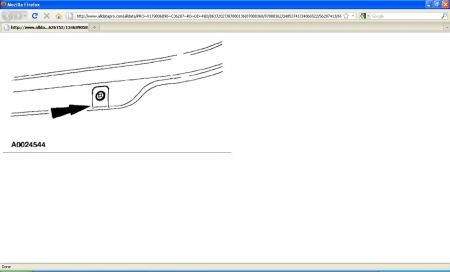
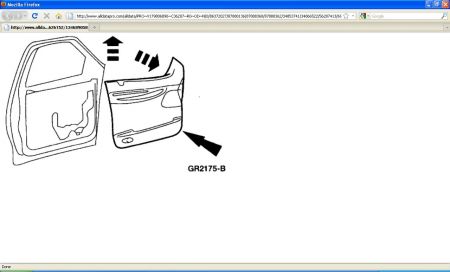
REMOVAL 1. Rotate the instrument panel dimmer switch to the position in which the interior lighting is off with the doors open. 2. Remove the door handle bezel from the trim panel. 3. Remove the window switch assembly. 4. Disconnect the window switch electrical connector. 5. Remove the upper trim panel screw at the window switch opening. 6. Remove the lower trim panel screw. 7. Lift the door trim panel by pulling directly upward on the armrest to disengage the panel clips. CAUTION: To avoid damage to door trim panel, do not pull directly outward for this step. INSTALLATION 1. To install, reverse the removal procedure.


https://images.2carpros.com/forum/automotive_pictures/416332_2002_ford_explorer_rear_exterior_door_handle_part1_1.jpg


https://images.2carpros.com/forum/automotive_pictures/416332_2002_ford_explorer_rear_exterior_door_handle_part2_1.jpg

EXTERIOR REAR DOOR HANDLE Removal and Installation 1. Remove the rear door trim panel. 2. Position the watershield aside. 3. Release the clip and release the exterior rear door handle latch actuating rod. 4. Remove the two exterior rear door handle nuts. 5. Remove the exterior rear door handle. 6. NOTE: Upon installation completion, apply force to the exterior rear door handle. To install, reverse the removal procedure. * Transfer parts as necessary. There you go.
Sep 8, 2010 at 12:34 PM
Join 2CarPros for free, one of the most advanced car repair communities on the internet. From first-time drivers to seasoned mechanics, everyone is welcome to reply, share details, and get better answers. You can add a temporary image or video first; uploads are limited to 20 MB.
Ask a Free Question
Repair Safety Notice: This information is for general instructional purposes only. Vehicle repair can be dangerous. Verify all information, follow manufacturer service procedures, use proper tools and safety equipment, and consult a qualified repair shop when needed.
