Just to confirm. Is the problem no heat, the inability to change air flow direction, or both? If it is heat, first confirm the engine coolant level is full. If this happened all at once, then suspect a bad blend air door. Take a look through this link:
https://www.2carpros.com/articles/replace-blend-door-motor
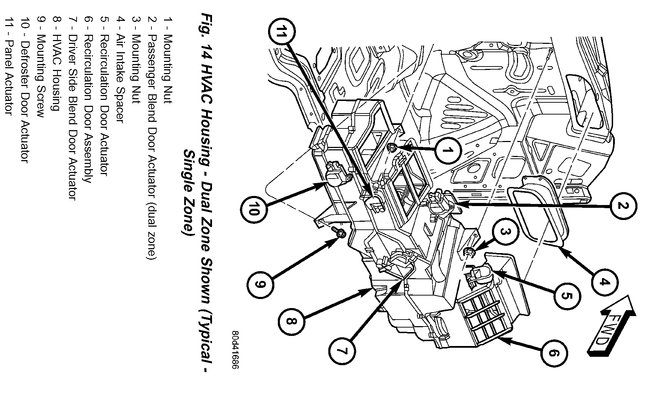
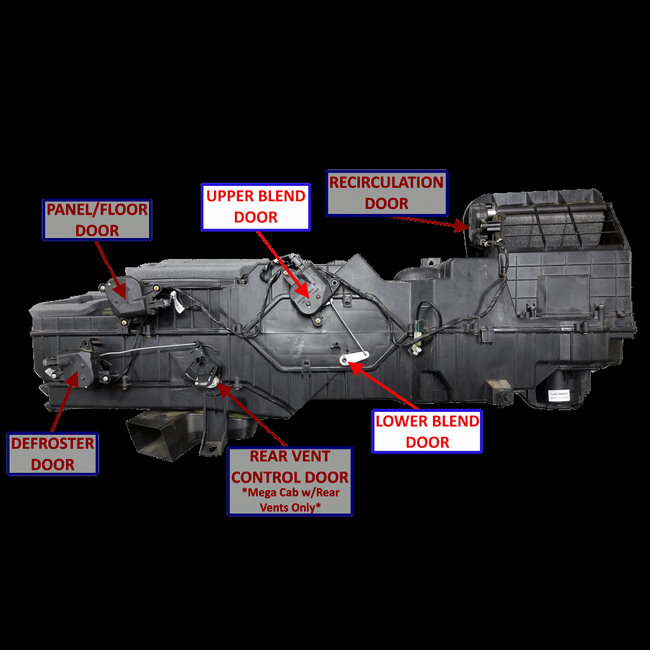
If you suspect that is the issue, here are the directions specific to your vehicle for replacement. The attached pic 1 correlates with the directions.
The single zone heating and air conditioning system is equipped with a single blend door actuator. The dual zone system has two blend door actuators, one for the driver side blend air door and one for the passenger side blend air door. The same service procedures can be used for each of these actuators.
1. Disconnect and isolate the battery negative cable.
2. Remove the instrument panel assembly.
Fig. 14 HVAC Housing - Dual Zone Shown (Typical - Single Zone)
3. Disconnect the HVAC wire harness connector for the blend door actuator from the actuator connector receptacle..
4. Remove the screws that secure the blend door actuator to the distribution housing.
5. Remove the blend door actuator from the distribution housing.
INSTALLATION
1. Position the blend door actuator into the heater/air conditioner housing. If necessary rotate the actuator slightly to align the splines on the actuator output shaft with those in the blend air door linkage.
2. Install and tighten the three screws that secure the blend door actuator to the distribution housing. Tighten the screws to 2 Nm (17 in. lbs.).
3. Reconnect the HVAC wire harness connector for the blend door actuator to the actuator connector receptacle.
4. Install the instrument panel assembly.
5. Reconnect the battery negative cable.
6. Perform the heater-A/C control calibration procedure.
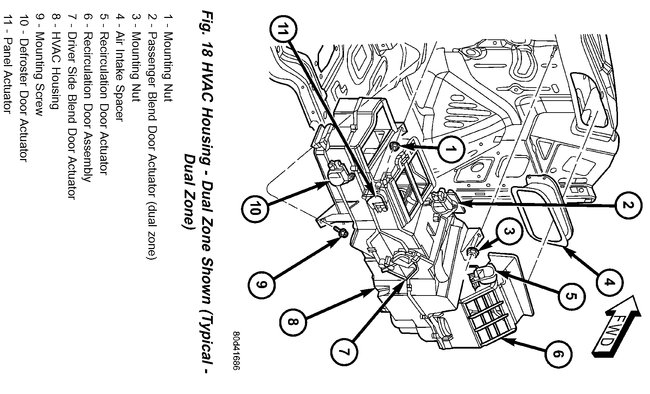
If there is also a problem with controlling air flow direction, then the issue is most likely related to a mode door actuator. This component is what is responsible for the flow direction.
1. Disconnect and isolate the battery negative cable.
2. Remove the instrument panel assembly.
3. Disconnect the electrical connector from the actuator (single or dual zone as required).
Fig. 18 HVAC Housing - Dual Zone Shown (Typical - Dual Zone)
4. Remove the two screws that secure the mode door actuators to the distribution housing. For single zone systems only lower actuator in present. For dual zone systems remove second actuator which is mounted on top of HVAC housing.
5. Remove the mode door actuators from the distribution housing.
INSTALLATION
1. Position the mode door actuators onto the heater/AC housing. If necessary, rotate the actuator slightly to align the splines on the actuator output shaft with those in the mode door linkage.
2. Install and tighten the two screws that secure the mode door actuators to the distribution housing. Tighten the screws to 2 Nm (17 in. lbs.).
3. Reconnect the HVAC wire harness connector for the mode door actuators to the actuator connector receptacle.
4. Install the instrument panel assembly.
5. Reconnect the battery negative cable.
6. Perform the heater-A/C control calibration procedure.
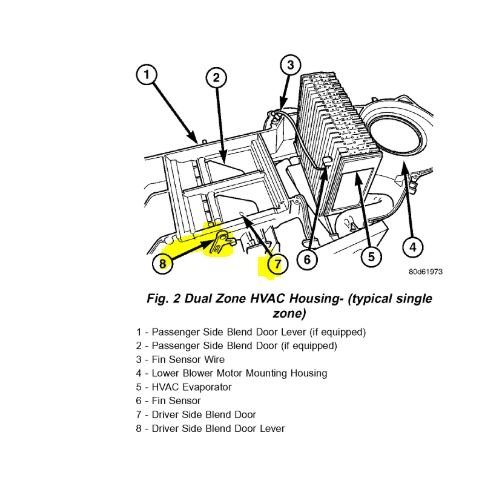
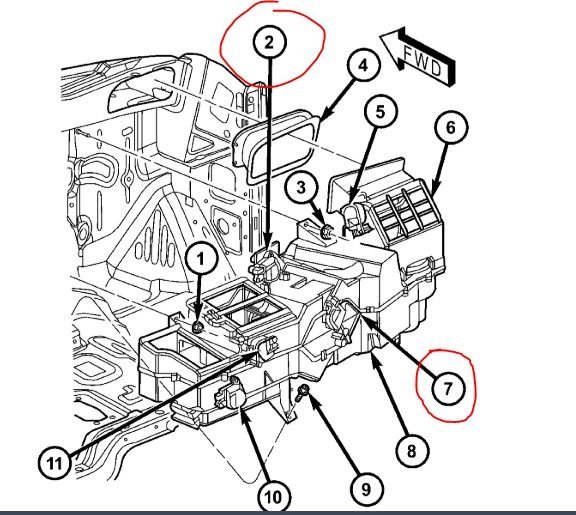
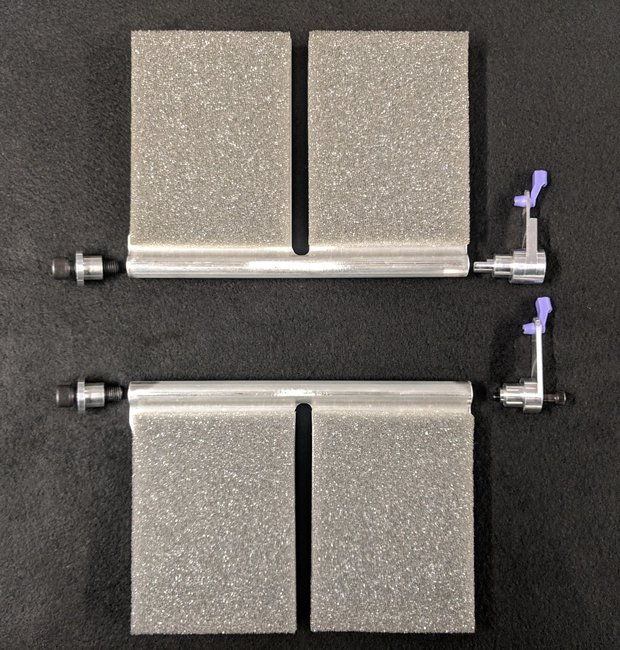
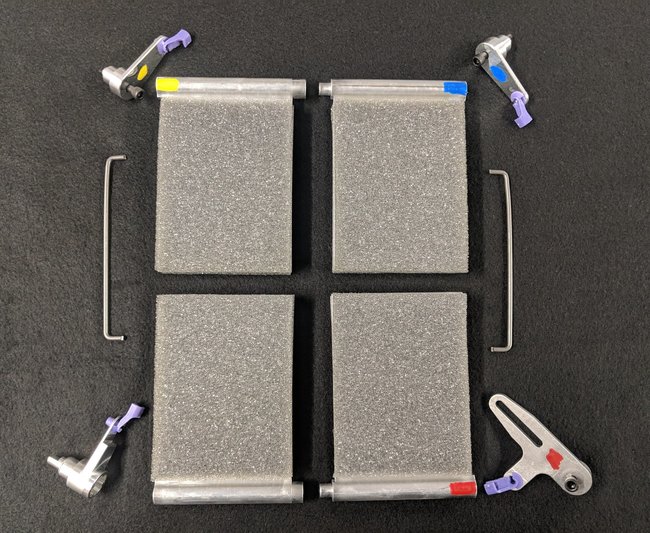
Check out the diagrams (Below). Please let us know what happens.
Images (Click to make bigger)
SPONSORED LINKS
Friday, April 23rd, 2021 AT 11:48 AM
