Friday, August 17th, 2018 AT 8:15 AM
SPONSORED LINKS
Coolant leak
5 Replies
Hi and thanks for using 2CarPros.com.
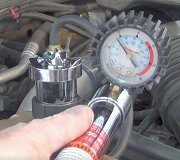
It is hard for me to tell which sensor you are seeing the leak from. What I suggest is to pressurize the system and then locate where the leak is coming from.
Here is a link that shows how it is done. Take a look at it and let me know if you have any questions. You will need the pump to pressurize the system, but most parts stores will lend you one.
https://www.2carpros.com/articles/radiator-pressure-test
As far as the sensors, I checked in my manual for coolant temperature sensors and they are not located on the front of the engine. Do this test and let me know what you find.
Take care,
Joe
SPONSORED LINKS
Was this helpful?
Yes
No
Friday, August 17th, 2018 AT 8:49 PM
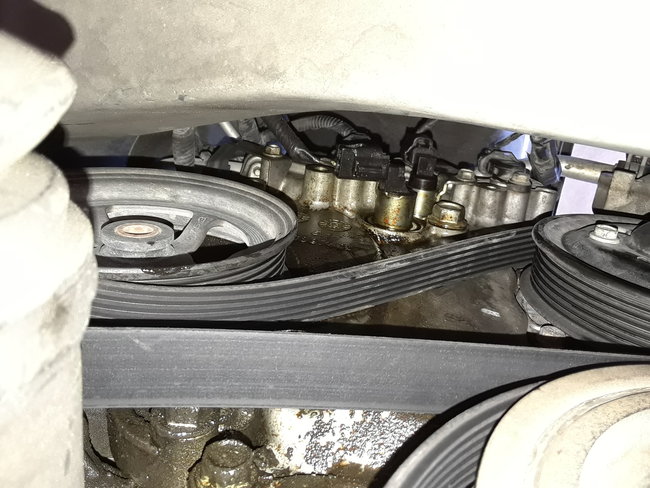
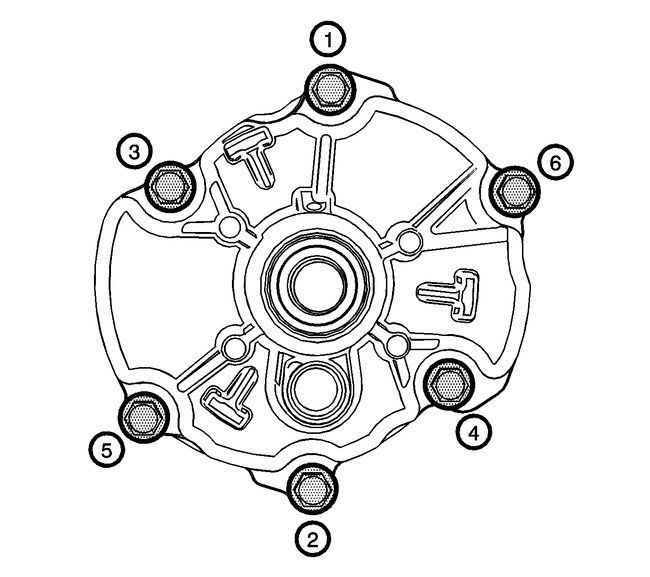
That doesn't sound like fun. Regardless, I'm glad you got it figured out so you can fix it. I figured since you got the job ahead of you, I would add the directions for you in case you needed them. All pictures attached correlate with these directions.
__________________________________________________________
Water Pump Replacement
Special Tools
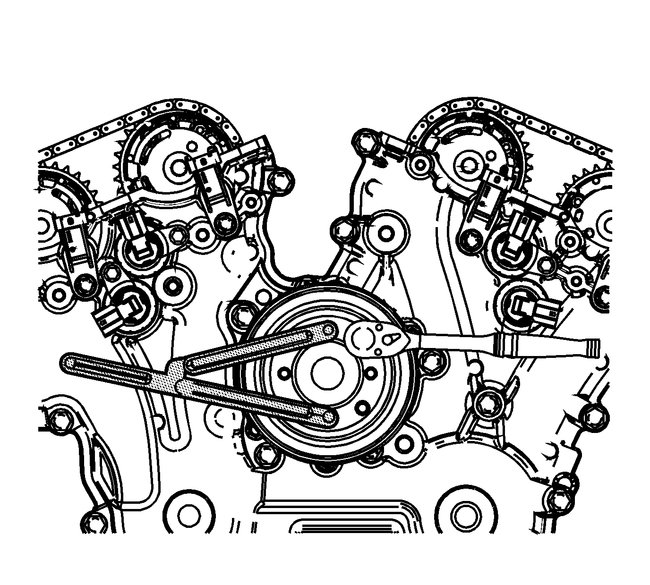
EN 46104 - Water Pump Pulley Holding Tool
Removal Procedure
1. Drain the cooling system. Refer to Cooling System Draining and Filling (Static Fill) See: Cooling System > Procedures > Cooling System Draining and Filling (Static Fill)Cooling System Draining and Filling (Vac N Fill) See: Cooling System > Procedures > Cooling System Draining and Filling (Vac N Fill).
2. Remove the drive belt. Refer to Drive Belt Replacement See: Drive Belt > Removal and Replacement > Drive Belt Replacement.
3. Remove the right engine strut mount. Refer to Engine Mount Strut Replacement - Right Side See: Engine Mount > Removal and Replacement > Engine Mount Strut Replacement - Right Side.
4. Remove the right engine mount strut bracket. Refer to Engine Mount Strut Bracket Replacement - Right Side See: Engine Mount > Removal and Replacement > Engine Mount Strut Bracket Replacement - Right Side.
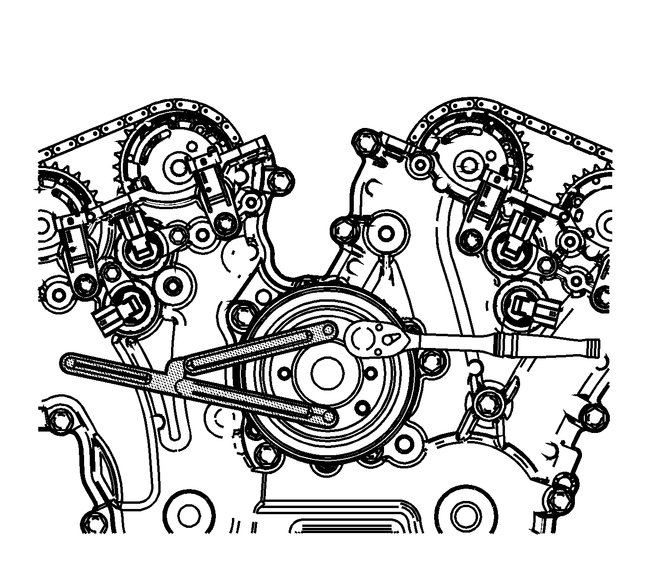
5. Use the EN 46104 - tool in order to retain the water pump pulley.
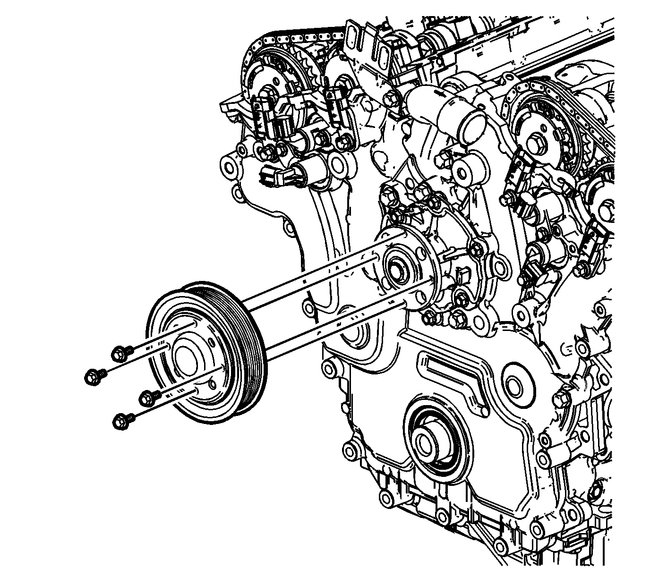
6. Remove the water pump pulley bolts and DISCARD the bolts.
Caution: This vehicle is equipped with torque-to-yield or single use fasteners. Install a NEW torque-to-yield or single use fastener when installing this component. Failure to replace the torque-to-yield or single use fastener could cause damage to the vehicle or component.
7. Remove the water pump pulley.
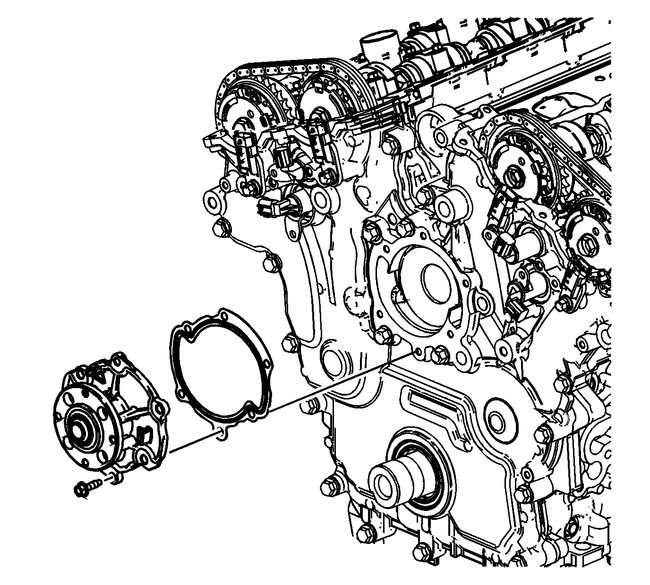
8. Remove the water pump bolts and DISCARD the bolts.
9. Remove the water pump.
10. Remove and DISCARD the water pump seal.
11. Carefully clean the water pump sealing surfaces.
Installation Procedure
1. Install a NEW water pump seal.
2. Install the water pump.
Caution: This vehicle is equipped with torque-to-yield or single use fasteners. Install a NEW torque-to-yield or single use fastener when installing this component. Failure to replace the torque-to-yield or single use fastener could cause damage to the vehicle or component.
Caution: Refer to Fastener Caution See: Vehicle > Technician Safety Information > Fastener Caution.
3. Install the NEW water pump bolts and hand tighten the water pump bolts.
4. Tighten the water pump bolts in sequence.
1. On the initial pass, tighten the bolts in sequence to 10 Nm (89 lb in).
2. On the second pass, tighten the bolts in sequence to 10 Nm (89 lb in).
3. On the final pass, tighten the bolts in sequence shown an additional 45 degrees.
5. Install the water pump pulley and the NEW water pump pulley bolts.
6. Use the EN 46104 - tool in order to retain the water pump pulley.
7. Install the water pump pulley bolts and tighten to 10 Nm (89 lb in).
8. Install the right engine strut mount. Refer to Engine Mount Strut Replacement - Right Side See: Engine Mount > Removal and Replacement > Engine Mount Strut Replacement - Right Side.
9. Install the right engine mount strut bracket. Refer to Engine Mount Strut Bracket Replacement - Right Side See: Engine Mount > Removal and Replacement > Engine Mount Strut Bracket Replacement - Right Side.
10. Install the drive belt. Refer to Drive Belt Replacement See: Drive Belt > Removal and Replacement > Drive Belt Replacement.
11. Fill the cooling system. Refer to Cooling System Draining and Filling (Static Fill) See: Cooling System > Procedures > Cooling System Draining and Filling (Static Fill)Cooling System Draining and Filling (Vac N Fill) See: Cooling System > Procedures > Cooling System Draining and Filling (Vac N Fill).
_____________________________________
I hope this helps. Take care and let me know if you have questions or need anything.
Joe
Was this helpful?
Yes
No
+1
Saturday, August 18th, 2018 AT 10:35 AM
No problem. I hope it helps you. If you have any questions or need additional information, do not be worried about asking. That is why I am here.
Take care and enjoy what is left of the weekend.
Joe
Take care and enjoy what is left of the weekend.
Joe
SPONSORED LINKS
Was this helpful?
Yes
No
Saturday, August 18th, 2018 AT 6:25 PM
Related Leak Content

Cooling System Pressure Test For Leaks
Instructional repair video
Sponsored links
SPONSORED LINKS

Cooling System Pressure Test For Leaks
