Car stalling codes P15DF , P0087 , P0171?

2014 BMW 320I
120,580 MILES • 2.0L • TURBO • AUTOMATIC
Avatar
BUSINESSFRED
  • MEMBER
  • 96 POSTS
I was driving on the highway when the car suddenly stalled , I pulled over and reset the car it drove again for a very short distance before stalling again.

The DTC Codes are
P15DF , P0087 , P0171

There was recently only 1 code but no longer current : DTC P144B

Not sure if they are related but want to trouble shoot each of these codes

The three codes all appeared after the car stalled
Aug 9, 2026 at 12:23 AM

Advertisement
Avatar
STEVE W.
  • Experienced Mechanic
  • 15,294 POSTS
All 3 are pretty much pointing to the same issue, Fuel system has a problem on bank one.
P15DF - Cold Start Fuel Pressure low Bank 1
P0087 - Fuel Pressure low Bank 1
P0171 - System lean Bank 1
P144B - Fuel level/consumption correlation error.

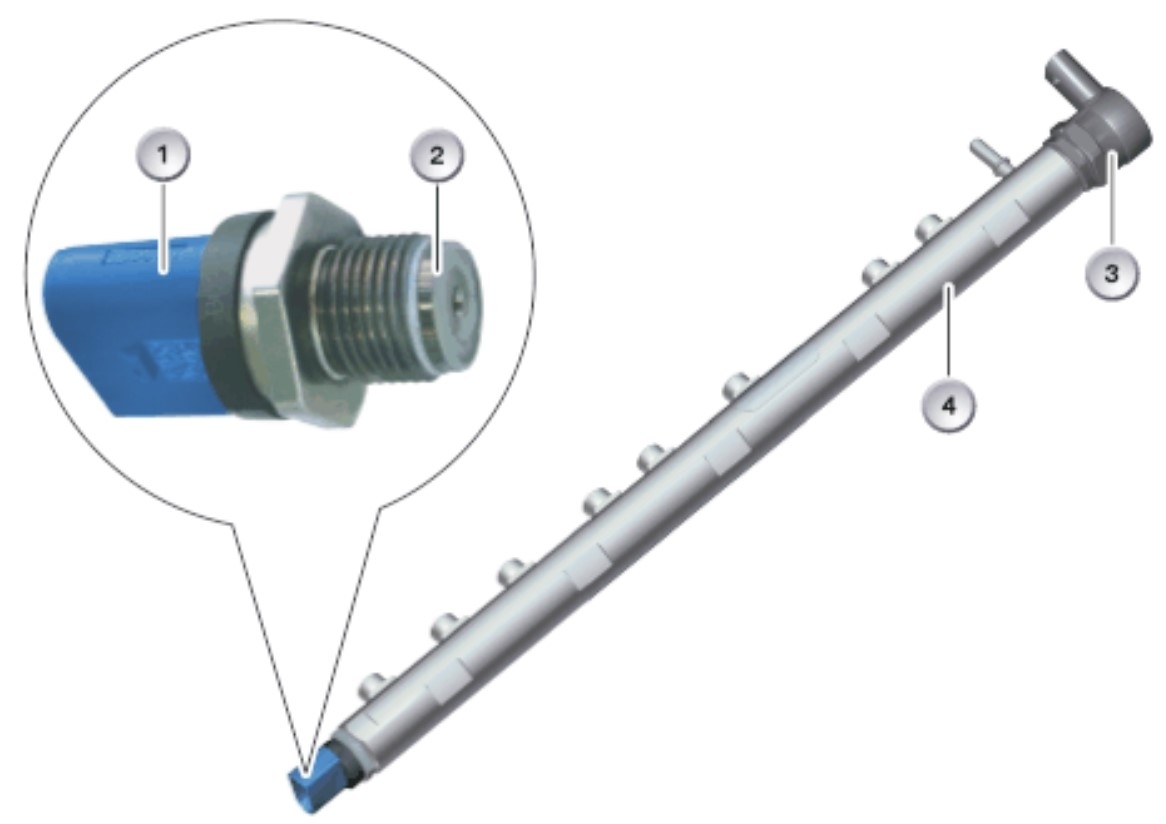
The common part for all 4 codes as all cylinders on an inline are Bank 1, a bad pressure sensor on the fuel rail. It's a simple 3 wire sensor that is a known failure item. Easy way to test it. Look on a scan tool at the fuel pressure with the key on. Unplug the sensor. Did the reading change. If yes the power and ground to the sensor and it's signal wire are all good. Replace the sensor. Part number - 13537620946 The basics are to pull the fuel pump fuse, then try to start the engine until it refuses to even fire a cylinder. Then disconnect the sensor, unscrew it from the rail, install the replacement. Reconnect, turn the key on and off a few times to prime the system, start the engine. Clear the codes. Test the operation by starting it and determining if any codes return.
The initial code was because the system uses the pressure and injector pulses to determine fuel use, but that use didn't match the sending unit in the tank. The sensor fails more and the ECM then puts in a substitute value that is intended to limp you home at not much more than an idle. That is why the restarts worked, it puts that value in, it then expects you to pull off the highway or into a side road and call for a tow.
Aug 9, 2026 at 2:33 AM
Avatar
BUSINESSFRED
  • MEMBER
  • 96 POSTS
I added some gas and the car started driving again . I believe the issue is the fuel gauge is not reading properly

Shows 1/3 full

What are the sensors that detect the fuel reading in the tank?
Aug 11, 2026 at 1:15 PM
Avatar
STEVE W.
  • Experienced Mechanic
  • 15,294 POSTS
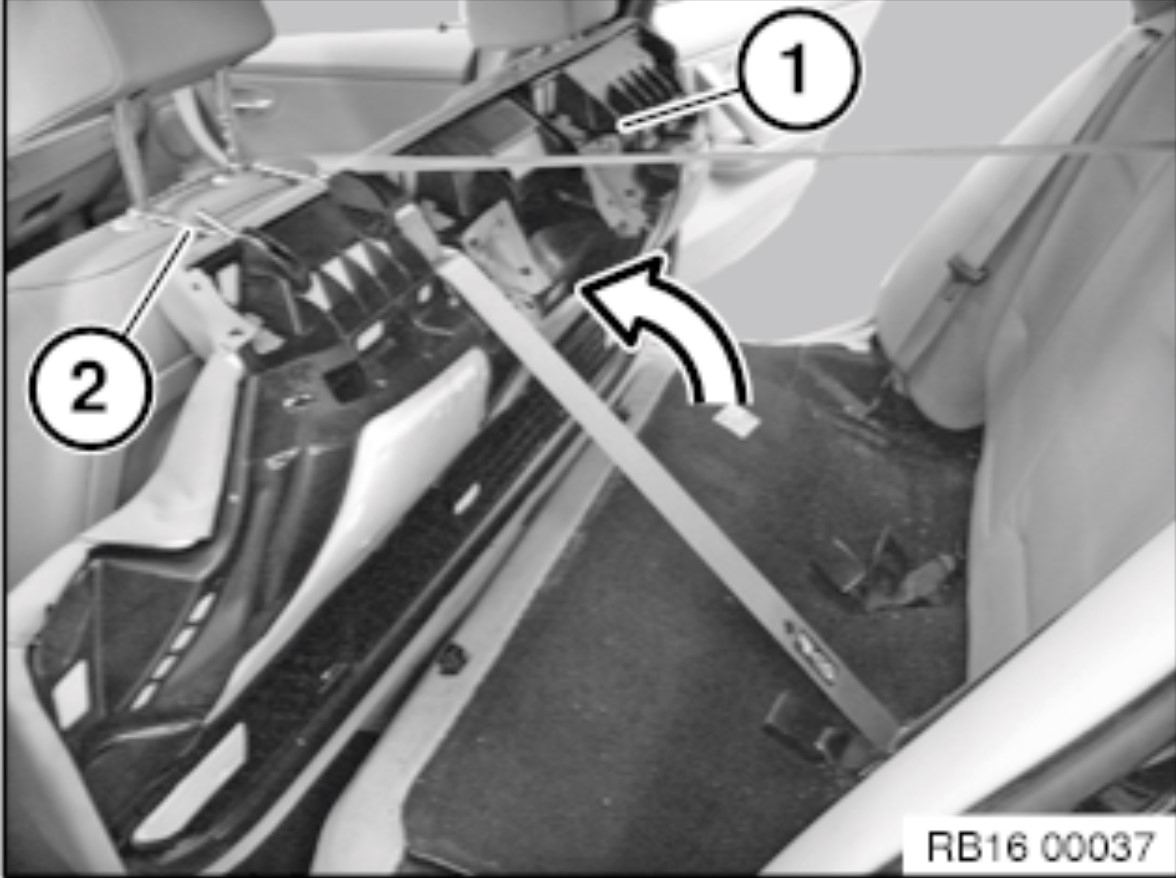
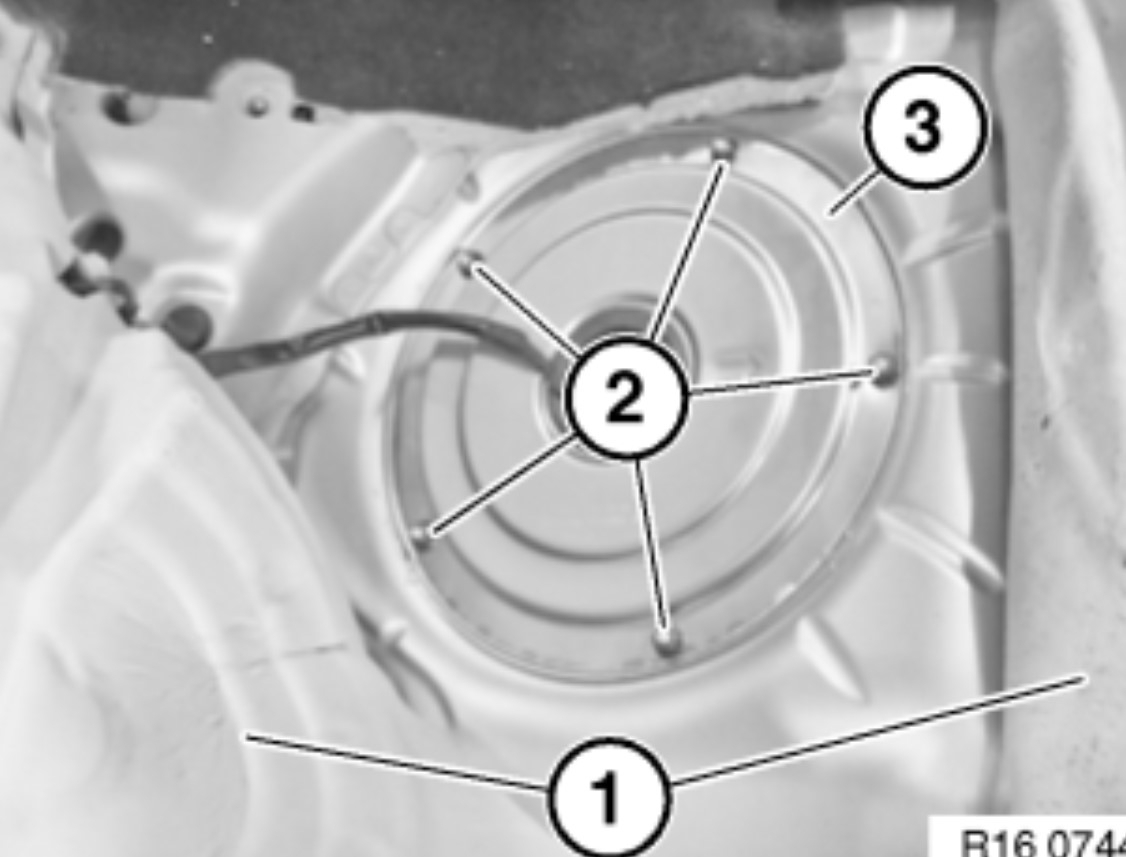
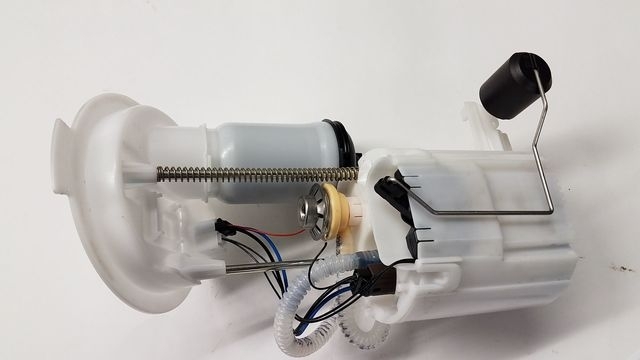
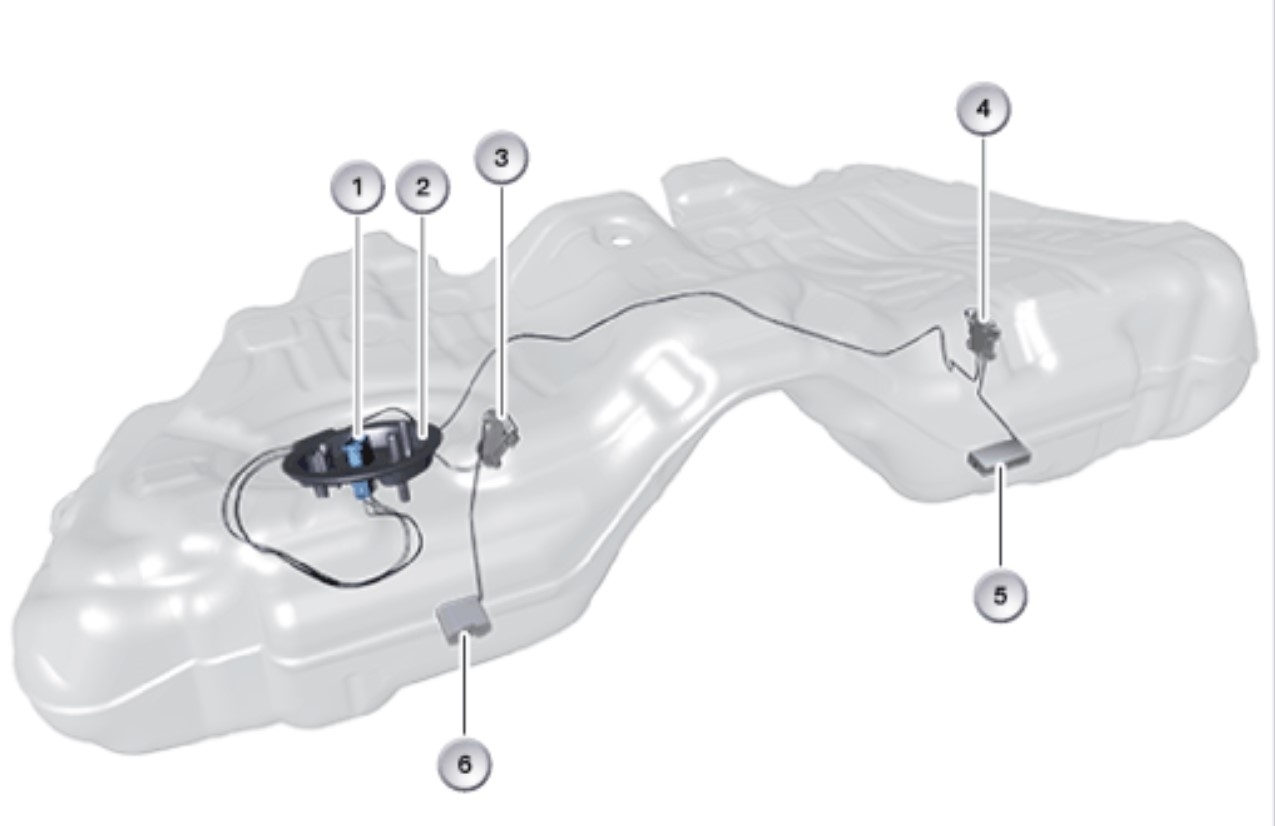
That would be possible if the gauge is wrong, that would make the car think it is using more or less fuel and would set the P1448 if nothing else. The level sensor is inside the fuel tank as part of the pump. To get to it you remove the back seat bench and set it out of the way. Then you remove the panel, then release the fuel lines and disconnect the electricals. Then you remove the lock ring and release the pump. You pull the pump out and set it into something to catch the fuel. They are annoying because you have to rotate and twist the pump because of the way they are made. Now you reverse the process to install the replacement. The pump is part 16117243975 and includes the level sender. When it comes to pumps I trust OEM only these days, far too many bad parts out there. Not fun to keep changing parts even if they are a warranty replacement.
Aug 11, 2026 at 1:55 PM
Avatar
BUSINESSFRED
  • MEMBER
  • 96 POSTS
I replaced the low pressure fuel pump with a Bosch BMW OEM pump as recommended but im still having the gas gauge meter fluctuation
Aug 12, 2026 at 3:33 PM
Avatar
STEVE W.
  • Experienced Mechanic
  • 15,294 POSTS
Did the pump come with a new level sensor? If it did then you are going to need to use a dealer level scan tool and use it to check the dash and the new sending unit together. On the tool you can watch the fuel level as reported by the sending unit as well as what the dash gauge shows and what the body control says. You may be able to use the old sending unit for the tests, connect it up and then watch the scan tool and dash gauge as you move it. If you drop it to the bottom do both the scan tool and gauge show empty (zero percent on some scan tools) and full (100 percent) at the other end. Does the gauge match? On most scan tools you can also send a test signal to the dash to show different fuel levels. So say you send 50% but the gauge reads empty. There is either an issue in the cluster or in the signal processing.
Aug 12, 2026 at 5:04 PM
Avatar
BUSINESSFRED
  • MEMBER
  • 96 POSTS
Yes it did
I believe it will be the secondary fuel sensor inside of the fuel tank , only issue is its part of the tank assembly .

Would you provide a step by step for removing the fuel tank on this vehicle?
Aug 13, 2026 at 12:42 PM
Avatar
STEVE W.
  • Experienced Mechanic
  • 15,294 POSTS
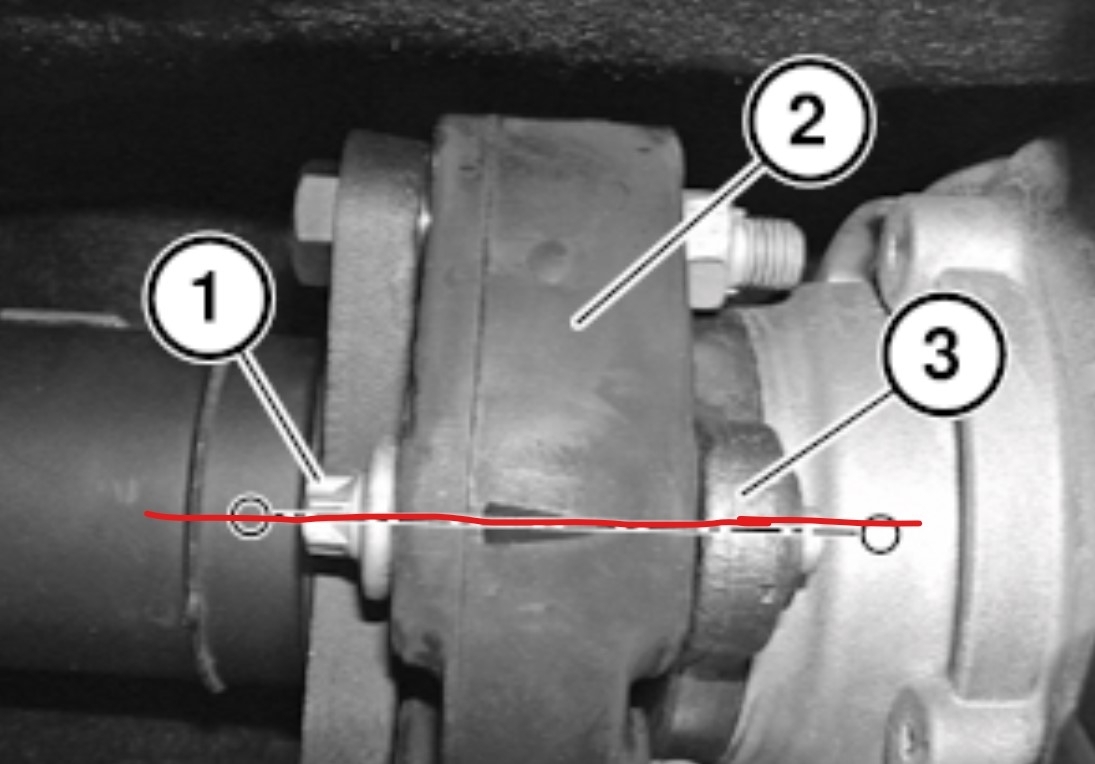
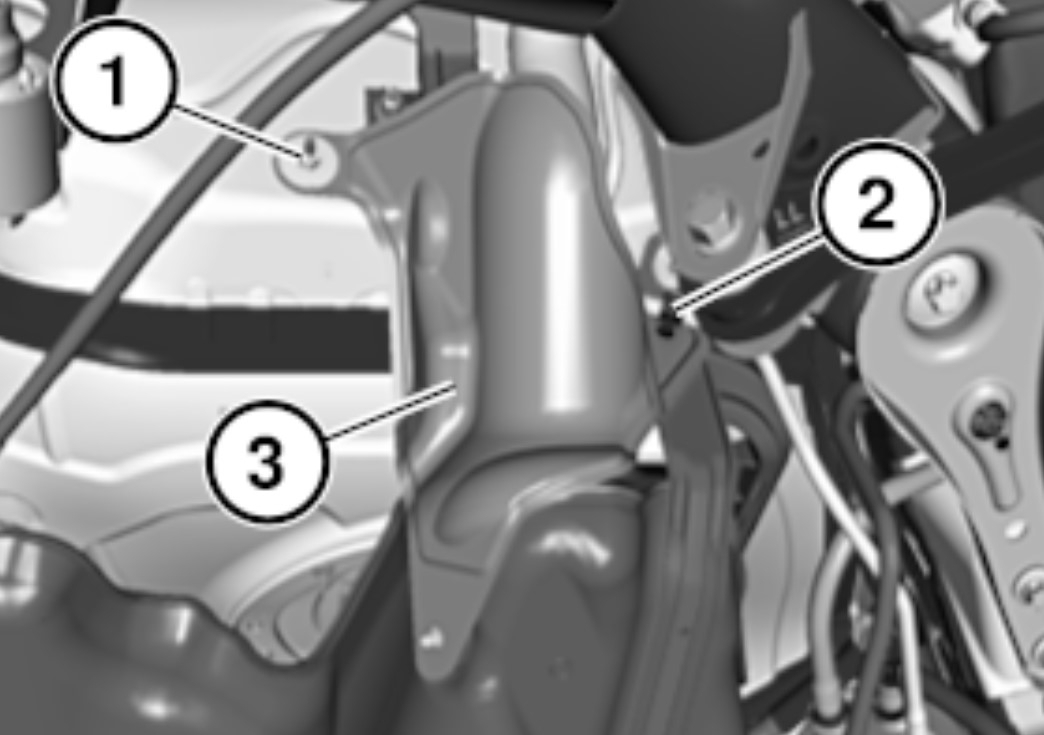
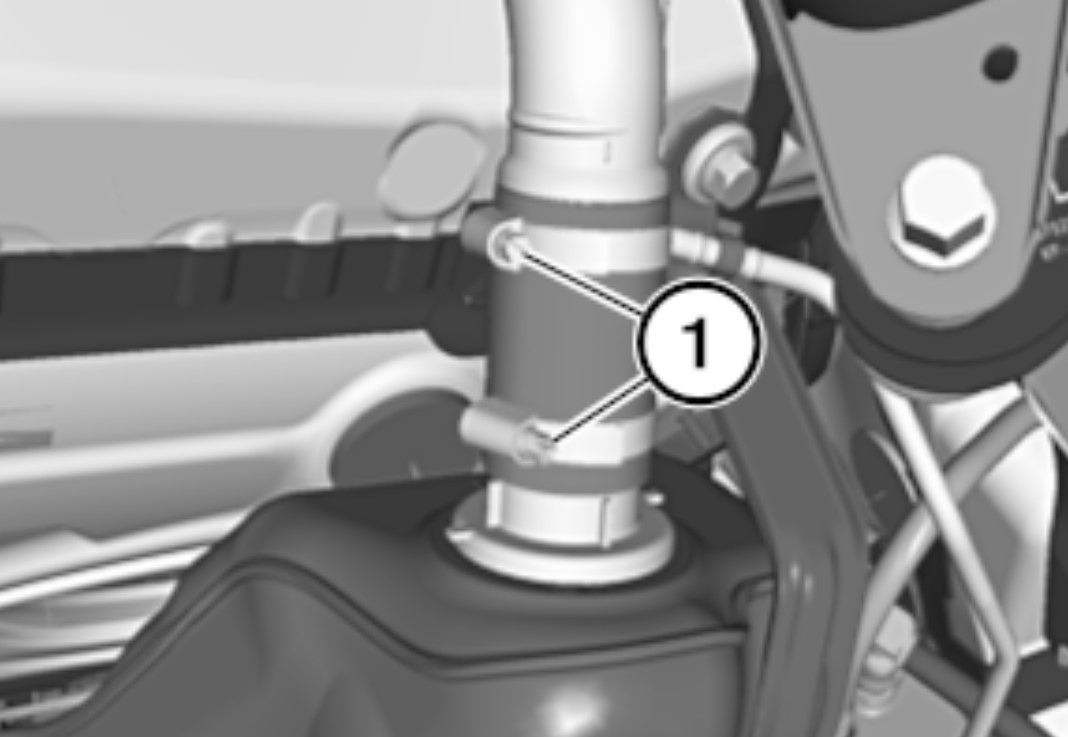
That can be tested as well using basically the same method as both sensors are functionally the same. Use the old sensor but connect it in place of the left sensor and see what the gauge and scan tool does. I've never seen the left side fail but I suppose it's possible. Usually it's the right side because of the vibration of the pump making the potentiometer crack. Removing the tank isn't all that hard but there are a few items to do before you can remove it. First pump out as much fuel as you can. You can do that through the fuel pump access. Leave the lines and connection apart. The tank is a difficult shape to handle if it has fuel moving in it. Next you have to get the car up a ways, not just to access the parts but to allow the tank to have room to come down. Then you have to remove the two covers at each end of the tank, don't be surprised if dirt falls out. Then you have to remove the drive shaft. For that you need to mark the shafts position before you try to remove it. It has to go back together correctly or you will get vibration. Now you remove the EVAP canister by releasing the tabs and the electrical connectors. Lastly you have to disconnect and lower the parking brake cables. You can disconnect them from the brake actuators at each side. With that all done you can start removing the tank. For that you remove the heat shield by releasing the clips, then you have to carefully work the parking cables down. Then you start removing the vent line and the filler neck by loosening the clamps. Put a jack under the tank to support both sides. Then remove the bolts that hold the straps in place. Then lower the tank. Reverse the process to install the replacement.
Aug 13, 2026 at 1:25 PM
Join 2CarPros for free, one of the most advanced car repair communities on the internet. From first-time drivers to seasoned mechanics, everyone is welcome to reply, share details, and get better answers. You can add a temporary image or video first; uploads are limited to 20 MB.
Ask a Free Question
Repair Safety Notice: This information is for general instructional purposes only. Vehicle repair can be dangerous. Verify all information, follow manufacturer service procedures, use proper tools and safety equipment, and consult a qualified repair shop when needed.