I am assuming the front center dash speaker, the defroster grille should lift up, you will need a trim tool, or plastic trim stick to get under it. There are probably 5-8 retainers or more along the front edge and around the speaker area. By front edge, I mean if you are facing forward. The book calls it the rear edge, as in rear of vehicle. Here is the procedure with what illustrations were shown. Option UV2, I believe is nightvision. If you have that, the procedure is still the same. There should be 3-4 screws holding the front of the dash pad under the grill. You will also need to remove all of the I/P dash vents, you can usually just grasp these with needle nose pliers and pull and they should come out. The left most (left of steering wheel) vent deflector can get stuck behind the wood grain, and can break if forced. You may just have to work with it a bit. Once you have the pad out, the speaker is attached to the bottom side of the upper I/P pad.
Defroster Grille Replacement (Without UV2)
Removal Procedure
Caution: Refer to SIR Caution in the Preface section.
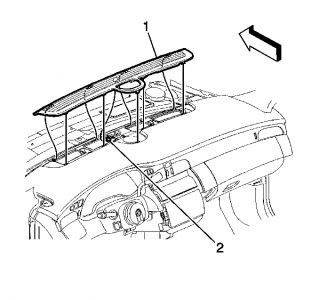
Using a flat bladed tool, pry upward on the rear edge of the defroster grille (1) in order to release defroster grille (1) retaining clips from the IP upper trim pad.

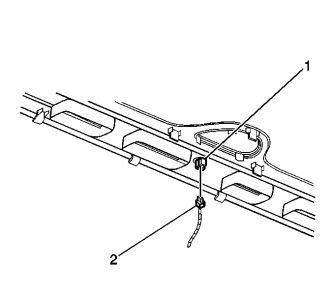
Disconnect the sunload sensor electrical connector (2).

Pull up on the rear edge, and then rearward, in order to remove the defroster grille (1).
Remove the defroster grille (1) from the instrument panel.
Installation Procedure
Partially install the defroster grille.
Reconnect the sunload sensor electrical connector (2) to the sunload sensor (1).
Insert the forward edge of the defroster grille (1) to the IP.
Align the defroster grille with the IP opening.
Press down along the rear edge of the defroster grille (1) in order to engage the retainer clips.
SPONSORED LINKS
Tuesday, May 11th, 2010 AT 10:47 PM

