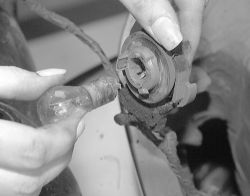
turn signal light bulb replacement

2002 BUICK REGAL
206,480 MILES • 6 CYL • FWD • AUTOMATIC
Avatar
LOST1UPT
  • MEMBER
  • 1 POST
I am trying to replace a turn signal bulb on the front passenger side. My question is how do I remove the housing without breaking it to replace the turning signal bulb located in the inside of the lights housing? Your response will be greatly appreciated and I will have more question and donation in the future with repair question because I just receive some tools. Thanks
Nov 7, 2008 at 11:05 AM
Advertisement
Avatar
IMPALASS
  • ASE Certified Mechanic
  • 3,112 POSTS
  • ASE Certified Mechanic
Hello I have provided the info your requested. Headlamp Assembly or Headlamp Bulb and/or Cornering, Sidemarker, Park, Turn Signal Bulb Replacement REMOVAL PROCEDURE
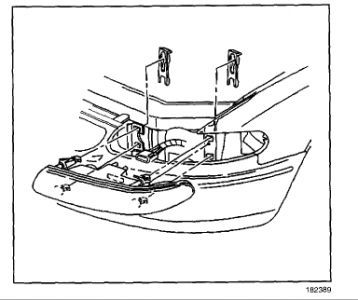

https://images.2carpros.com/forum/automotive_pictures/248015_1_40.jpg

Open the hood. Apply light pressure to the headlamp lens to hold the headlamp in place while removing the retainers. Lift up the headlamp retainers to release, then remove the retainers. Remove the headlamp mounting tabs from the slots in the upper fascia support and the fender reinforcement.
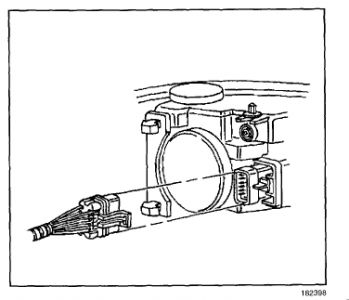

https://images.2carpros.com/forum/automotive_pictures/248015_2_27.jpg

Disconnect the electrical connector from the headlamp. Remove the headlamp.
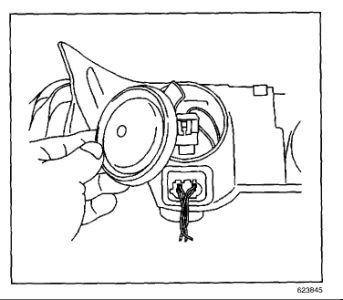

https://images.2carpros.com/forum/automotive_pictures/248015_3_23.jpg

Remove the rubber access covers from behind the headlamp bulb/sockets to be replaced. CAUTION: Refer to Halogen Bulb Caution in Service Precautions.
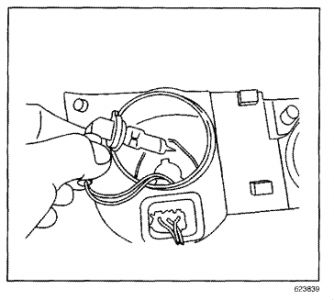

https://images.2carpros.com/forum/automotive_pictures/248015_4_12.jpg

Rotate the headlamp bulb/socket counterclockwise to release. Remove the headlamp bulb/socket from the headlamp.
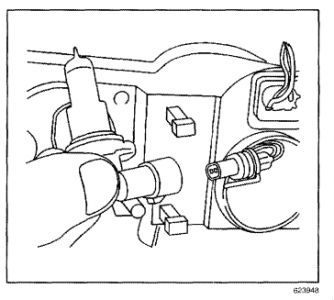

https://images.2carpros.com/forum/automotive_pictures/248015_5_8.jpg

Disconnect the electrical connector from the headlamp bulb/socket. INSTALLATION PROCEDURE
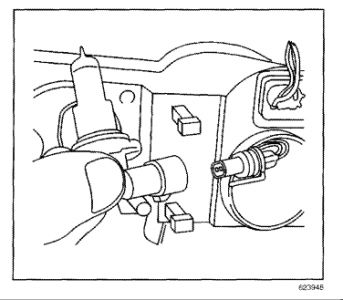

https://images.2carpros.com/forum/automotive_pictures/248015_6_4.jpg

Connect the electrical connector to the headlamp bulb/socket.
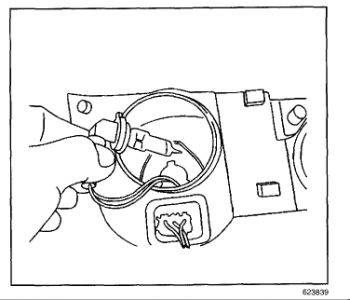

https://images.2carpros.com/forum/automotive_pictures/248015_7_5.jpg

Install the headlamp bulb/socket to the headlamp. Rotate the headlamp bulb/socket clockwise until fully seated.
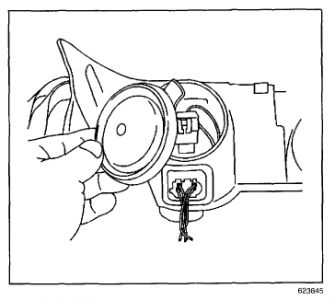

https://images.2carpros.com/forum/automotive_pictures/248015_8_3.jpg

Install the rubber access covers to the headlamp.
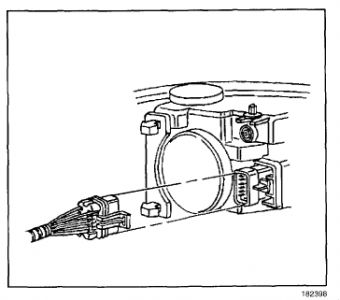

https://images.2carpros.com/forum/automotive_pictures/248015_9_2.jpg

Connect the electrical connector to the headlamp.
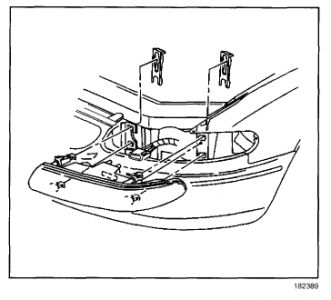

https://images.2carpros.com/forum/automotive_pictures/248015_10_2.jpg

Position the headlamp mounting tabs to the slots in the upper fascia support and the fender reinforcement. Apply light pressure to the headlamp lens to hold the headlamp in place while installing the retainers. Align the headlamp retainers over the headlamp mounting tabs, then press the retainers down until fully seated. Inspect the headlamp for proper fit. Check the headlamp aim, if a new headlamp was installed, or if service or repairs in the front end area may have disturbed the headlamp mounting brackets. Refer to Headlamp Aiming. Close the hood.
Nov 7, 2008 at 11:36 PM
Avatar
N3MGS
  • MEMBER
  • 1 POST
Electrical problem
1999 Buick Regal Engine Size unknown Wheel Drive Type unknown Automatic 65000 miles
----------------------------------------------------------------
Where can I find instructions to replace a rear turn signal lamp for a 1999 Buick REgal?
Jan 6, 2021 at 2:40 PM (Merged)
Avatar
LEGITIMATE007
  • ASE Certified Mechanic
  • 5,121 POSTS
  • ASE Certified Mechanic
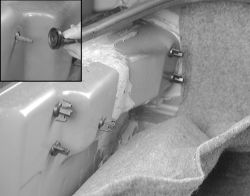
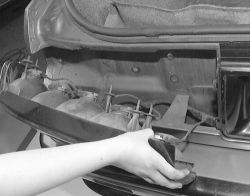
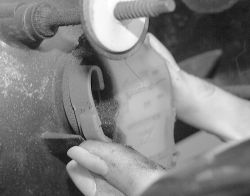
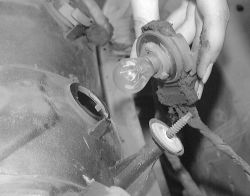
Most rear lamps can be accessed from inside the trunk. Open trunk and look for access past the carpet. By pulling back the carpet or removing the large plastic carpet retaining nuts, you can see the back of the light assembly. Fig. 8: Once the carpet is pulled down, you can see the retaining wingnuts which must be removed to access the rear bulbs If you can reach the bulb from inside the trunk, you don't need to remove the lens assembly to replace the bulbs. But, if you can't reach the bulb and connector assembly, you may need to remove the lens assembly. If necessary, remove the tail light panel screws and the lens assembly. Fig. 9: Carefully pull the rear light assembly away from the vehicle for access to the bulbs You can now simply turn the bulb connector assembly counterclockwise and remove it from the lens housing. Fig. 10: Depress the bulb and socket retaining tabs, turn the socket ... Fig. 11: ... then pull the bulb and socket from the rear of the lens Fig. 12: Carefully press the bulb in and twist it approximately 1/8 turn counterclockwise to remove it from the socket To remove the bulb, turn the twist lock socket (at the rear of the housing) counterclockwise 1/4 turn, then remove the socket with the bulb; replace the bulb if defective.


https://images.2carpros.com/forum/automotive_pictures/88091_fig8_1.jpg


https://images.2carpros.com/forum/automotive_pictures/88091_fig9_1.jpg


https://images.2carpros.com/forum/automotive_pictures/88091_fig10_1.jpg


https://images.2carpros.com/forum/automotive_pictures/88091_fig11_1.jpg


https://images.2carpros.com/forum/automotive_pictures/88091_fig12_1.jpg

Jan 6, 2021 at 2:40 PM (Merged)
Avatar
JOE ADAMS
  • MEMBER
  • 1 POST
Electrical problem
1999 Buick Regal 6 cyl Two Wheel Drive Automatic

can you tell me how to replace the front turn signal light on a 1999 Buick Regal?
Jan 6, 2021 at 2:40 PM (Merged)
Avatar
JACOBANDNICKOLAS
  • ASE Certified Mechanic
  • 110,194 POSTS
  • ASE Certified Mechanic
If you can't get them from under the hood, there should be 2 steel slide pins. Pull them up and the light assembly should come out so you can access the bulb. Make sure when you replace the slide pins that they attach to the headlight assembly.
Jan 6, 2021 at 2:40 PM (Merged)
Avatar
TOMARN ONE
  • MEMBER
  • 1 POST
How to access and change front(driver side)turn signal bulb
Jan 6, 2021 at 2:40 PM (Merged)
Avatar
JACOBANDNICKOLAS
  • ASE Certified Mechanic
  • 110,194 POSTS
  • ASE Certified Mechanic
If I remember correctly, on an 88, the bulbs are accessed from under the hood of the vehicle. Have you checked? If I remember, it was a tight fit to get my hand in to access it.
Jan 6, 2021 at 2:40 PM (Merged)
Join 2CarPros for free, one of the most advanced car repair communities on the internet. From first-time drivers to seasoned mechanics, everyone is welcome to reply, share details, and get better answers. You can add a temporary image or video first; uploads are limited to 20 MB.
Ask a Free Question
Repair Safety Notice: This information is for general instructional purposes only. Vehicle repair can be dangerous. Verify all information, follow manufacturer service procedures, use proper tools and safety equipment, and consult a qualified repair shop when needed.